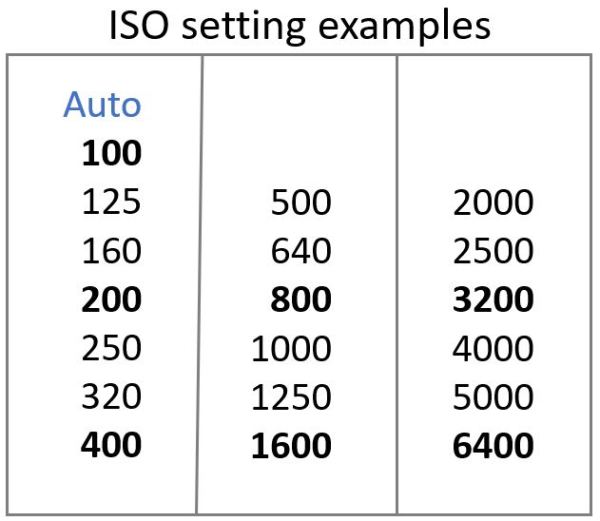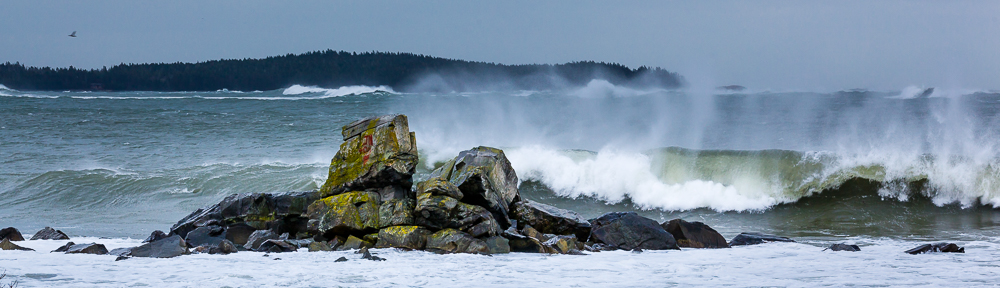

Exposure in simple terms is the brightness of the over all photograph. The exposure can be controlled completely by the camera, auto mode, or completely by the user, manual mode. In semi-automatic modes the user and the camera work collaboratively to determine the final exposure.
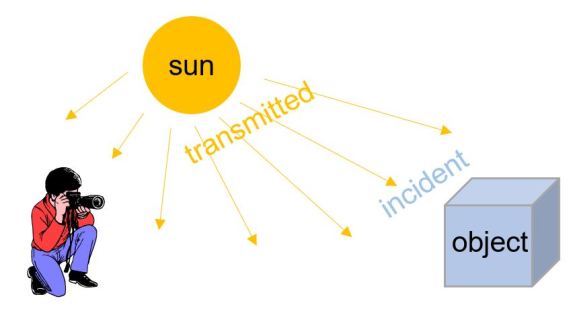
“Incident Light” – Light which is directly falling on a subject
“Incident Light” is the light which is directly falling on a subject transmitted from a light source. In this case the diagram shows the light from the sun, transmitted light, falling on, the box object, the photographer, and surrounding area, referred to as incident light. With the photographer in the current position, the camera is not able to measure the incident light falling on the object.
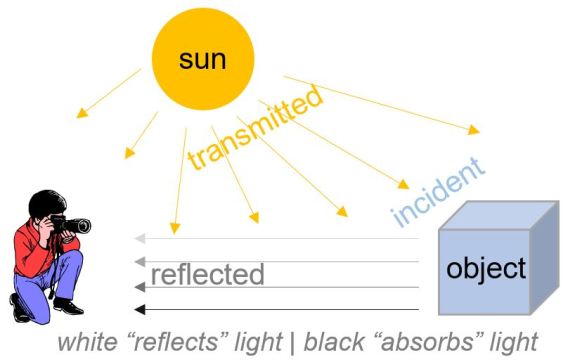
“Reflected Light” – Light which is bouncing off the object and surrounding area
“Reflected light” is the light reflected off the object and the surrounding area which originated from the “incident light”. This light enters the camera and based on the aperture, shutter speed, and ISO settings creating the final exposure when you push the shutter button.
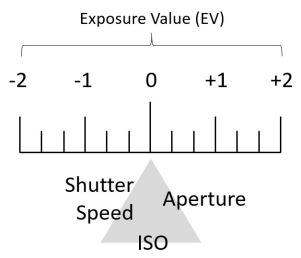
The camera has a built in continuous light meter, seen through the view finder or in live view mode, to help the camera determine what is a good exposure by measuring the “reflected light“. The light meter meter indicator moves, left or right, shown on the meter as it indicates the amount of light the camera sees displaying the result on a scale typically from [ -2 to 0 to +2 ].
So far we have learned aperture, shutter speed, ISO, light, and how the camera measures the light. To put these terms together let’s look at the following teeter-totter/seesaw concept of a balance analogy to help explain the interaction between the aperture, shutter speed and ISO settings.

In “manual mode” as we adjust any of the three settings; aperture, shutter speed, or ISO, away from being balanced (proper exposure) by 1/3 stones, the brightness (exposure) of our image will be either brighter or darker depending on the adjustments made.
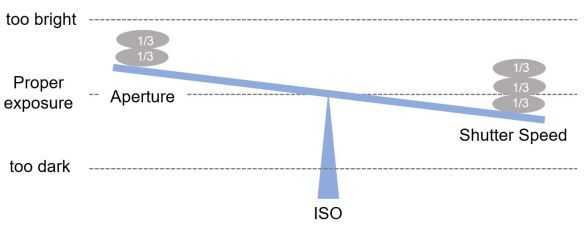
In the directly above example, if we set the aperture larger, a bigger hole by removing 1/3 stones, the seesaw will move up toward the too bright point. Conversely, if we set a smaller aperture, a smaller hole by adding 1/3 stones, the seesaw will move down toward the too dark point.
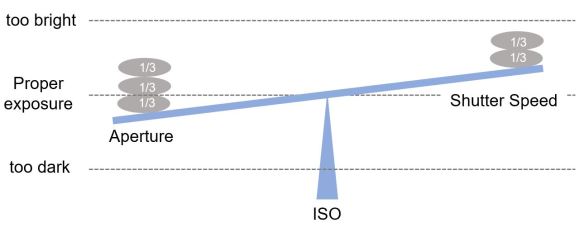
In the next above example, by setting the shutter speed to a longer duration, by removing 1/3 stones, the seesaw will move up toward the too bright point. Conversely, if we set the shutter speed to a shorter duration , by adding 1/3 stones, the seesaw will move down toward the too dark point.
ISO also plays a role in exposure, if we increase the ISO to a higher value it will push the seesaw toward the too bright point. Conversely, if we decrease the ISO to a lower value it will become closer to the too dark point.
From these examples we can see that there is a balance to maintain between aperture, shutter speed and ISO. If we change aperture we also need to change shutter speed in the opposite direction to maintain the balance (proper exposure). If we adjust ISO we also need to change the aperture or shutter speed settings to maintain a proper exposure.
In our next lesson we will introduce the concept of the exposure triangle which is the most common terminology used to discuss exposure.