August Theme Challenge – “Perspective (Low Camera Angle)”

One of the key components when out capturing photographs is to consider your composition. Part of deciding on the composition for any image is what camera angle to use. This month I encourage you to create an image using a low camera angle, getting low to the ground, think of it as a “bugs eye view”. Getting low is not how we normally view things and as a result creates interesting images. By positioning your camera at a lower angle the result is more engaging as it appears to make the viewer feel they are right there.

Here are some general tips and techniques for low angle photography. Use the same techniques as you do for shooting any image; set your aperture for the desired depth of field, adjust the camera settings for a correct exposure, focus on the subject,  find a good composition while considering the light, get your camera low, and finally wait for the right moment. I have included the camera settings for the example images below to help.

Get your camera low by using your articulating screen (not on all cameras) or get as low as you can by either setting your tripod as low as it will go or even lay down if you are hand holding your camera. Take a small tarp, beach towel or large plastic garbage bag to help keeping you from getting too soiled which helps keep your camera gear clean.

One of the main guidelines for shooting pets or children is to get down to eye level. In the image below with the puppy, we see that the composition included the persons legs and feet, as well as the trail to help with telling a story.

©TrevorAwalt_MG_1292-Edit_s

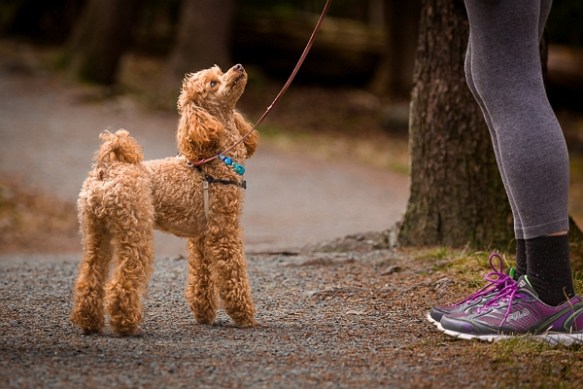
f/6.3, 1/640, ISO 400, @244mm

With the image of the wave crashing on the rocks, not only the low angle but the closer you get to your subject the more engaged the viewer will be. Just be careful, know your surroundings, don’t take any unnecessary risks,  and watch for a while before you attempt getting into position to take the image to ensure your safety.

Mar 2019

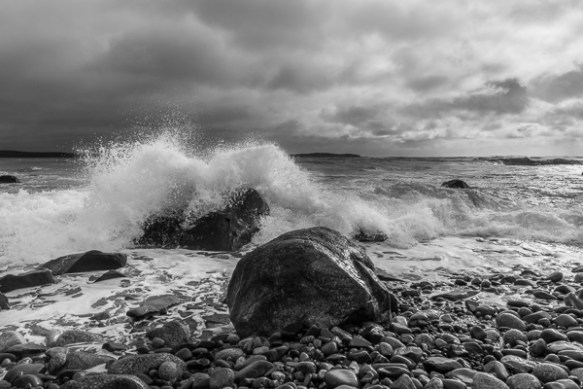
f/16, 1/400, ISO 200, @24mm

Take advantage of the terrain. In the image of the crab claw, found laying on the rocks, I stood on the rocks that were lower than the rock my subject was on and positioned myself so that the light was behind the subject. I laid my camera on the rock in front of the subject to take the photo. The depth of field in the photo looks shallow because of being close to the subject and by using a longer focal length, in this case 70mm.

©TrevorAwalt00360__48A9391-Edit-2_s

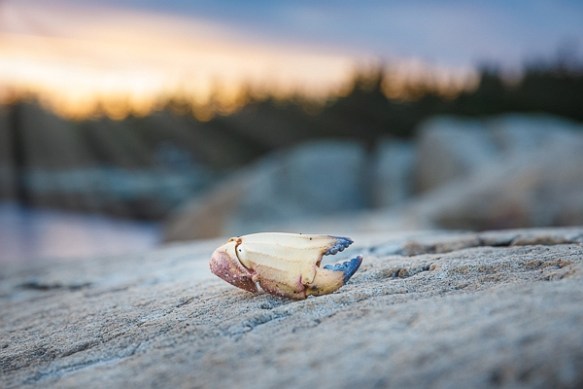
f/8, 1/50, ISO 500, @70mm

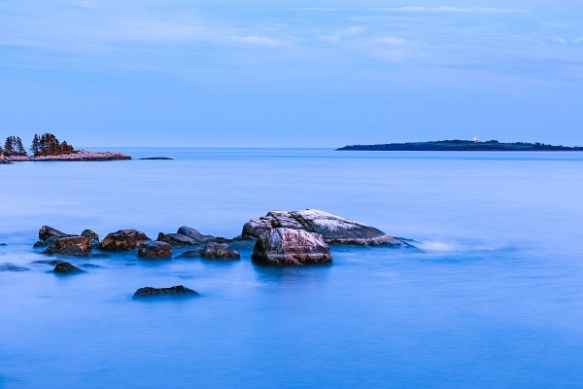
With the minimalist image of the rock in the sand, Using an even longer focal length can give you the sense of being lower than normal. In this case I was kneeling on the sand instead of laying down because I had not brought anything to lay on in the sand. Remember you do not want any sand getting on or into your camera/lens so be careful when on a beach with your gear.

©TrevorAwalt_MG_9174_s

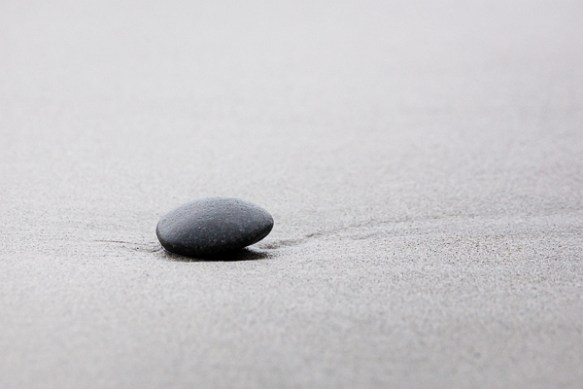
f/8, 1/400, ISO 1000, @500mm

This year we have a few more wild Snowshoe Hare’s hanging around in our yard and this was a great opportunity during a sunset to capture an intimate image. The subject in this case was elevated slightly on a bank, and I positioned myself to have the subject backlit creating the rim light.

©Trevor Awalt_00360__48A9316-Edit_s

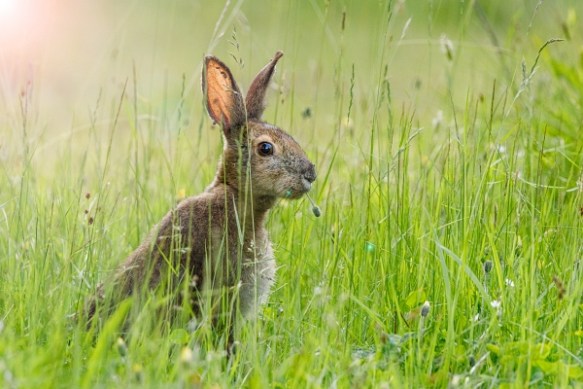
f/8, 1/400, ISO 4000, @600mm

As always check the result on the camera display by zooming in and around the image as well as reviewing the histogram to make sure everything is just right before you consider being finished taking your image(s).

Students are encouraged to develop their ability to tell a story or invoke an emotion, as well as how to plan and troubleshoot while creating their images. As such it’s important to not only create the image but to also include a “title”, and write a short paragraph about; how they came up with the idea, any interesting back ground that compelled them to make the image, and describe any techniques on how they overcame any obstacles.

As always with our monthly theme challenges we try to seek out an instructional resource, below are some YouTube video links to help with some important tips, hints and ideas.
Low Angle Photography instructional aids:
Photography Using Low Angles: by The Art of Photography (5min 26sec)
Landscape Photography Composition – Photographing at low Angle: by Michael Breitung (7min 50sec)

An important part of improving your photography is practice, which is one aspect of the monthly theme challenge, in addition you have an opportunity to learn about different genres, techniques and tips.

July Theme Challenge – “Landscapes”

Now that the Covid-19 restrictions are relaxing, we can now get outside with our cameras to enjoy visiting our favorite spots and create new images. Photographing the Landscape or Seascape is one of the most popular genres and we can understand why as we get out and witness nature showing off it’s grand scenery while we experience the smell of the ocean and see the lush green color of the vegetation now that the tree buds have turned into leaves.

Capturing in a single image what you see in front of you is the challenge which takes a bit of knowledge, practice and creativity to accomplish. The most important things to know to create a successful image are; know your camera, how to achieve a good exposure with proper focus, creative composition, a subject or purpose, a special moment, good light, and finally post processing skills to bring out the best in your final image.

The technical aspects of capturing an image requires; knowing how to set your aperture, shutter speed, and ISO, which lens to use, and using a tripod to help achieve a sharp well exposed, properly focused image with an appropriate depth of field. For example, when shooting a landscape image, you would like all of the image to be sharp throughout, and be able to see detail in the highlights as well as the shadows while still having appealing contrast. For general landscape and seascape images, start with selecting a wide angle lens around 24mm, setting your ISO to 100 with the aperture set between f/8 to f/11 depending on your depth of field requirements. Then adjust your shutter speed to expose for the highlights, to obtain as much digital information in the captured image as possible. When you take a test shot check there are no highlight alerts and the histogram to make sure it is pushed to the right with information in the shadows. Remember the mood of the image will be restored during final post processing, in other words you capture the image to be as bright as possible with no highlight clipping.

However, if you are shooting Jpeg and do not post process your images set your exposure to match the mood you want to achieve. In extreme cases such as sunrises and sunsets you may require the use of in camera HDR (not available on all cameras) or the use of a graduated neutral density filter (usually 2 or 3 stops) to help compress the dynamic range to be able to see detail in the shadows instead of a final silhouette image.

The purpose or subject of the image is your inspiration to capture the image and by spending time choosing the composition to eliminate distracting elements as well as having your subject or purpose positioned in the frame that allows the viewer to easily identify the subject or story provides more impact. Then it’s a matter of waiting for the right moment and light to capture your final image.

PeggysCove_IMG_0336
The inspiration for the above image is of the iconic Nova Scotia Peggy’s Point Lighthouse at Peggy’s Cove. As it sits on the rugged granite rocks waiting for its light to be seen when the light changes from day to night.

©TrevorAwalt_4x6_00360__48A9632_s-small

I waited for “blue hour” to capture this image using a slower shutter speed to create a calming mood as the water swirled around the rocks by New Harbour Road, Blandford, and to capture the light from East Ironbound Island Lighthouse seen in the distance which marks the entrance to Mahone Bay.

Remember to check the result on the camera display by zooming in and around the image as well as reviewing the histogram to make sure everything is just right before you pack up and head home to do the final post processing.

It is also important to enjoy your experience, so show up early and take time to soak in what you see and feel to help create a better composition, your image will mean so much more to you. Finally, have fun, which is really the most important thing.

Students are encouraged to develop their ability to tell a story or invoke an emotion, as well as how to plan and troubleshoot while creating their images. As such it’s important to not only create the image but to also include a “title”, and write a short paragraph about; how they came up with the idea, any interesting back ground that compelled them to make the image, and describe any techniques on how they overcame any obstacles.

As always with our monthly theme challenges we try to seek out an instructional resource, below are some YouTube video links to help with some important tips, hints and ideas.
Landscape Photography instructional aid:
Mastering Exposure – A Landscape Photography Tutorial: by Nigel Danson (14min 59sec)
Mastering Focus – A Landscape Photography Tutorial: by Nigel Danson (18min 5sec)
4 Camera settings that Every photographer Must understand: by Nigel Danson (20min 29sec)
7 Simple Photo Composition Tips to Improve Your Photography: by Nigel Danson (19min 33sec)
White Balance in Landscape Photography Lightroom Tutorial: by Nigel Danson (20min 45sec)
How to Create and Edit Better landscape Photos Lightroom Tutorial: by Nigel Danson (26min 12sec)

An important part of improving your photography is practice, which is one aspect of the monthly theme challenge, in addition you have an opportunity to learn about different genres, techniques and tips.