For this month, April 2025, the theme challenge is “Faces In Places”. The intention for this month is learning to see better by slowing down and being more observant of your surroundings so that you can see things that you may not have seen before. We are not concentrating on any specific genre of photography, instead hopefully just learning to see better. We’ll leverage what we learned in the “Observation” theme challenge May 2021. Specifically, go out looking for faces within objects such as but not limited to; rocks, trees, buildings etc… Focus on creating an image where you can see a face within your subject.
While you are out on your daily walk take your camera to see what you can find this month, and include us in your success, share the image you’ve created this month.
Some Considerations
Camera Settings: For camera settings you can start in Aperture Priority mode (Av for Canon or A for Nikon, Sony etc…). Depending on your subject and focal length the aperture can be pretty much anything, just decide on how much depth of field you need for your subject and the overall image you are trying to create. An aperture anywhere between f/4 and f/11 while keep your ISO as low as possible, say 100 through 800, remember this is just a starting point. Keep an eye on what the camera chooses for a shutter speed, if you are hand holding your camera, adjust your ISO to obtain a faster shutter speed of at least 1/100 or as a minimum 1/focal length.
Focal Length: It’s best to get closer to your subject, using a wider angle lens to maximize your depth of field. Choose a focal length say between 24mm to 100mm depending on your final composition.
Example Images
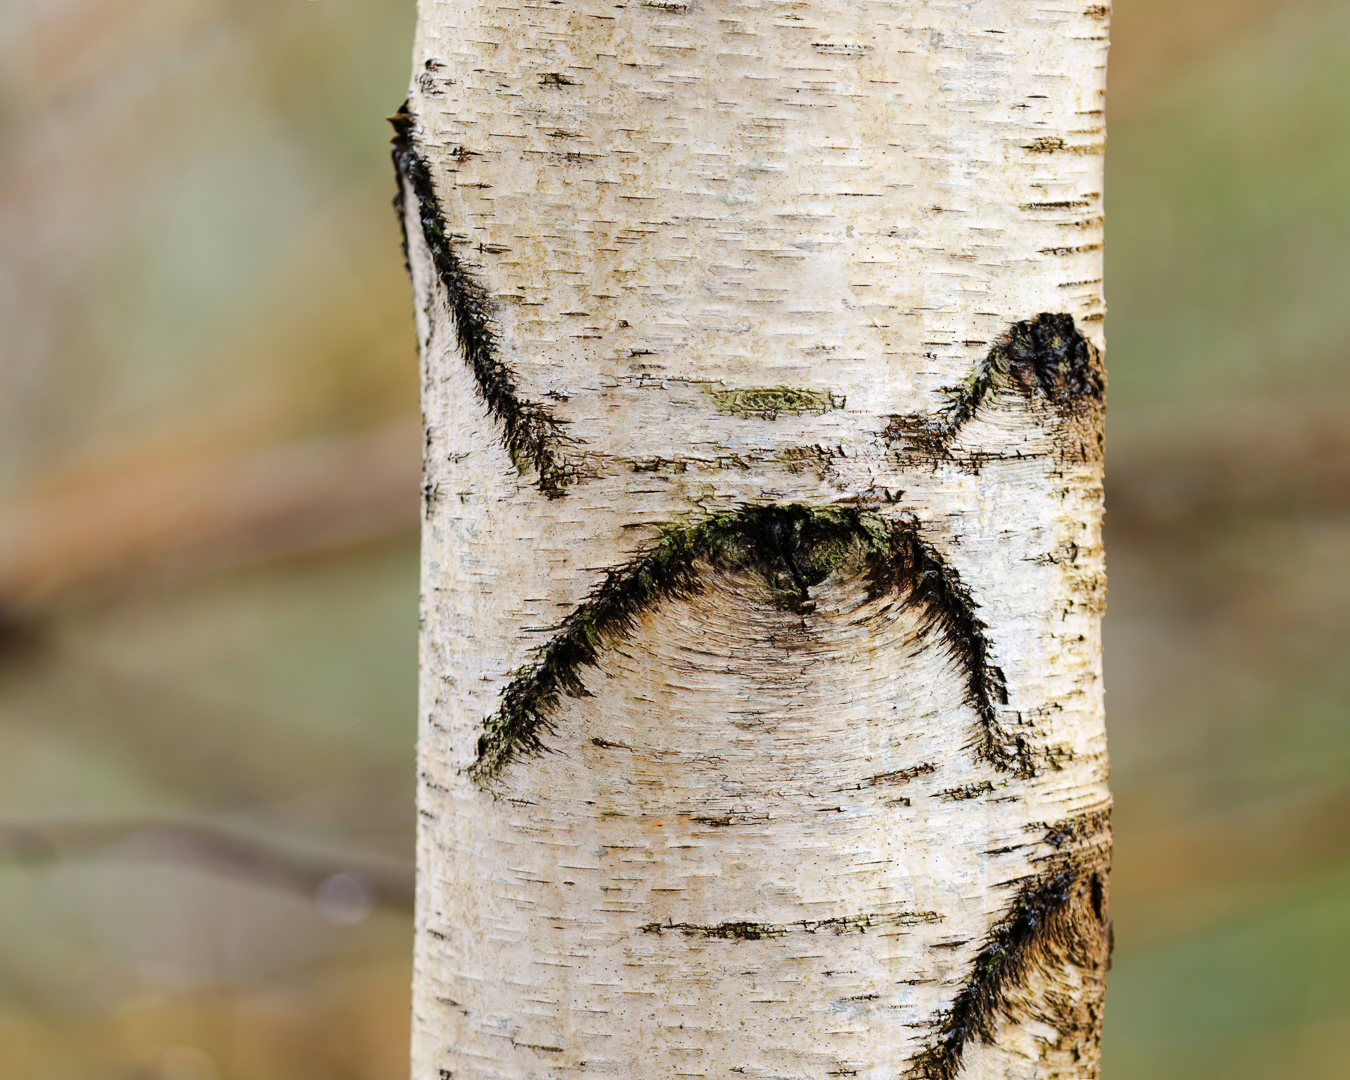
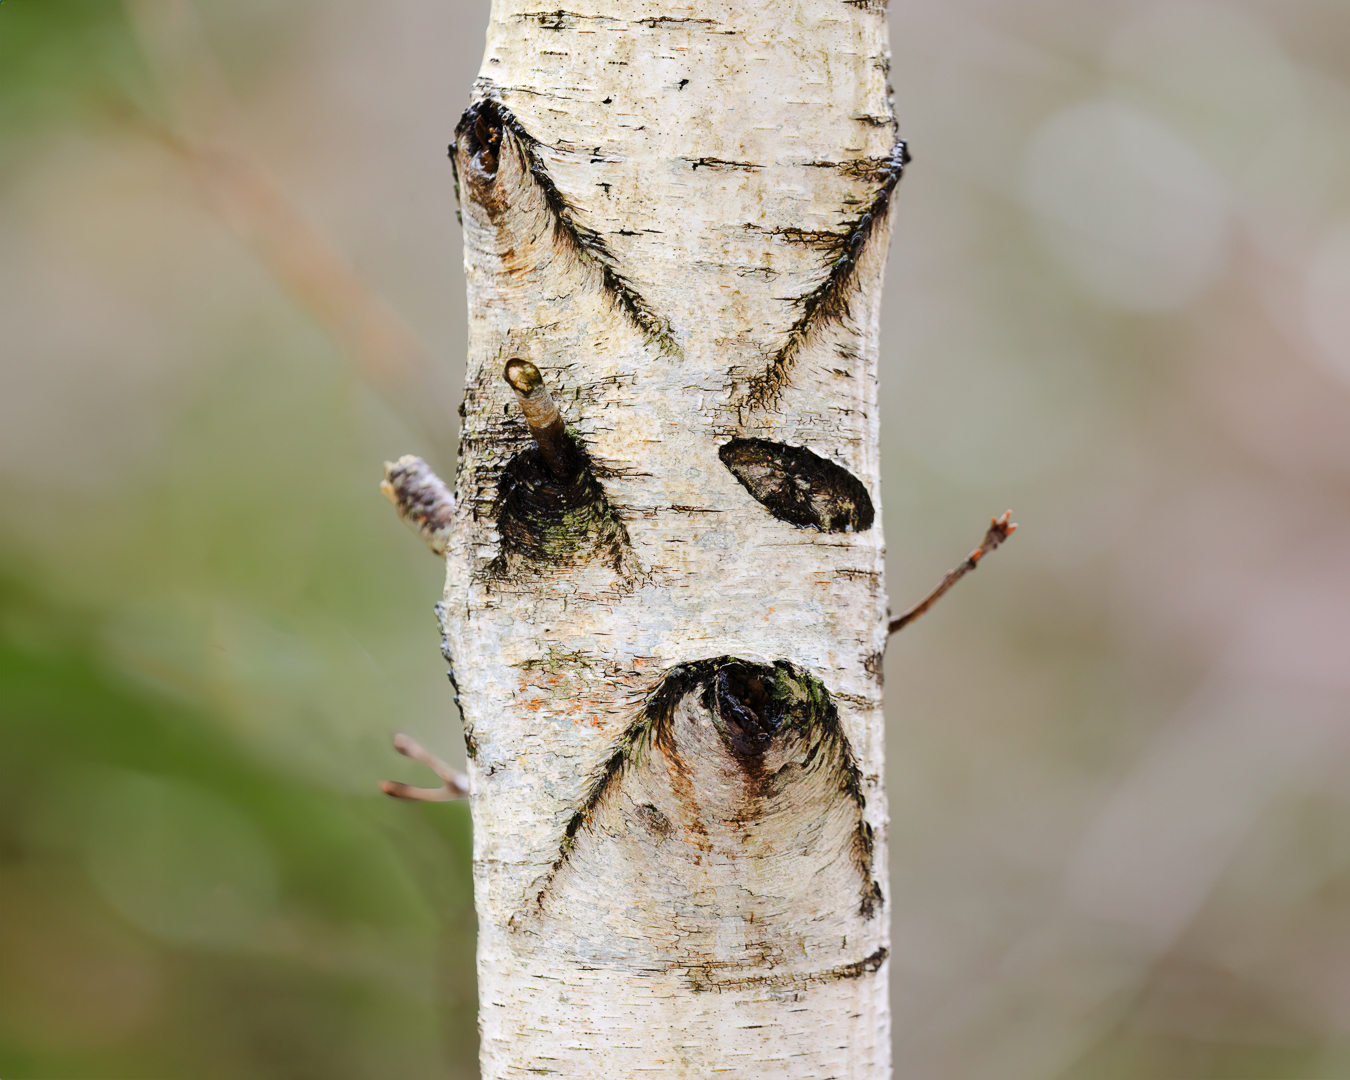
Below in the first image we see a guard rail post that appears to look like it has two eyes and a nose. In the two remaining images of white birch trees we see which appear to be some unhappy faces.

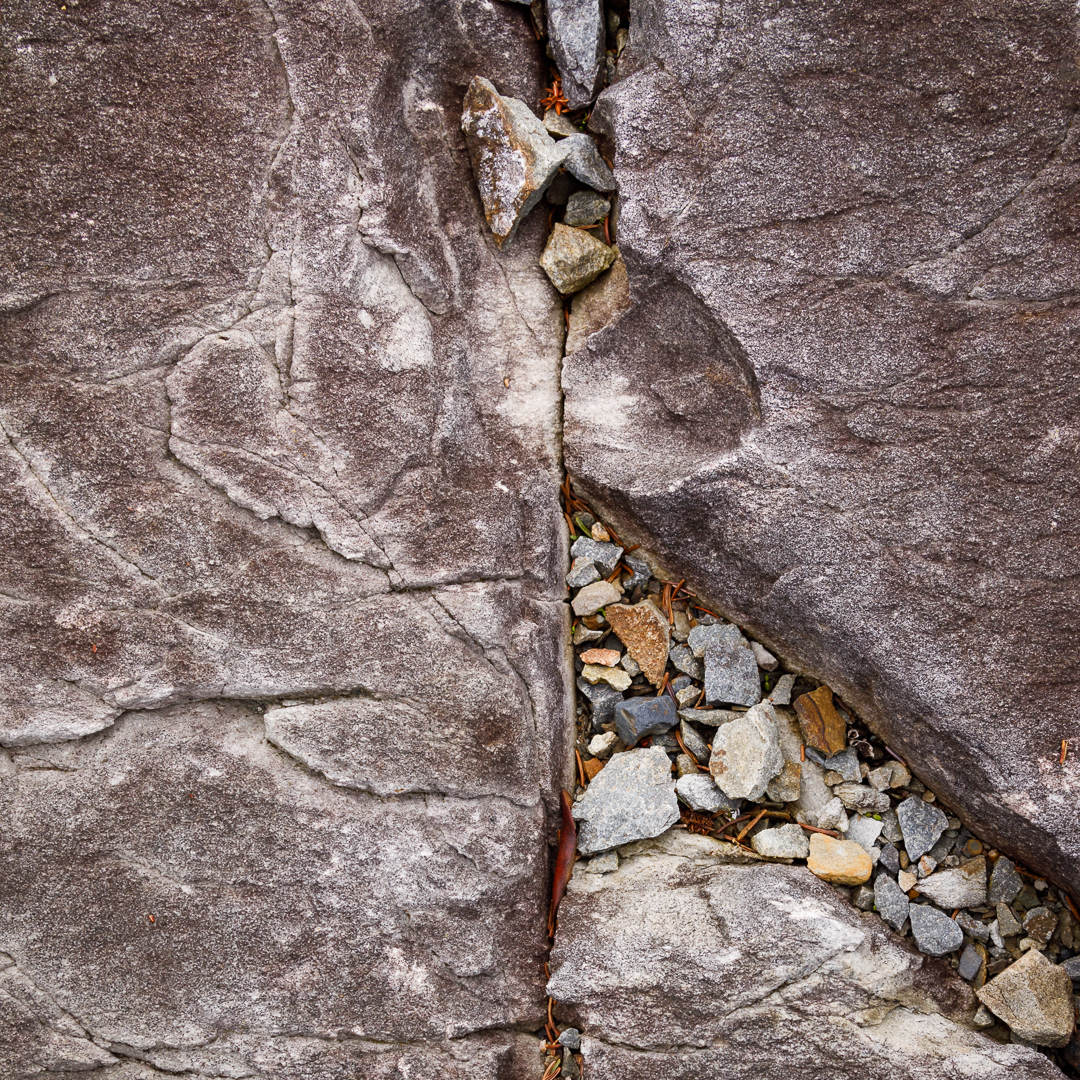
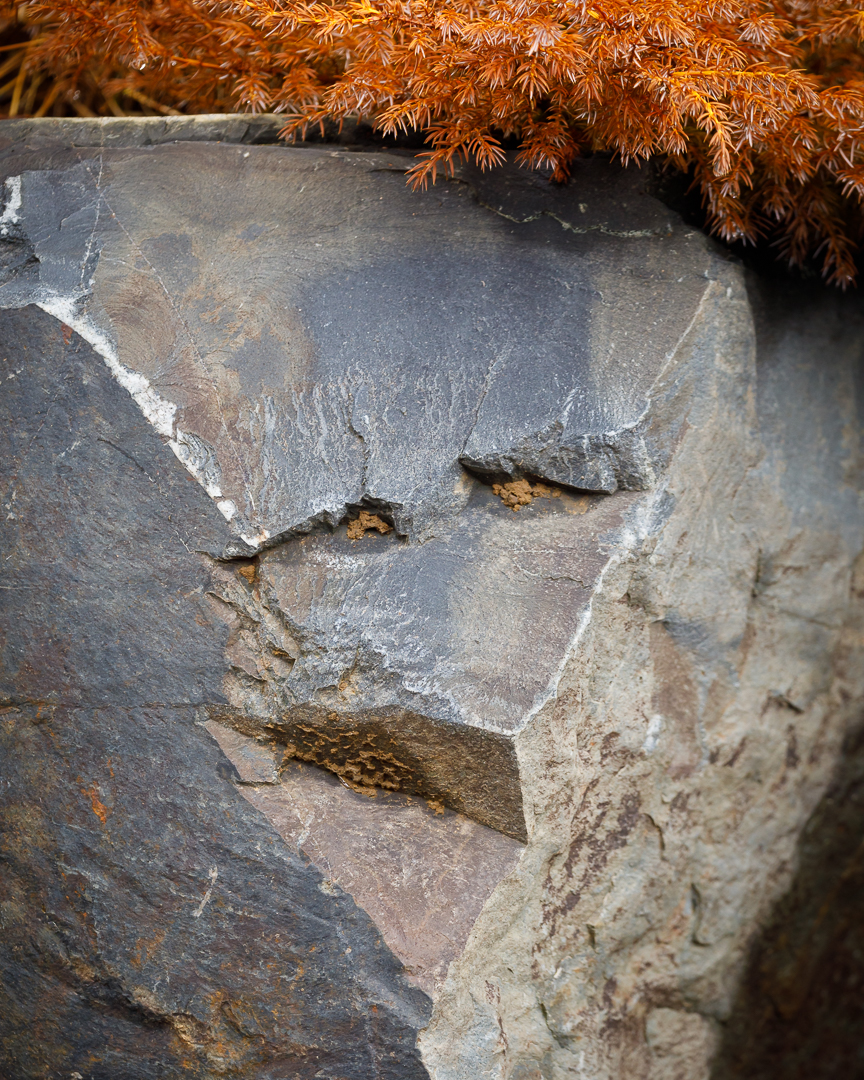
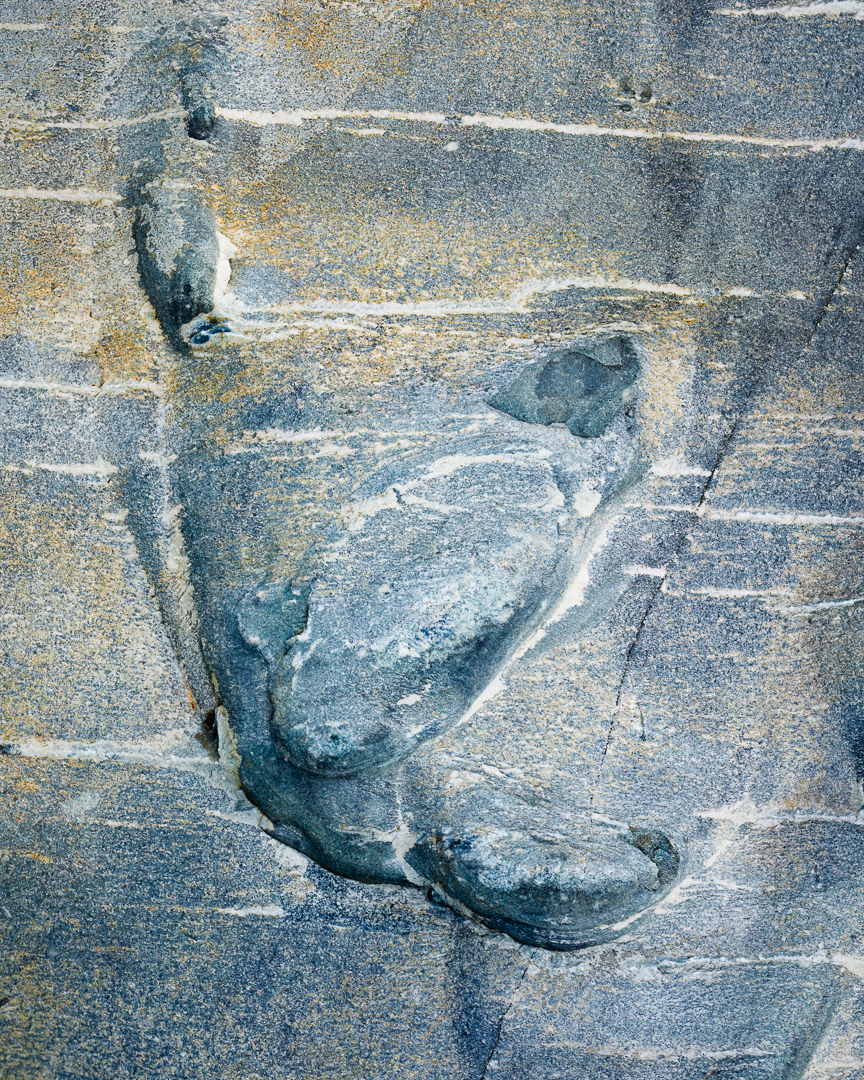
Rocks can contain abstract faces if you look hard enough, the object of this exercise to see something else in the subject which will help identify a story for your image. The first image in the upper left shows a profile face of what appears to be a dog, The second image appears to have two eyes, a nose, and mouth as well as brown/reddish hair (defined by the tree branch). The third and fourth images are a bit more ghostly and abstract, but appear to contain a face shape and details; eyes nose, and mouth.

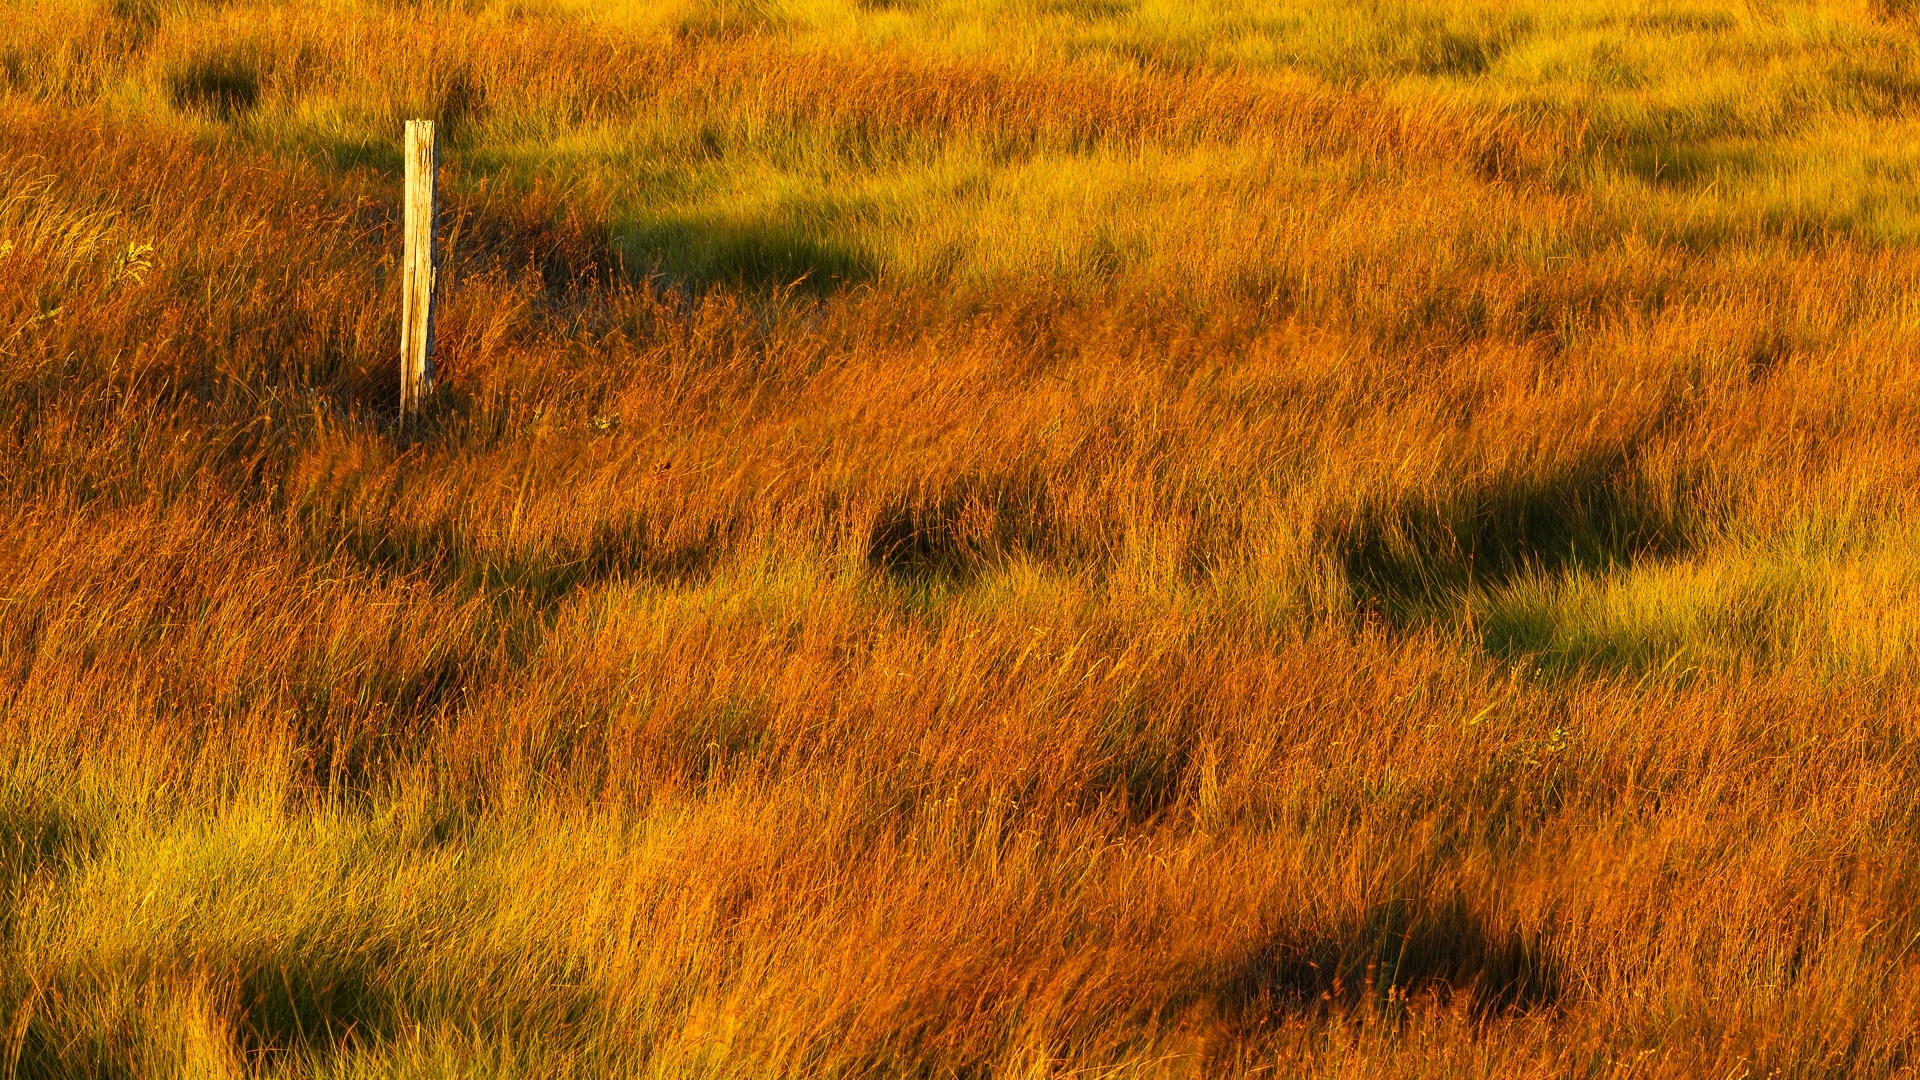
You can even see faces in the landscape. If you look lower right you will see two eyes a nose and a mouth. When you go out to find some faces, just take your time and keep looking it’s amazing what you will see.
Additional Resources
As always with our monthly theme challenges we try to seek out additional instructional resources, below are some YouTube video links to help with some tips, hints and ideas.
Learning to see in Photography instructional aids:
■ Train Your Brain to See Like a Photographer: by The Photographic Eye (13min 55sec)
■ Learn to See Hidden Photos All Around You: by The Photographic Eye (9min 14sec)
■ How To See Photos and Compositions: by Mike Browne (12min 38sec)
■ Abstract Photography Walk – Creative Tips & Tricks: by Viewfinder Mastery (12in 26sec)
You’re encouraged to develop the ability to “tell a story or invoke an emotion“, as well as learn to plan and troubleshoot while creating images.
- It’s important to not only create an image but to also include a “Title”, this process helps with; determining your subject or story, and composition.
- Try writing a short paragraph about; how you came up with the idea, any interesting back ground that compelled you to make the image, and describe any techniques how you overcame any obstacles.
- Do some research and include any relevant information behind the subject of your image. This helps with planning and your approach for a story
An important part of improving your photography is practice, practice, practice which is one important aspect of the monthly theme challenge, in addition you have an opportunity to learn about different genres, techniques and tips that you are not familiar with.
Share your images and stories experienced this month
Even though this website is not setup to directly upload your images, you can achieve something similar by commenting on the post; paste your social media or google drive link to your image in the comment, then type any additional message you’d like to share. Everyone who visits will be able to visit your link. Note comments are moderated so it will not show up right away. We do get notifications when any comment is posted, so it won’t take long to get approved and have your comment subsequently show up. By pasting your social media or google drive link in your comment, it gives everyone visiting the blog a chance to click the link to see your image for the challenge and also the ability to look at your other work by viewing your social media through your pasted link. We want sharing to be a positive experience and we hope you have fun with this month’s photo challenge.