We have done a number of theme challenges so far that have been quite specific in various genre’s and techniques to try. Hopefully by now you should have some idea as to what images you like to create.
This month the theme is “Enjoy Your Photography” which we will take literally. Think about what you like to photograph, what makes you feel good, and don’t worry about what anyone else thinks or how many likes you do or don’t get on social media. Remember why you started your journey with photography. Create an image for you or for someone close to you that you will enjoy remembering or feeling that special moment that you captured.
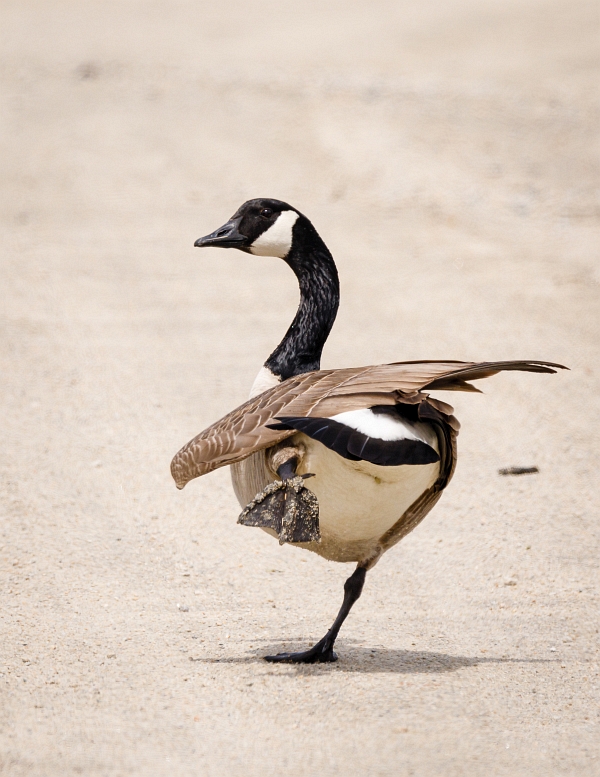
If you enjoy getting up close to wildlife, like myself, it’s exciting to get close enough to fill the frame and push the shutter at that special moment. With the image of the Goose it was a matter of getting low and waiting for it to do the broken wing ritual. Many birds do this to try to draw attention away from their partner.
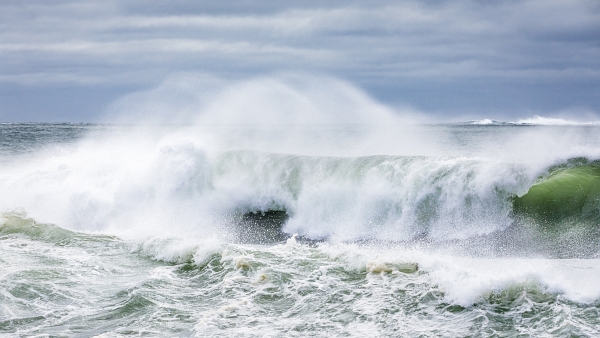
The ocean can be very dangerous, but if you are careful by finding a safe location to photograph from, you can capture some exciting moments as waves are crashing just after a severe storm. Use a longer focal length to be at a safe distance from the ocean.
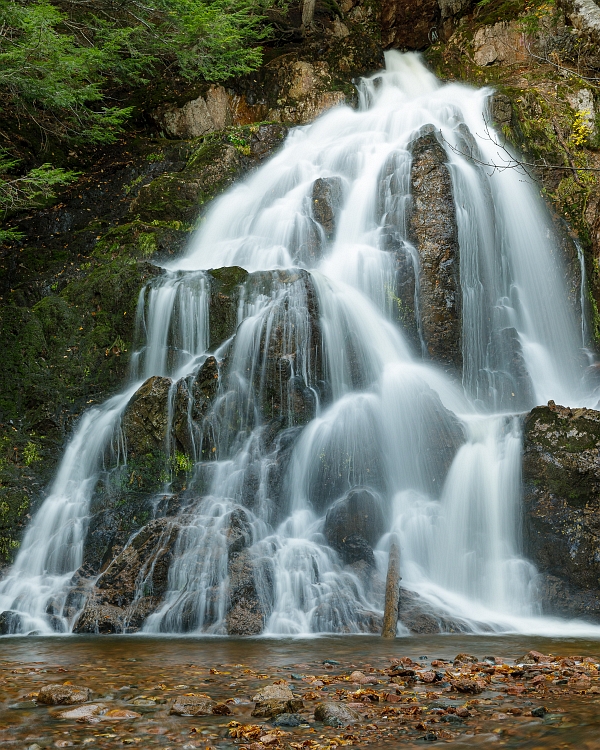
I really enjoy taking images of streams and waterfalls. It’s such a peaceful experience; the sound of wildlife, the rushing water and wind in the trees, as you sit listening and enjoying your surroundings. It is so nice to just relax and take in what you are feeling even before you get your gear out to create an image. The extra time you spend will even connect you more to your final image.
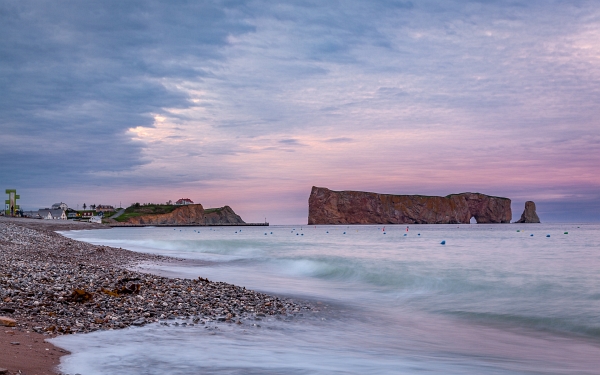
Go back through your images that you took recently or even years ago and I guarantee you will find some absolute treasures that will bring back many memories. This photo was during our vacation a few years ago to Perce, Quebec. As we were finishing up our evening meal at the restaurant overlooking the bay, we saw the light starting to change in the sky and on Perce Rock. After quickly paying for our meal, we rushed down to the water’s edge to capture the moment.
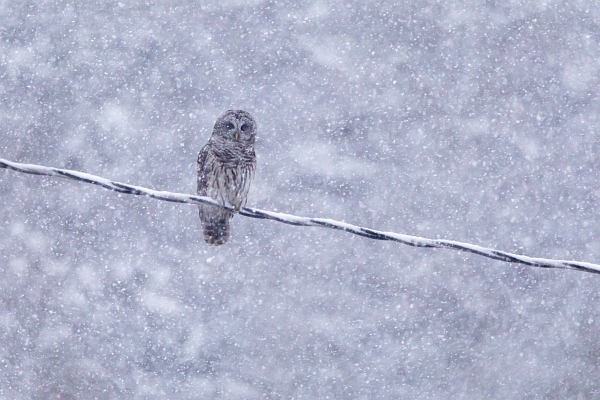
We had always hoped to get the opportunity to capture an image of an owl close to home and this year on the 21st of January my wife spotted a Barred Owl in our area. During the snow storm on the next day my wife spotted the owl again and I was able to take a manually focused image of the owl with my camera pointing out the open door of our living room while resting my camera/lens on a stool with a cushion as a makeshift tripod. We were both so excited, what a rush.
So go out and create an image that you enjoy, or even look through some of your existing images and take that special journey down memory lane.
Students are encouraged to develop their ability to tell a story or invoke an emotion, as well as how to plan and troubleshoot while creating their images. As such it’s important to not only create the image but to also include a “title”, and write a short paragraph about; how they came up with the idea, any interesting back ground that compelled them to make the image, and describe any techniques on how they overcame any obstacles.
As always with our monthly theme challenges we try to seek out an instructional resource, below are some YouTube video links to help with some important tips, hints, ideas, or just somethings to think about.
Enjoy Your Photography instructional aids:
■ How to AVOID frustration and ENJOY photography by: David Dixon Photography (6min 56sec)
■ Photography 28: Learn to Enjoy your own Photography (not just the gear) by: Ira Crummey (6min 51sec)
■ Feeling Like Your Photography Sucks by: First Man Photography (19min 40sec)
An important part of improving your photography is practice, which is one aspect of the monthly theme challenge, in addition you have an opportunity to learn about different genres, techniques and tips.
