May Theme Challenge – “Observation”

Observation is an important technique to improve your composition skills. The key to observation is to just slow down and spend time looking at every detail in your surroundings to really see what is around you. I emphasize around you because it’s important to not just look at what is in front of you but also what is around you as the image you decide to create may be in another direction. By slowing down and taking the time to “observe” you will not only see better but you’ll also feel and as a result you will be able to create more compelling images. Improving your observation skills helps you to identify a subject which helps your compositions by being able to feel or see the story and identify what belongs in the frame to support the feeling, subject, or story.

This month I encourage you to slow down and really try to see what is around you to create some interesting images of the new things that you are seeing that you may not have seen before. Even with the current pandemic restrictions you are still able to go out in your own area, keeping proper social distancing in mind, to practice observing. The more you try this exercise the more you will improve your ability to see.

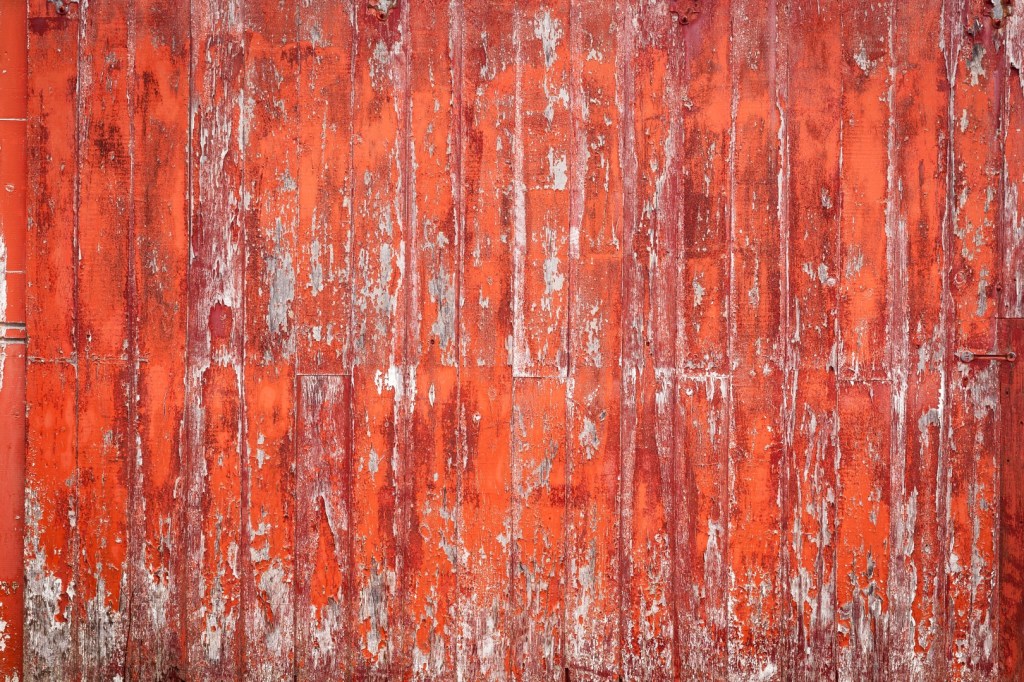
This month we will take an exercise approach to improve our observation skills by looking for shapes, building on last moths texture challenge, by seeking out shapes within textures. You can also look for shapes within a composition or identify an abstract shape of a subject.

As with our texture challenge, it doesn’t matter what camera you have, even the camera in your phone will help you improve your ability to improve your photography through observation. This months challenge is more about helping you learn to see better.

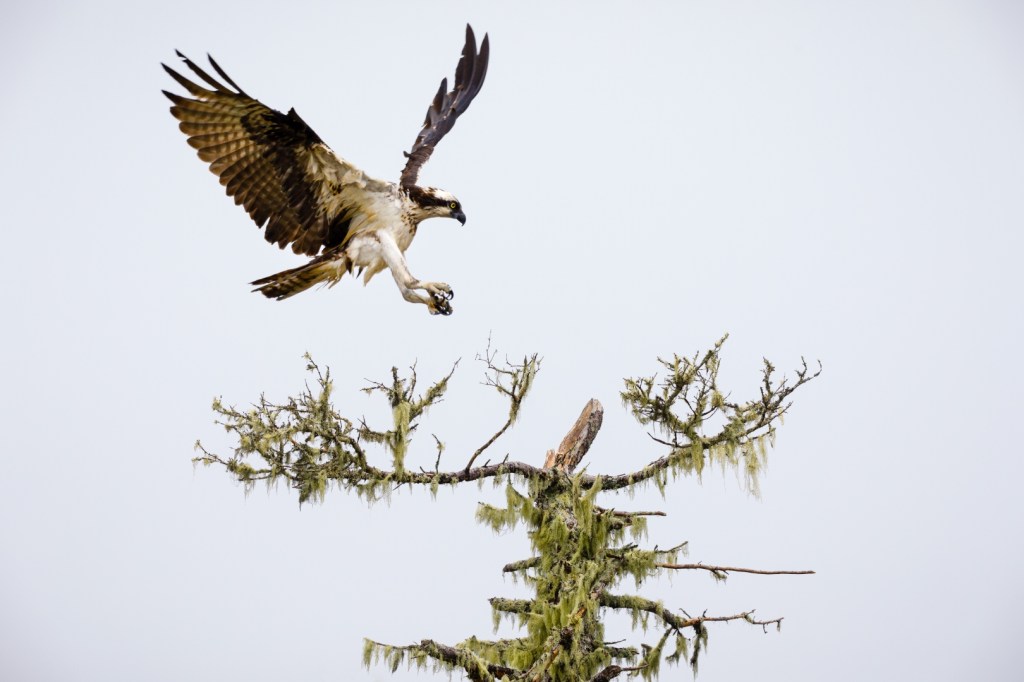
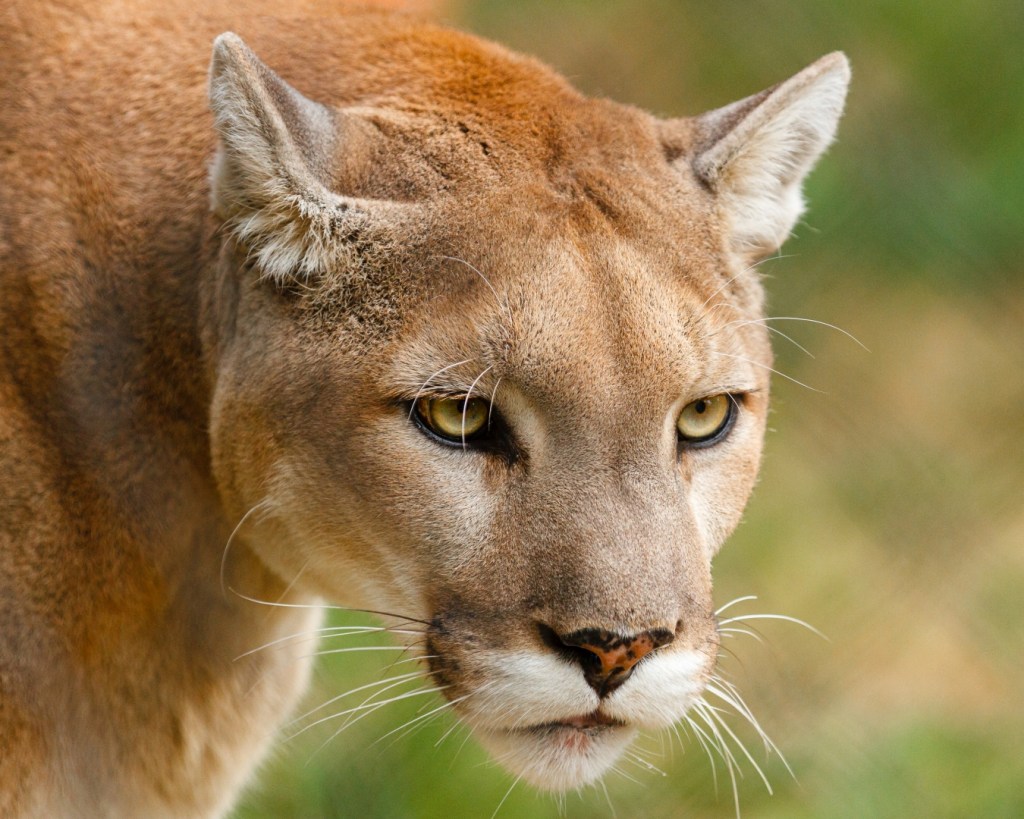
Let’s take a look at some image examples:

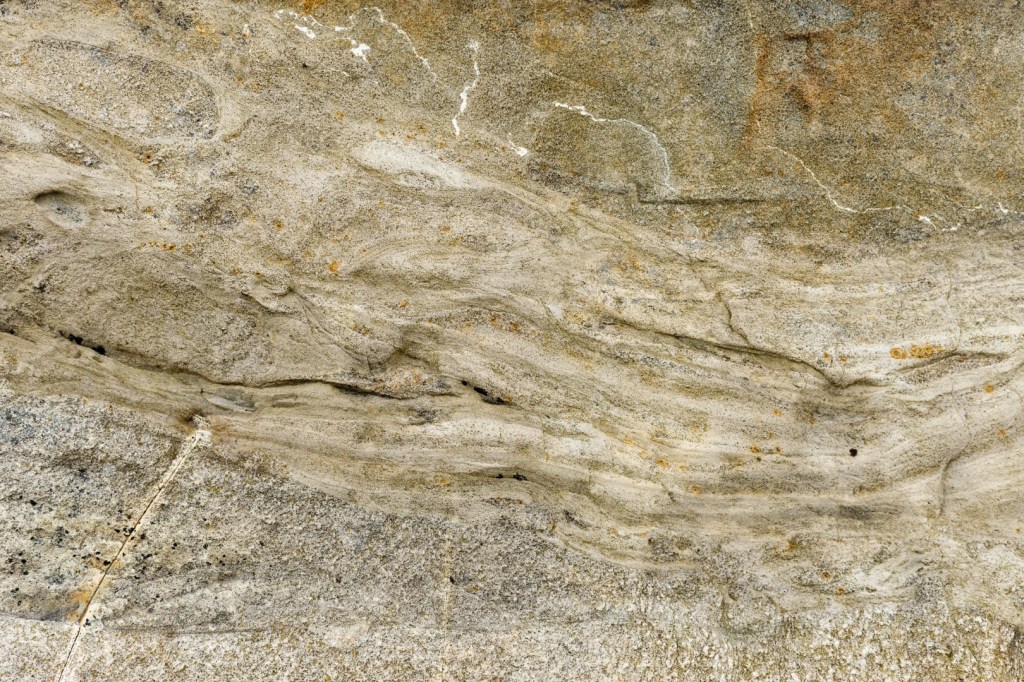
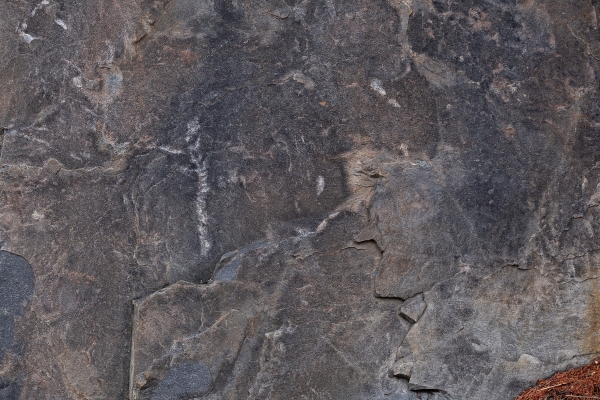
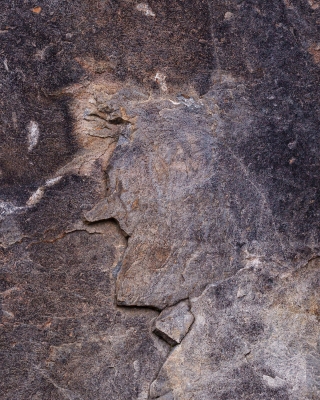
A shape within a texture; below within the original rock surface image on the left you may not initially notice the person on the bottom right of the image. Once you take the time to look more closely you see a profile image of a person, possibly even resembling a cartoonish character. The final image shown on the right was post-processed a bit to darken around the subject to help it stand out so the viewer can see it more easily.

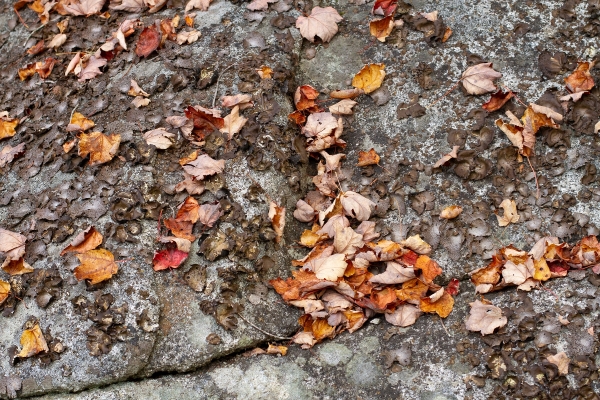
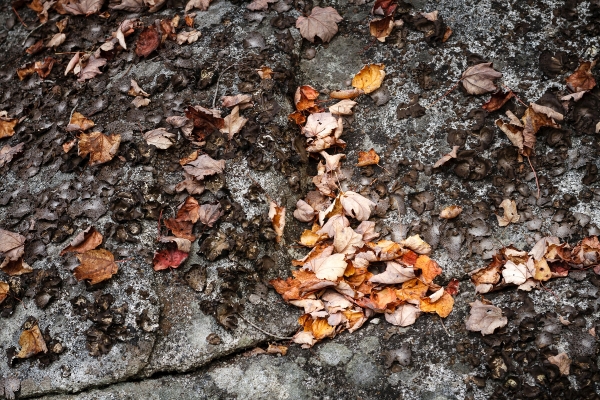
Finding something out of Chaos; looking at the image on the left below its hard to imagine what your brain is seeing, but it’s telling you that there is something there because you’ll find yourself still looking at it. After a while you slowly begin to see an upright cartoon rabbit running down a hill, as shown in the image on the right, again slightly post-processed, by darkening and de-saturating the leaves surrounding the subject.

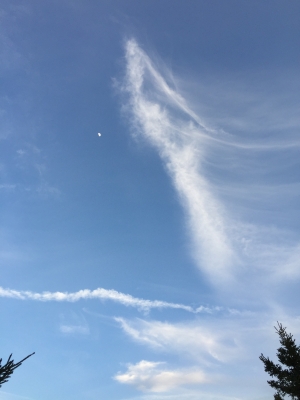
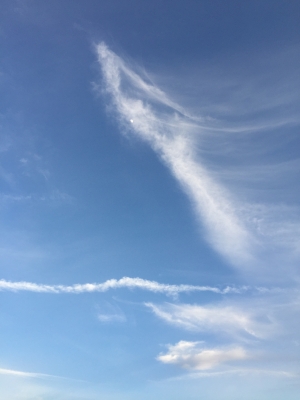
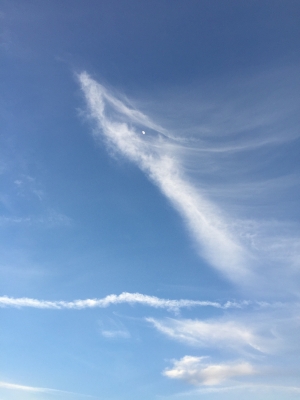
Waiting for the decisive moment; I was out for a walk and noticed the clouds, shown below, what I felt looked like a dragon and also noticed the moon. I wondered as the clouds and the moon were moving if the moon would end up in a position to be the eye of the dragon. Even though this was just plain luck, I took a number of images leading up to the final image on the right to capture the moments as they were happening. This is a great example of identifying what you are seeing, using a bit of creativity, and anticipating a story that you are hoping will unfold in front of you.

Abstract interpretations of a subject; The image below is from the “Valley of Fire” state park in Nevada taken back in 2011. The lava rock in this park has so many incredible rock formations. This image appears to me as a person kneeling down which is abstract form what it really is, a rock formation. If you look closely at some of your past images, there may be many that contain abstract subjects.

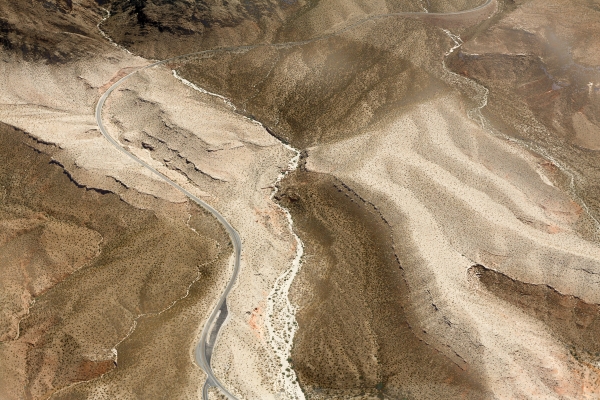
Abstracts within a Landscape; The image below was taken from a helicopter while taking a flight into the Grand Canyon in 2011. I noticed the different colors in the sand and how it looked like two aliens were about to kiss.

Let’s see what images you create this month.

Students are encouraged to develop their ability to tell a story or invoke an emotion, as well as how to plan and troubleshoot while creating their images. As such it’s important to not only create the image but to also include a “title”, and write a short paragraph about; how they came up with the idea, any interesting back ground that compelled them to make the image, and describe any techniques on how they overcame any obstacles.

As always with our monthly theme challenges we try to seek out an instructional resource, below are some YouTube video links to help with some important tips, hints, ideas, or just something to think about.
Observation instructional aids:
How to take Better Photos through Observation by: Nigel Danson (19min 2sec)
How to become a better photographer through ‘visual exercise’ by: Sean Tucker (6min 40sec)
Looking Around and Observation in Photography #78 by: Clive Talbutt (9min 38sec)
3 Photography Skills You Should Learn (and will pay off forever) by: Nigel Danson (19min 59sec)

An important part of improving your photography is practice, which is one aspect of the monthly theme challenge, in addition you have an opportunity to learn about different genres, techniques and tips.

April Theme Challenge – “Textures”

When talking about texture we think of details within the surface of subjects or objects, such as with cement, bricks, cracked paint on a wall, sand, leaves, bark on tree trunks etc… Texture is possible due to the light and dark areas on a subject caused by the way the light hits the surface creating highlights and shadows. The lower the angle of light the more pronounced the texture will be. These surfaces can be interesting as an image on their own, or when combined with other images can create images considered to be fine-art.

This month I encourage you to seek out possible subjects or objects to create your own texture images to not only use them on their own but also to combine with other images that you may already have to create something different than just with a single image, especially if the image on it’s own is missing that little extra something that you can’t put your finger on.

The key to a successful texture image is to choose something that has a pattern in combination with color that is pleasing or interesting. Think about getting close while at the same time considering a composition that fills the frame. Remember to consider the minimum focus distance because if you’re too close you will not be able to obtain focus, you can always back off slightly and crop your image if necessary later.

Once you start looking for textures you will start to see they are everywhere, just slow down, look around and use your imagination. It doesn’t matter what camera you have, even the camera in your phone will allow you to capture great textures; just fill the frame, hold the camera steady, adjust your exposure for the mood, and make sure you have attained focus.

Because you will be getting close to the object or subject consider the depth of field to obtain a sharp image. Depending on your camera and lens combination, I would suggest starting with an aperture range between f/5.6 and f/8. If you are using a camera phone that has a fixed aperture try using the best lens choice or stay back from your subject a bit while still filling the frame. Always check your captured image to make sure its sharp. It’s ideal to have all of the texture in focus, so find that spot that still allows you to fill the frame, get the composition you want while still obtaining a sharp image.

Let’s take a look at some texture image examples:

We will now show some examples of using these above images as textures to combine with some sample images to create something different. For the examples shown below, we will be using a free program called Photoscape X, however you can also do the same with Photoshop Elements or Photoshop with even better results because you can mask out some of the texture from your main subject.

Example 1: Even though an image of clouds would not typically be considered a texture we can still use it as such to help enhance our images. The following video shows, for example 1, how I used Photoscape X to create the “after” image. You can use the same technique with the procedures provided below on your own images.

For each image I have provided the Photoscape X settings used when placing the textures on top of an image to create the “after” images.

Insert -> image -> cloud img5709: opacity (50%), blend mode (multiply)
Color: lighten shadows (60), contrast (15), brightness (10), apply
Save -> save as -> _texture suffix

Example 2: This image was taken at a local zoo and even though I was close to the wire mesh of the cage you can still see it in the background. By using a texture we can help improve the image. Choosing the right texture for an image is important, because you just can’t take any texture and put it with any image they need to complement each other. Here is the procedure I used in Photoscape X to create the “after” image.

Insert -> image -> rock img1783: opacity (35%), blend mode (overlay)
Color: clarity (2), lighten shadows (20), contrast (5), brightness (5), apply
Save -> save as -> (save the photos including objects outside [No]), _texture suffix

Example 3: The image of the Willet has a nice clean background which is nice but maybe with a texture it could look better. You never know until you try this technique to see the outcome. I used the following procedure in Photoscape X.

Insert -> image -> rock img8505: opacity (25%), blend mode (hard light)
Color: clarity (5), lighten shadows (25), contrast (10), blacks (-20), whites (20), apply
Save -> save as -> _texture suffix

Example 4: Taking the time to get a clean background with flowers takes time and good composition, but adding a texture can also provide that something extra as long as it complements the image. Here is the Photoscape X procedure used.

Insert -> image -> rock img8481: angle (90), opacity (25%), blend mode (overlay)
Color: clarity (5), darken highlights (35), contrast (10), cyan/red (5), apply
Save -> save as -> (save the photos including objects outside [No]), _texture suffix

Example 5: The following image of a Blue Heron can have a different look if we combine it with the beach foam image. The Photoscape X procedure used is as follows.

Insert -> image -> water image [texture_48A1525]: opacity (35%), blend mode (hard light)
Color: clarity (5), contrast (10), brightness (30), apply
Save -> save as -> (save the photos including objects outside [No]), _texture suffix

Students are encouraged to develop their ability to tell a story or invoke an emotion, as well as how to plan and troubleshoot while creating their images. As such it’s important to not only create the image but to also include a “title”, and write a short paragraph about; how they came up with the idea, any interesting back ground that compelled them to make the image, and describe any techniques on how they overcame any obstacles.

As always with our monthly theme challenges we try to seek out an instructional resource, below are some YouTube video links to help with some important tips, hints, ideas, or just something to think about.
Textures instructional aids:
Texture Photography – Create your own ANYWHERE! by: Peter McKinnon (8min 32sec)
Textures Ep 113: Take & Make Great Photography with Gavin Hoey by: Adorama TV (10min 28sec)
Texture Art Photography by: Dale Kincaid (4min 46sec)

An important part of improving your photography is practice, which is one aspect of the monthly theme challenge, in addition you have an opportunity to learn about different genres, techniques and tips.