The Spring 2025 “Digital Photography 101 Workshop” is offered through the Chester Municipality Recreation “Explore Life” Program Starting Apr 23rd, 2025. You can Register between Apr 8th through 18th 2025 (cost $115) by calling Chester Recreation at (902) 275-3490.
Only Six (6) spots available, providing a more personalized experience.
This Workshop has been offered since 2018, and consistently receives A+ student reviews. Our Digital Photography Workshop Series is made up of Two (2) Workshops; “Digital Photogaphy 101 Workshop Spring 2025” & “Digital Photography 102 Workshop Fall 2025” each are Six (6) Weeks in duration which also include; weekly assignments plus Three (3) field trips.
Digital Photography 101 Workshop, (Cost $115) part 1 of the 2 part series, is a comprehensive Six (6) week workshop intended for the beginner, which sets the foundation on topics such as; exposure, aperture, shutter speed, ISO, exposure compensation, metering modes, including camera settings. The course materials include professional slides in pdf format, the recorded class videos, and camera settings in pdf format. The included weekly assignments and the Three (3) field trips provide the student with 1 on 1 help with hands on experience directly associated with the in class learning sessions. The camera requirement for this course is the use of a DSLR, Mirrorless, or Bridge camera with manual control.
Here is the Poster for the Spring 2025 April through May Digital Photography 101 Workshop. Keep an eye out for the “Fall 2025 Digital Photography 102 Workshop” poster in September.
Note: if you are using an iphone or android phone and want to use the QR code, just save the image to your photos app and then push on the QR code and then click on open it in your default browser which will take you to the the training web site for more detailed information or please visit our courses page.
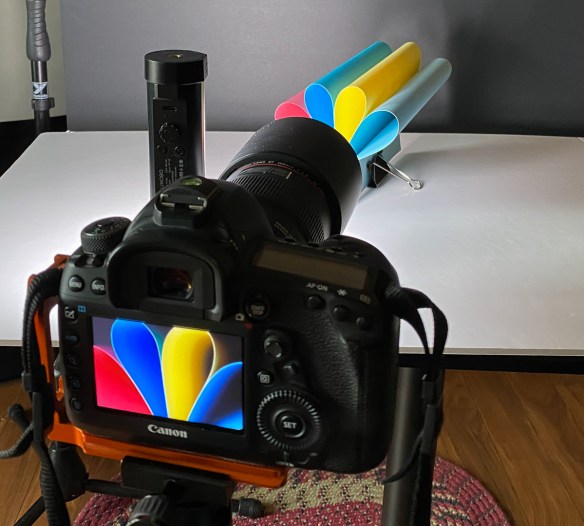
For this month, March 2025, the theme challenge is “Abstract Paper”. Keeping with our last month’s theme we get to create our images inside where it’s nice and warm. We’ll learn more about macro/close-up photography, lighting, perspective and creativity by taking multiple images of the same subject to obtain different results.
There are two setups and examples shown below, making use of different types of paper; (#1) coloured 8.5″x11″ 85lb – 110lb card stock, and (#2) plain 8.5″x14″ 20lb paper. Arrange your paper by loosely folding and then holding the multiple sheets of paper together using a paper clip at each end. Using a camera equipped with a 50-100mm lens on a tripod level or slightly elevated with your folded paper arrangement on a flat surface (white foam board) held by a 2″ binder clip and a dark background (black foam board). Be aware of your minimum focus distance so you can be as close as possible to fill the frame with a sharp image.
There are a number of items required for either setup; ■ (1) Camera + Tripod. ■ (2) Lighting; A lamp, LED light or off camera flash to create angled light, see setup images below. ► lamp with daylight led light bulb, or portable LED light such as LUXCEO Portable RGB Photography Light. ► Off camera flash with colour gels; Godox Wireless trigger (Canon), Godox Wireless Speedlite flash (Canon), Universal Flash Gels Amazon.ca. ■ (3) 85lb A4 (approx 8.5″ x 11″) assorted colour card stock paper Amazon.ca Example also check the Dollar Store or Dollarama. ■ (4) 20lb 8.5″x14″ paper. ■ (5) paper clips. ■ (6) White and Black foam core 20″ x 30″, Dollar Store or Dollarama ■ (7) 2″ binder clip.
#1 Lamp or LED Light with Colour Card Stock
Setup #1 using colour card stock with an LED light. Your setup maybe slightly different depending on what you have available. Basically the light is placed to the front left about 15 degrees, just adjust the position and brightness to get the desired shadows. Change the position or rotate the paper to achieve the different perspectives. Important; notice the paper is on a slight angle to the camera.
Camera Settings: Start in Aperture Priority mode (Av for Canon or A for Nikon, Sony etc…). Depending on your subject and focal length the aperture would typically be between f/2.8 and f/5.6, just check your images in camera for paper edge sharpness (you may want to focus stack your image the wider your aperture). Keep your ISO as low as possible between 100 – 800. Get as close as possible to the paper but a little further than your minimum focus distance. Focus on the edges of the paper. Use a wired remote or a 2 second timer. Focal Length: To fill the fame as best as possible try using a lens between 50mm -100mm. Be aware of your minimum focus distance to ensure you can focus on your subject.
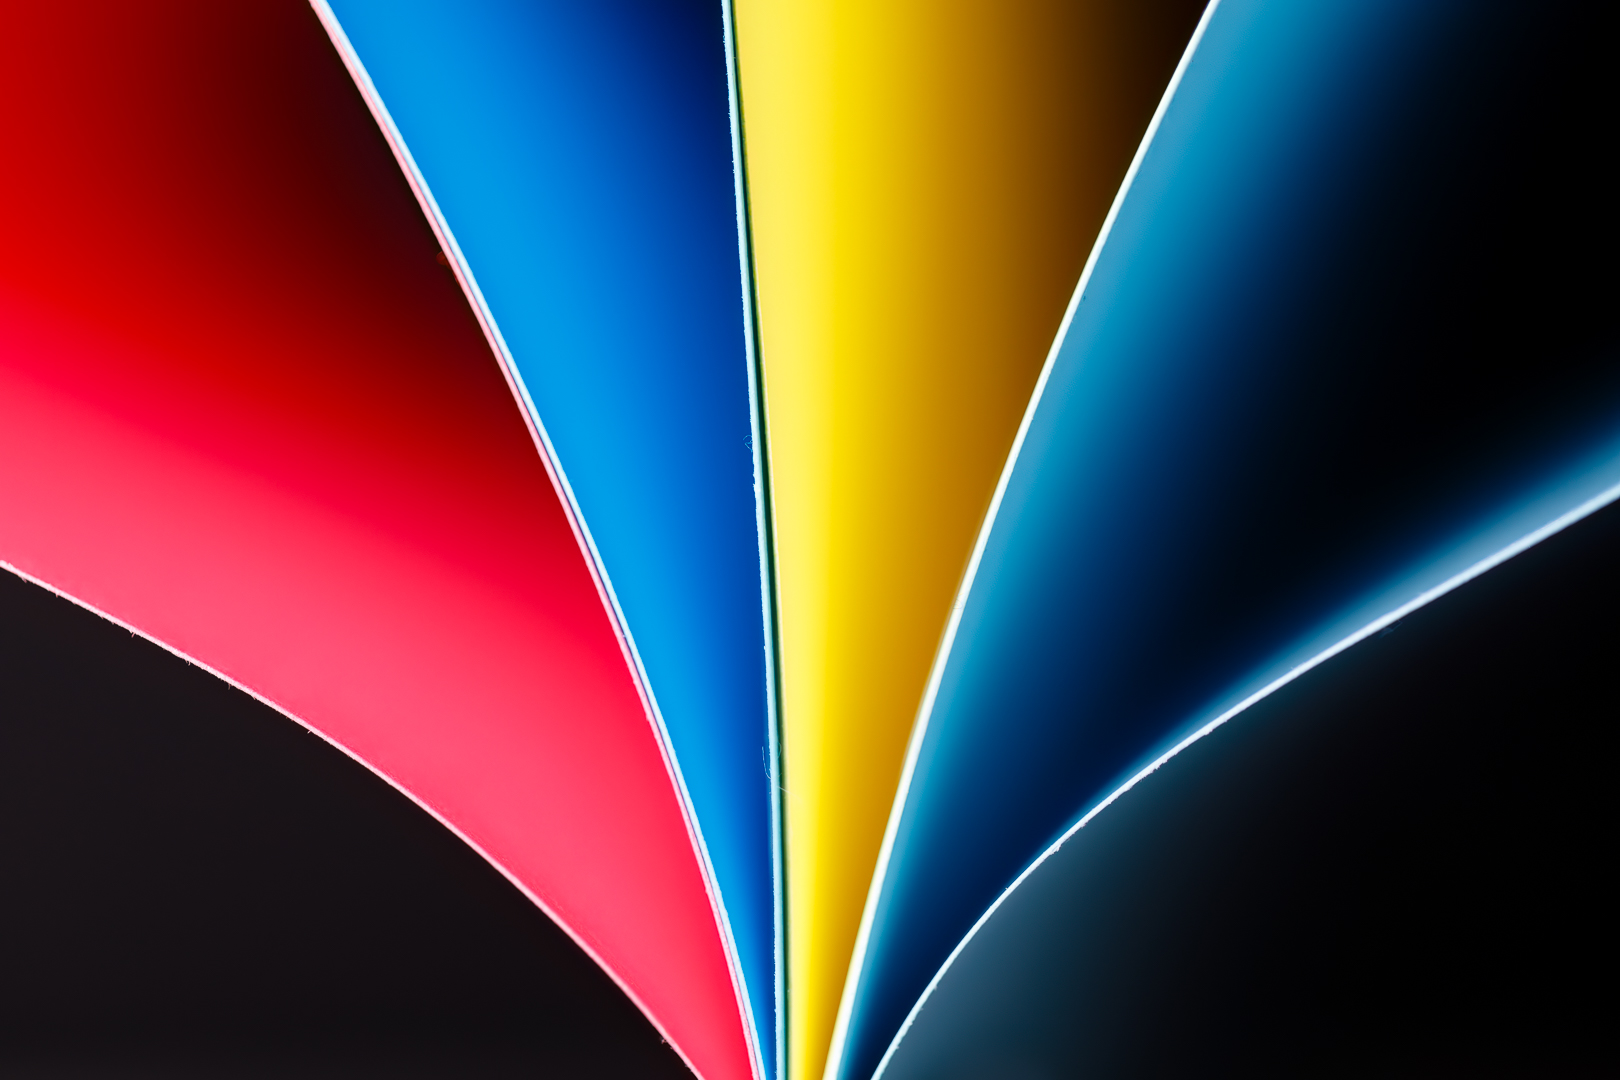
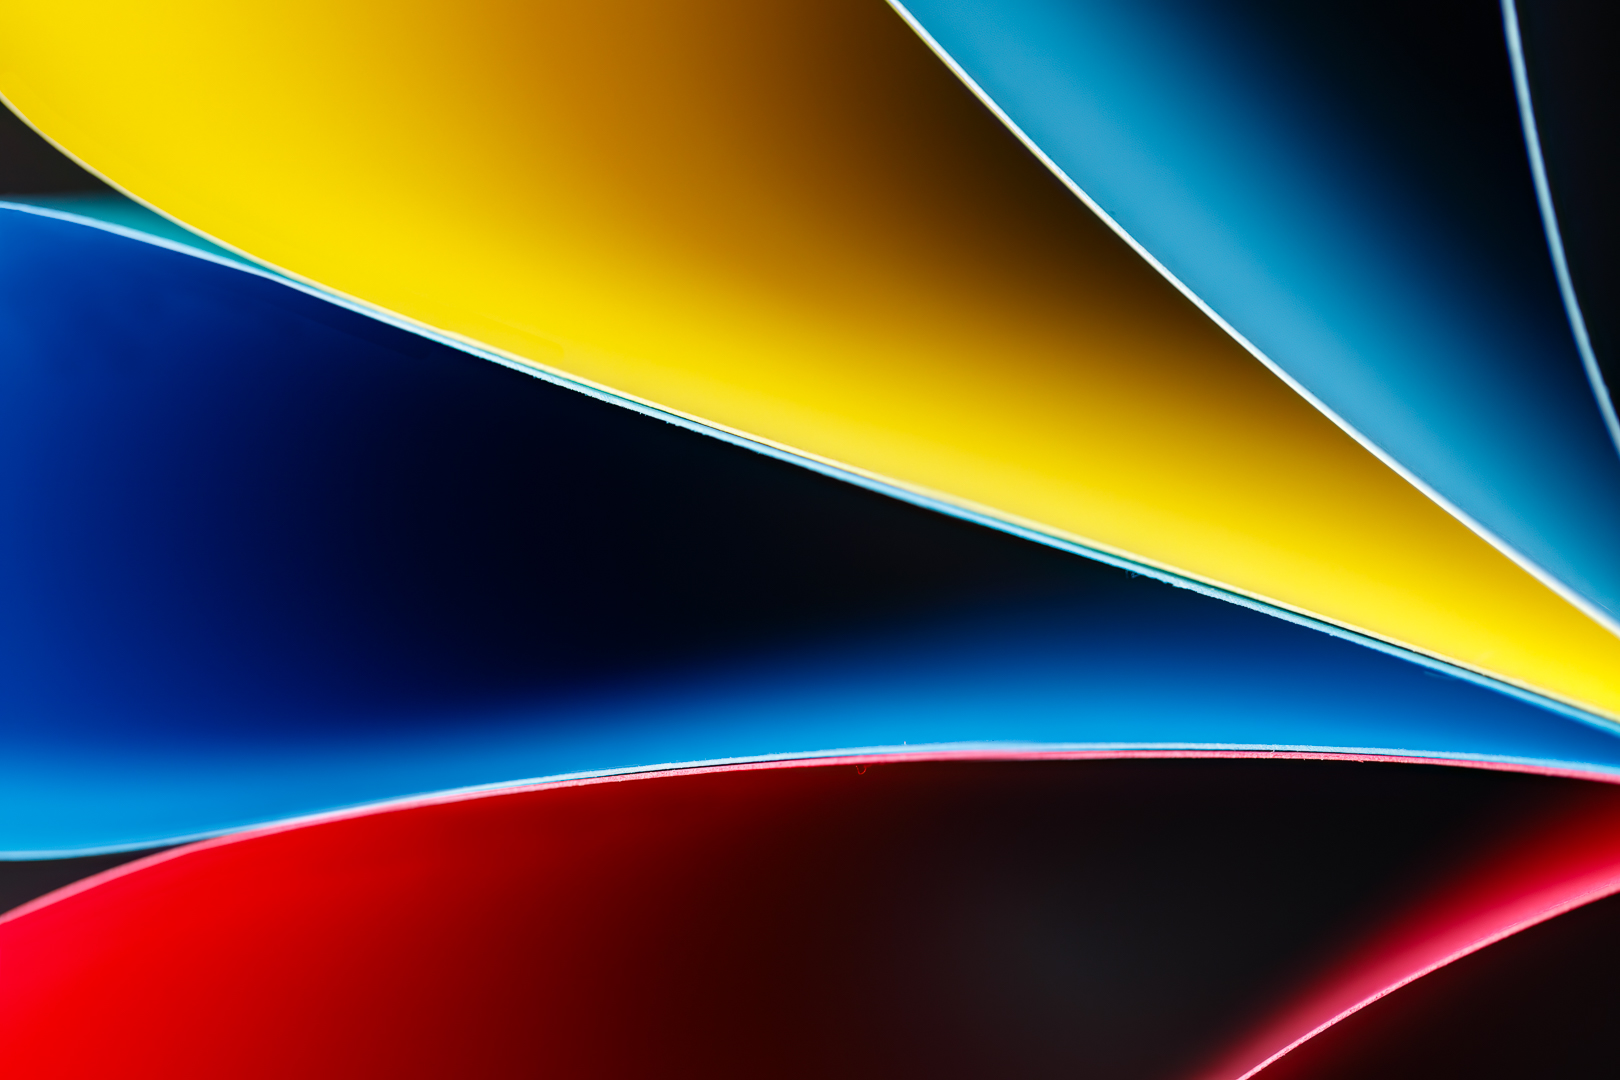
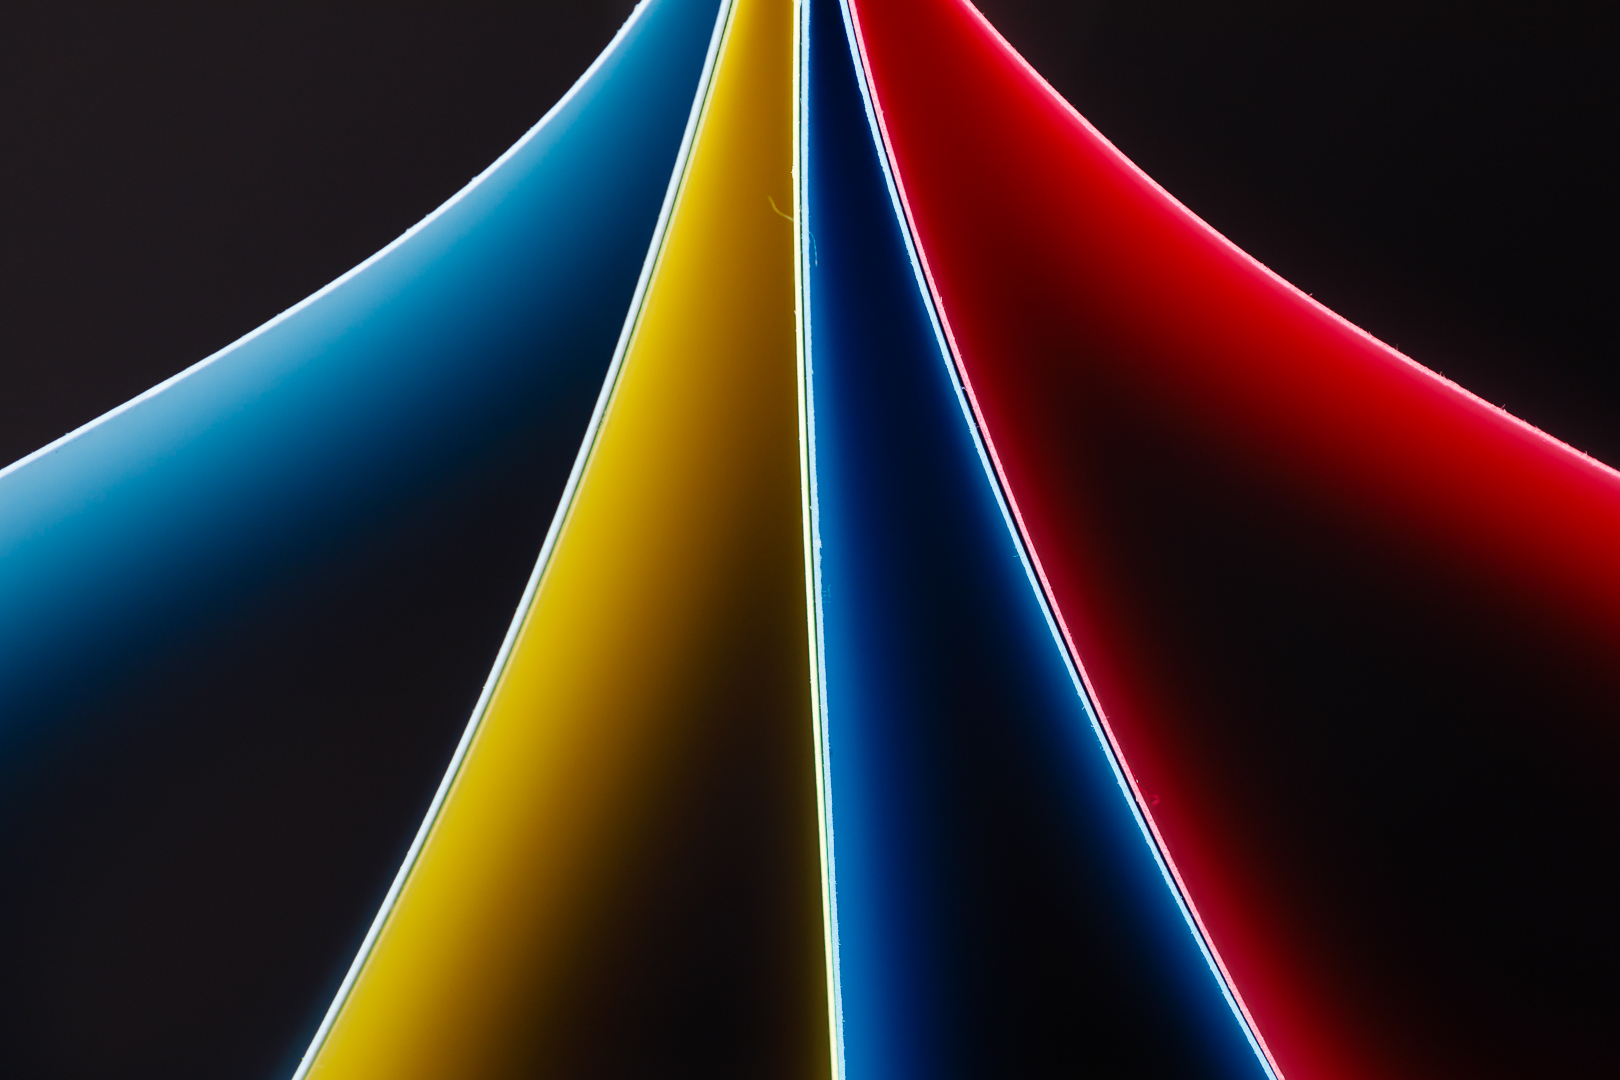
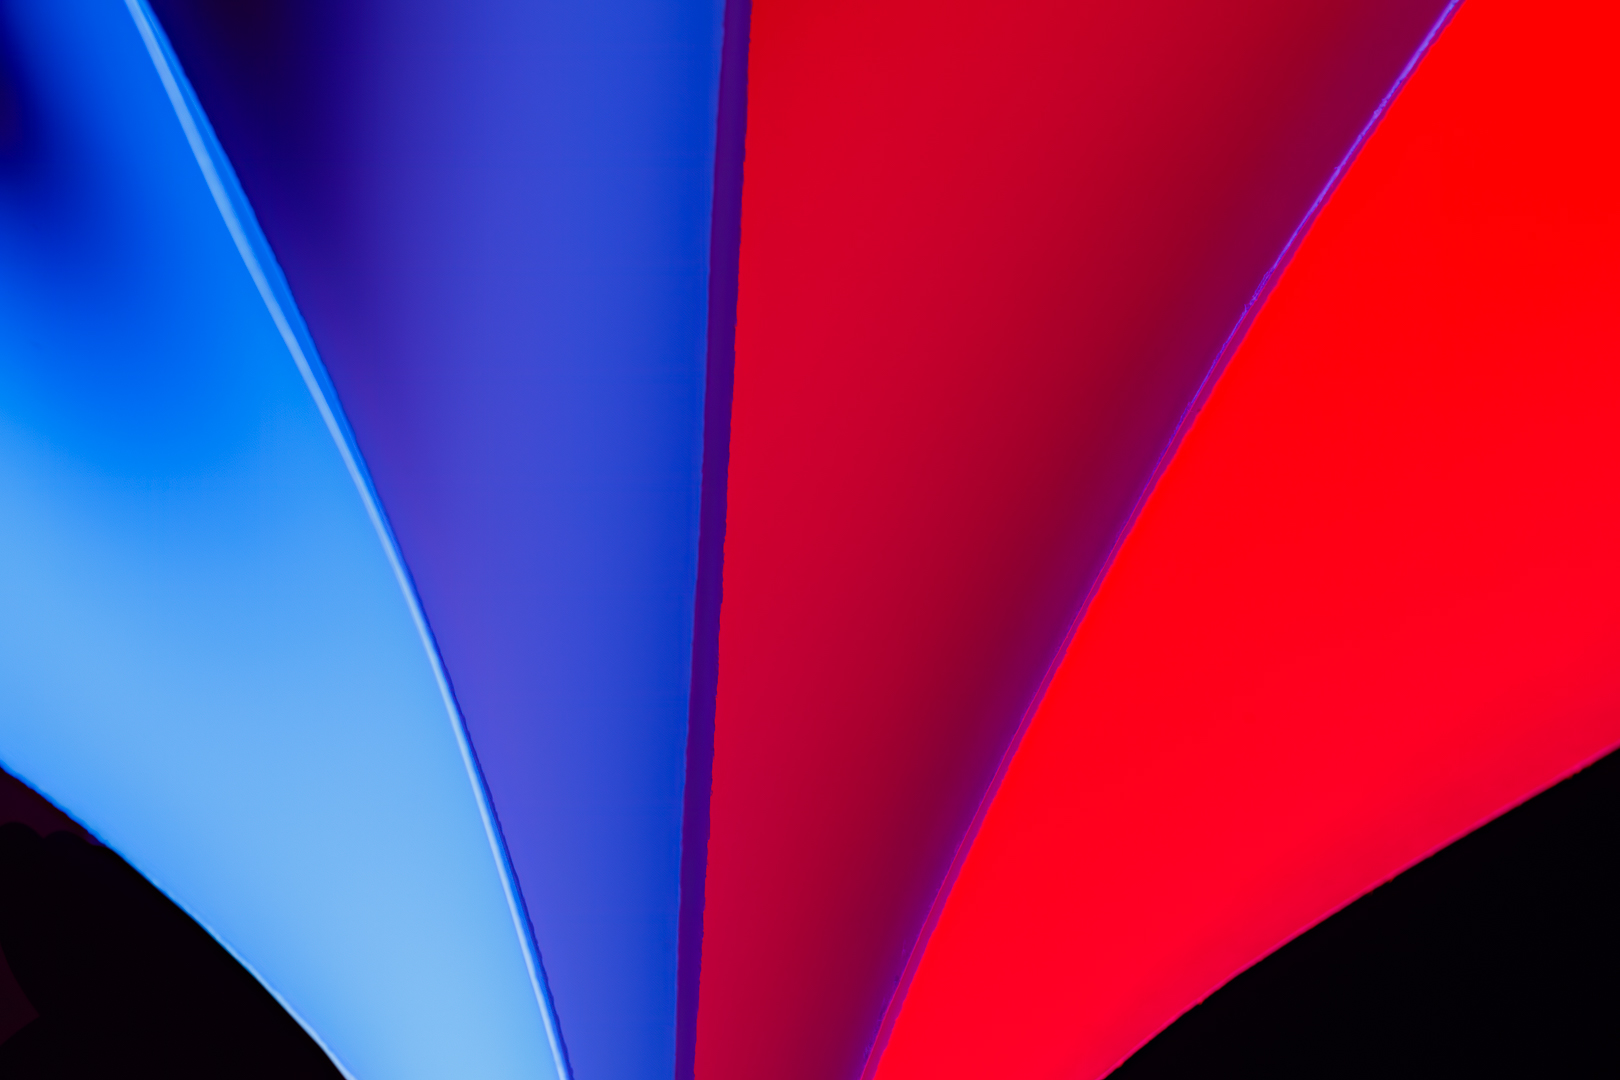
#1 Examples – Colour Card Stock
For the example images below my camera, 5DmkIV, EF100mm f/2.8 Macro lens, settings were; f/2.8, 1/100, ISO 200, @100mm using a LUXCEO RGB LED light model P100. Be aware of your ambient light in the room, you want it darker than your LED light.
#2 Flash with Colour Gels
Setup #2 using off camera flash and colour gels. Your setup maybe slightly different depending on what you have available. Basically the lights are placed about 90 degrees, with a different colour on each side. Adjust the height of the flash units to minimize colour spill over the top of the paper. Add additional folded paper to the inside of the loose fold to get the zig-zag look. Change the position of the paper to achieve the different perspectives. Important; notice the paper is on a slight angle to the camera.
Camera Settings: Start in Manual mode. The aperture would typically be between f/2.8 and f/5.6, shutter speed 1/160, ISO 200, flash power at 1/64 power (adjust the flash power to achieve the desired exposure). Get as close as possible to the paper but a little further than your minimum focus distance. Focus on the edges of the paper. Use a wired remote or a 2 second timer. Focal Length: To fill the fame as best as possible try using a lens between 50mm -100mm. Be aware of your minimum focus distance to ensure you can focus on your subject.
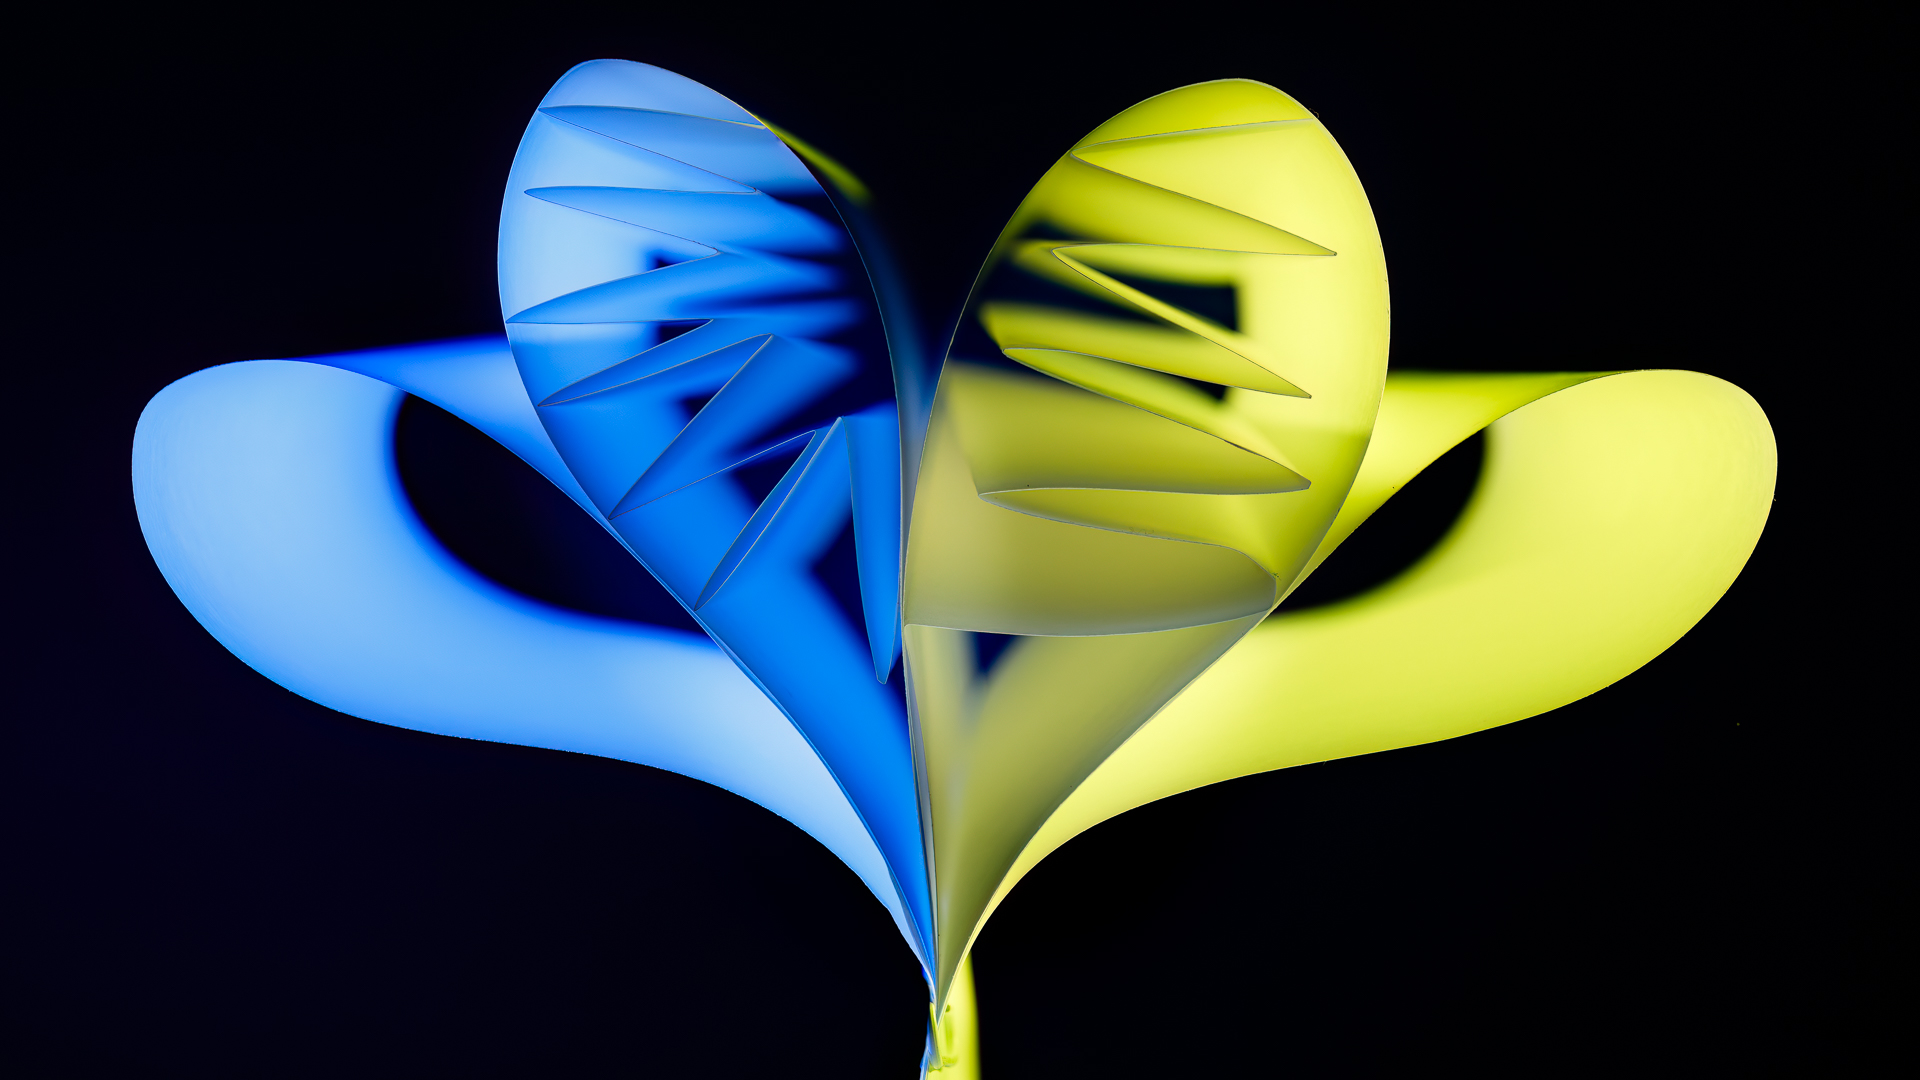
#2 Examples – Flash with Colour Gels
Using flash and gels with 20lb plain paper you can create images with any colour, limited only by the colour of your gels. Be careful of your exposure. The example images are shown below. My camera and settings were; 5DmkIV, EF100mm f/2.8 Macro lens, settings were; f/5.6 – f/8, 1/100, ISO 100 – 200, @100mm using a Canon 580EXII off camera flash with a wireless Godox XT Trigger system.
An important part of improving your photography is practice, practice, practice which is one important aspect of the monthly theme challenge, in addition you have an opportunity to learn about different genres, techniques and tips that you are not familiar with.
Share your images and stories experienced this month
Even though this website is not setup to directly upload your images, you can achieve something similar by commenting on the post; paste your social media or google drive link to your image in the comment, then type any additional message you’d like to share. Everyone who visits will be able to visit your link. Note comments are moderated so it will not show up right away. We do get notifications when any comment is posted, so it won’t take long to get approved and have your comment subsequently show up. By pasting your social media or google drive link in your comment, it gives everyone visiting the blog a chance to click the link to see your image for the challenge and also the ability to look at your other work by viewing your social media through your pasted link. We want sharing to be a positive experience and we hope you have fun with this month’s photo challenge.