With the Paris 2024 Summer Olympics taking place right now it’s a perfect time to be inspired this month, August 2024, with our theme challenge “Summer Sports“. We’ll discuss; sailing, soccer, kite surfing, baseball, and motocross, however, you are not just limited to these sports. We can also take some of what we learned from last month’s theme challenge Street Photography and apply it to this month’s challenge. With Sports Photography some important tips to know are; understand the sport you are shooting, your equipment, how your camera settings interrelate, composition, perspective, and the decisive moment. By implementing these they will help you capture successful sports images.
As with previous challenges you can choose to present your images in either Colour or Monochrome.
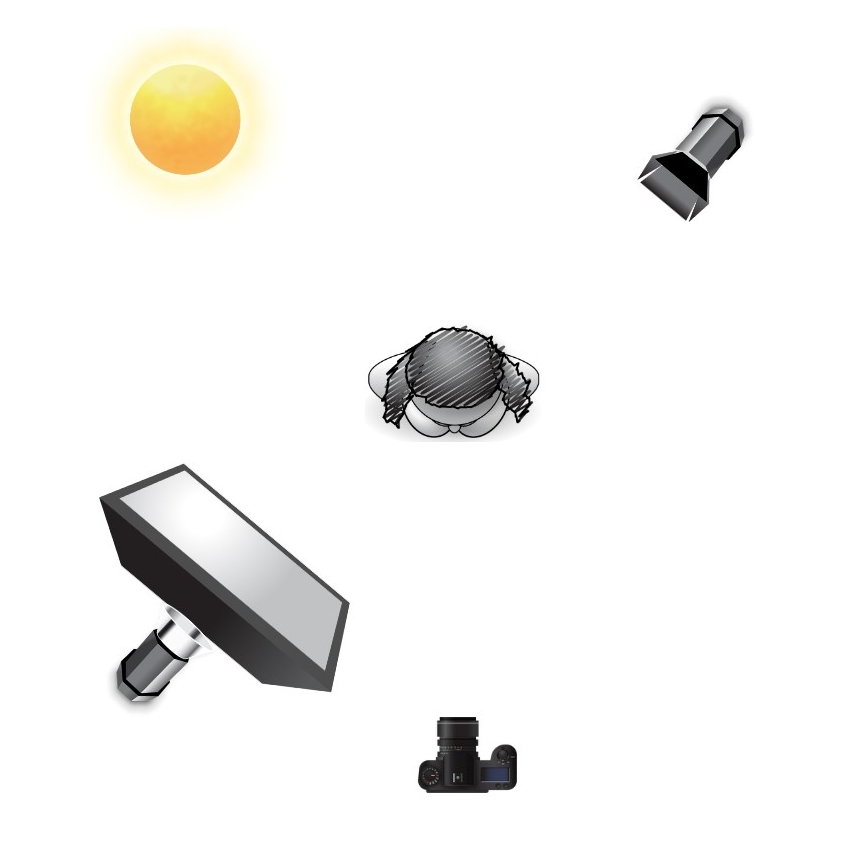
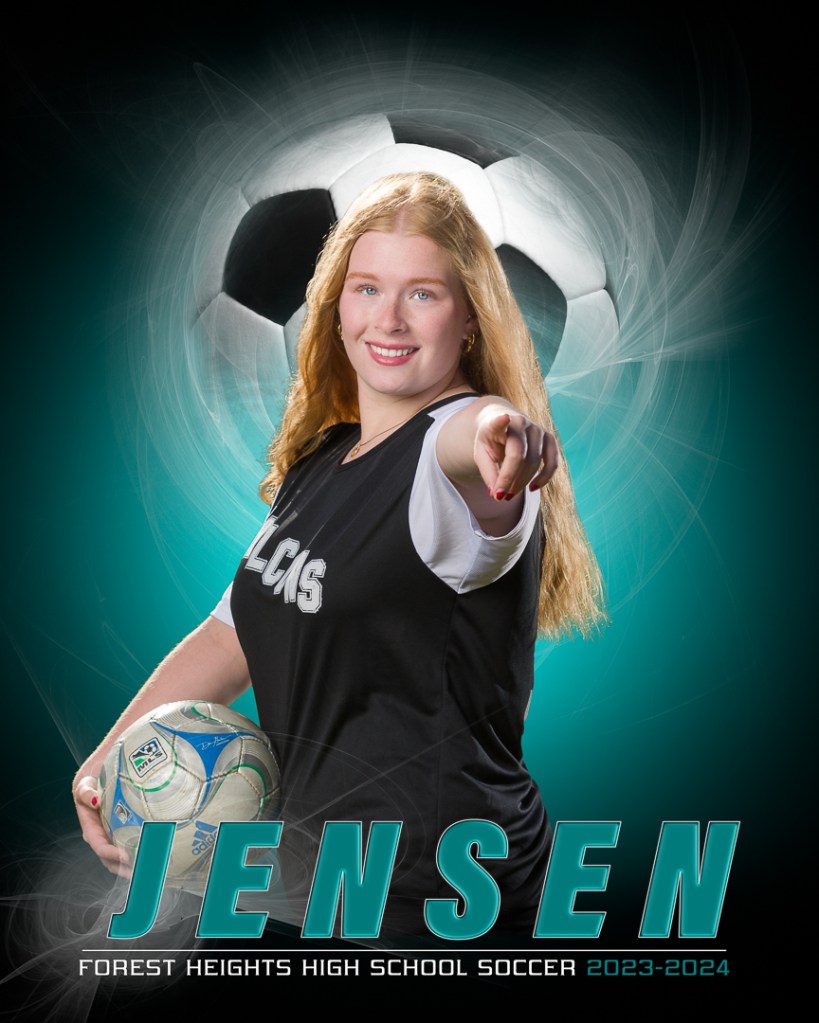
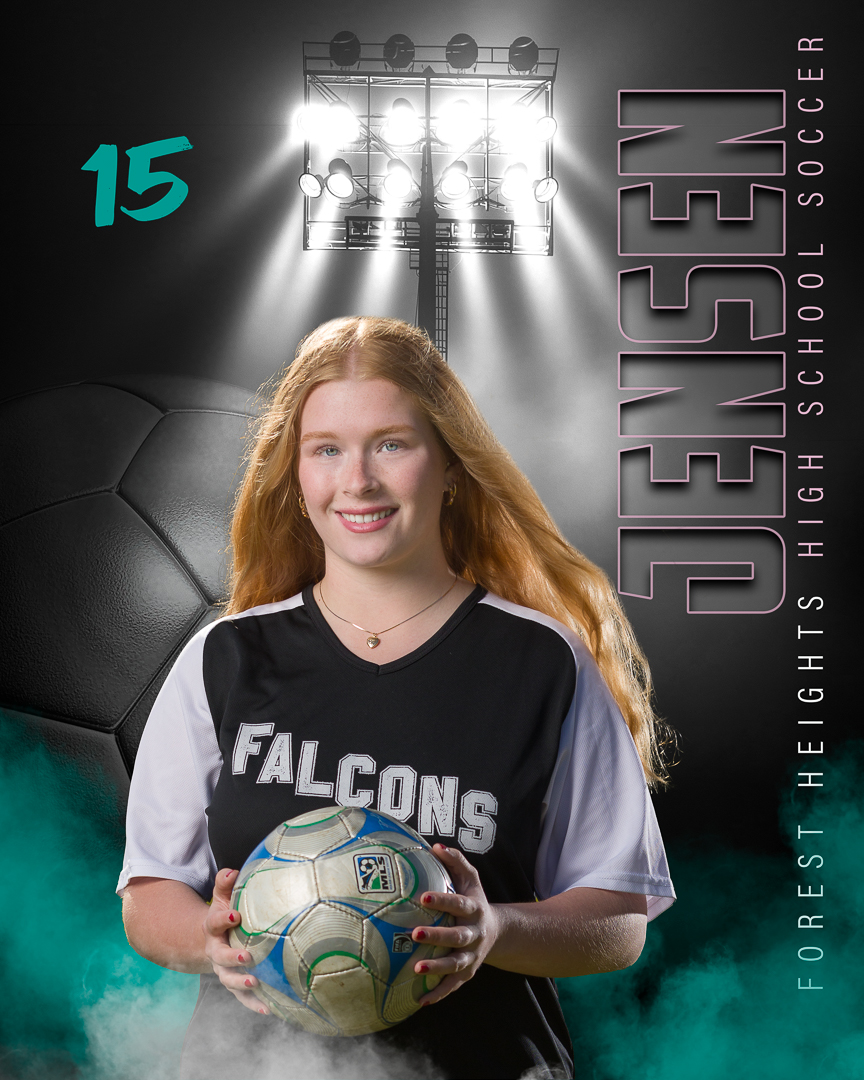
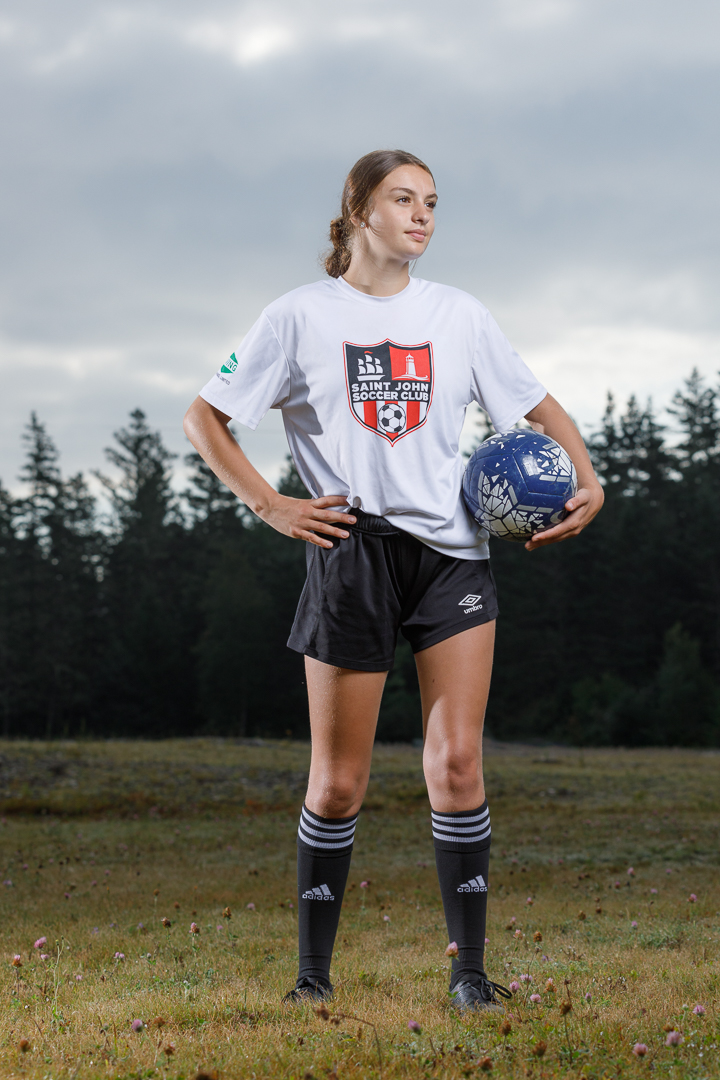
The above image of the soccer athlete is a composite of an on-location environmental portrait combined with a Digital Background. The location was a high school soccer field with the athlete positioned so the late day sun was behind her at camera left just out of the frame for hair and rim light, plus a Godox AD600 (flash) with a 7″ reflector camera right out of frame for hair and rim light on the opposite side, plus a second Godox AD600 (flash) with a 32″x47″ softbox modifier used as fill light for the subject. The lighting diagram shown was created using, “Sylights”, a web based lighting diagram creator.
Sports Photography
Sports photography can be a lot of fun and is a genre that you can build your equipment and skill over a period of time. The specific sport you decide to photograph can simply be due to opportunity, such as your kids participating in a specific sport or your area has specific features that make it a great place for a certain sport. Or you have a keen interest in a specific sport and have connections in your area that gives you unique access. There are some important general considerations about who you photograph that need to be considered if photographing children. If you are photographing a sport that involves children such as but not limited to; minor league baseball or soccer, it’s important to introduce yourself to the organization and parents to make sure they are ok with you taking photographs. Remember to only photograph the people you have permission to, also sharing images with the organization and parents goes a long way to gain their trust. There are many images and styles of photographs you can take considering; action, perspective and composition. So get out there and have some fun.
- Sports photography will challenge your skill level. It’s a form of photojournalism which requires you to get it as right as possible in camera. Photojournalism is considered a historical record which typically only allows you to do basic editing of the images such as; exposure, cropping, and noise reduction etc.. it is typically NOT accepted or recommended to use Photoshop to add or take anything from the photograph.
- It’s not only capturing a specific moment in time, the “decisive moment”, you need to consider perspective and composition to obtain the best clean background possible which includes in camera only the specific subject matter that contributes to the story of that instant in time. Cropping may be necessary in post-processing for the final photograph to minimize or eliminate distractions that are no part of the story.
- Know your sport, it’s important to know where to position yourself and to anticipate what would happen next. For example in baseball with a runner on first the next play would be to 2nd base on a hit for a possible double play.
- Typically the images you take can only be used for personal or photojournalism purposes unless you have a signed release from the appropriate person(s)
- It is highly recommended to obtain permission to take images of children
- It is NOT recommended to take a photo showing anyone in a compromising situation or in an unflattering way
General Camera Setting Suggestions:
- As a starting point, use Shutter Priority Mode (Canon = TV, Nikon = S) with a shutter speed starting around 1/1000 or higher. This is a balancing act considering ISO and the speed of the action. The camera will automatically set your aperture which will typically end up being wide open which helps with background blur to make your subject standout.
- With ISO set it to the lowest possible setting. This can end up actually being quite high because it depends on the available light and your equipment (mainly the maximum aperture of your lens). Remember if you are shooting at a higher ISO filling the frame is important, so you do not have to crop your image, as cropping will also magnify any digital noise.
- set exposure metering for approximately 5% center of your frame (Canon = Spot, Nikon = Spot)
- set exposure compensation to -1 to start (adjust it +/- to get the desired exposure, you’ll need more negative with a higher contrast scene), it really depends on how back-lit your subject is. Your exposure compensation setting will depend on how much of the background you want to not be over exposed.
- Enable highlight alert
- Typically you will be taking your photos hand holding your camera, therefore, enable image stabilization. A monopod can be very helpful but it does take a bit of time to get used to using one.
- The subjects will be moving therefore choose a continuous focus mode (Canon = AIServo, Nikon = AF-C)
- Typically for a lens, use one with wide aperture capability such as f/2.8 or f/4 (f/5.6 can be used with higher ISO’s) and a focal length anything from 100mm through 600mm (typically 200mm – 400mm), it really depends on the composition of each photograph, it’s best to fill the frame in camera but remember you can always crop your images in post if necessary
- You can also use manual mode if the lighting conditions are consistent, just start with the settings from your results using shutter priority mode as described above.
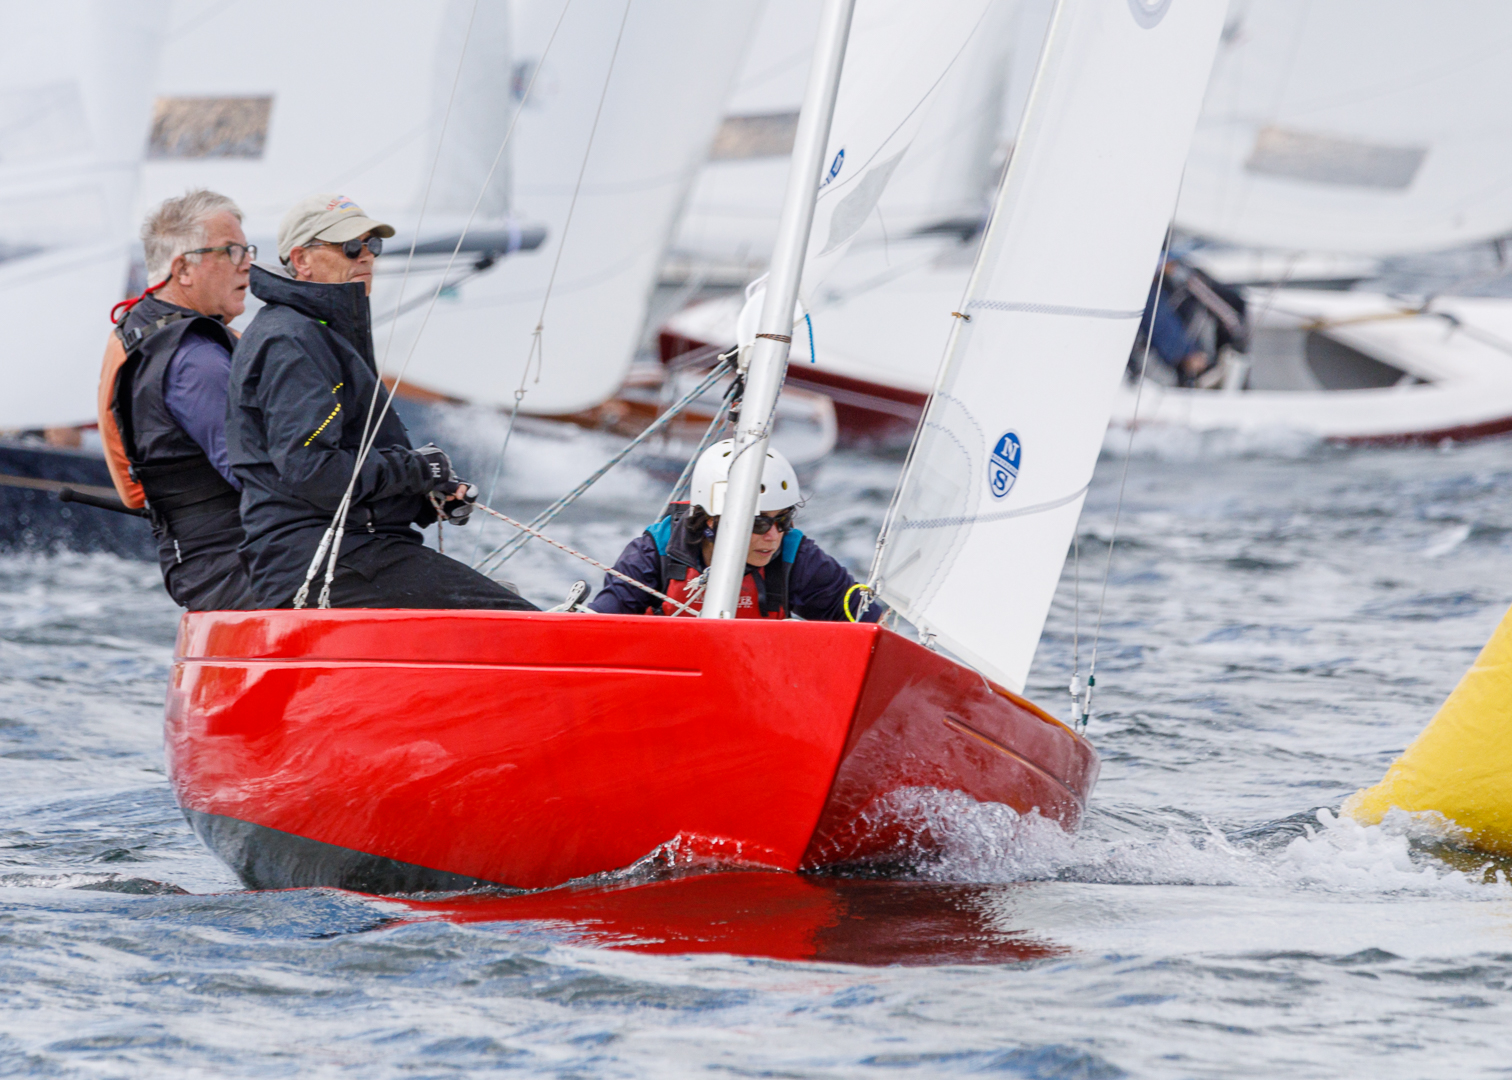
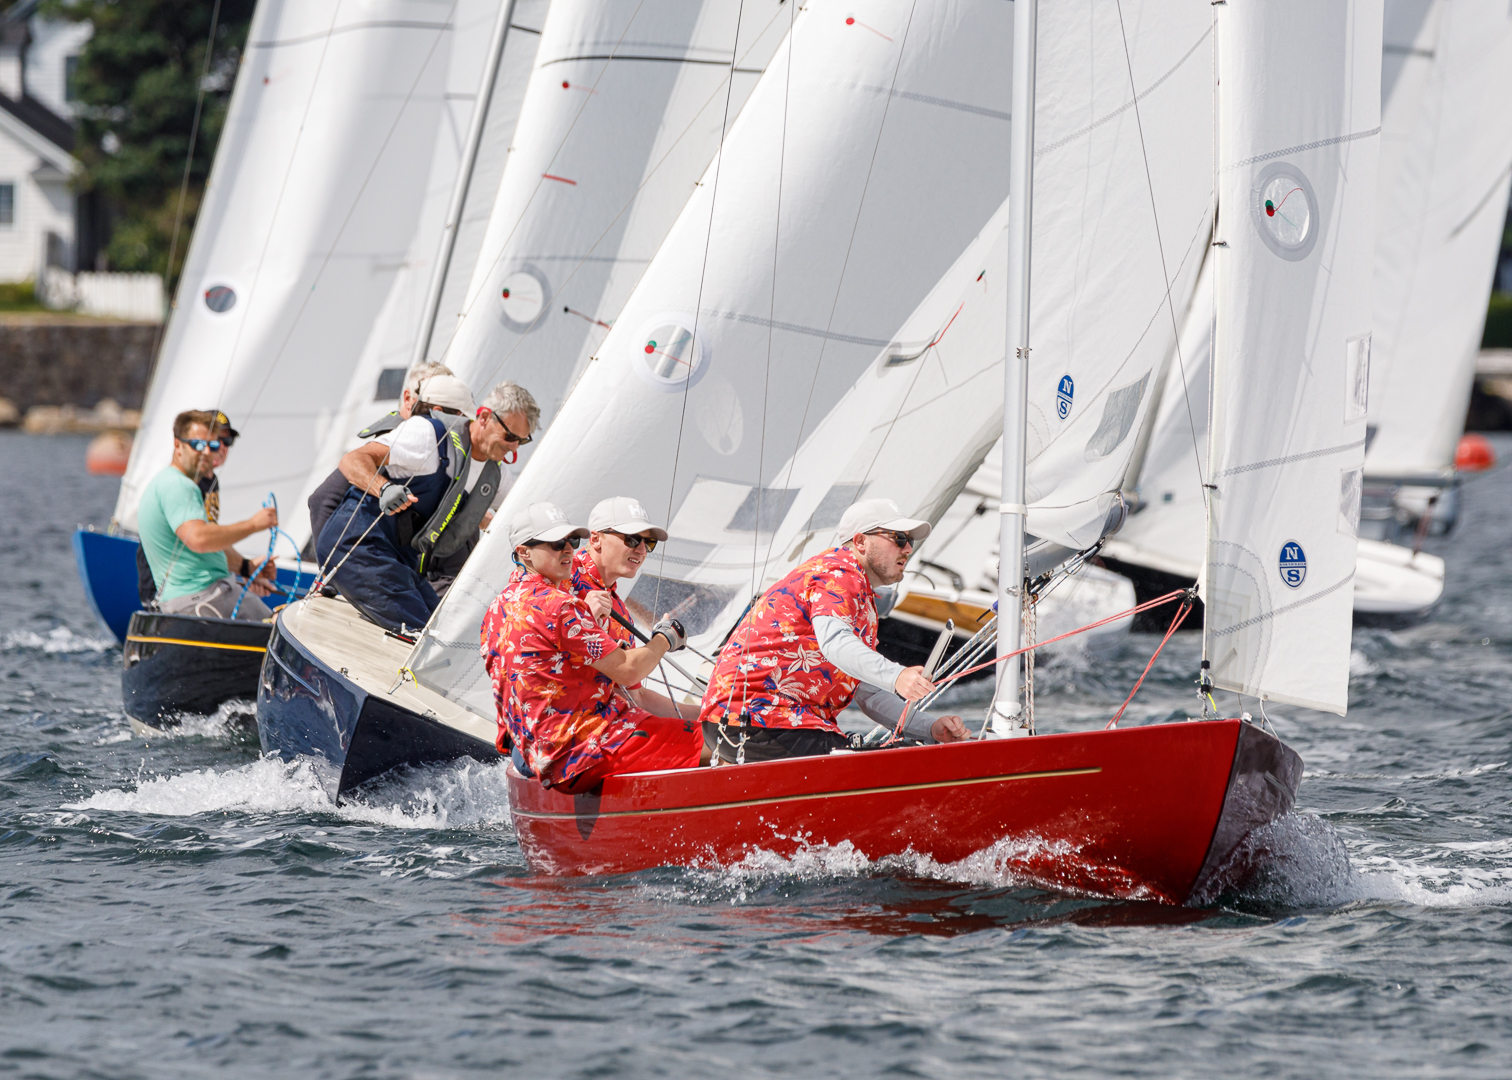
Sailing
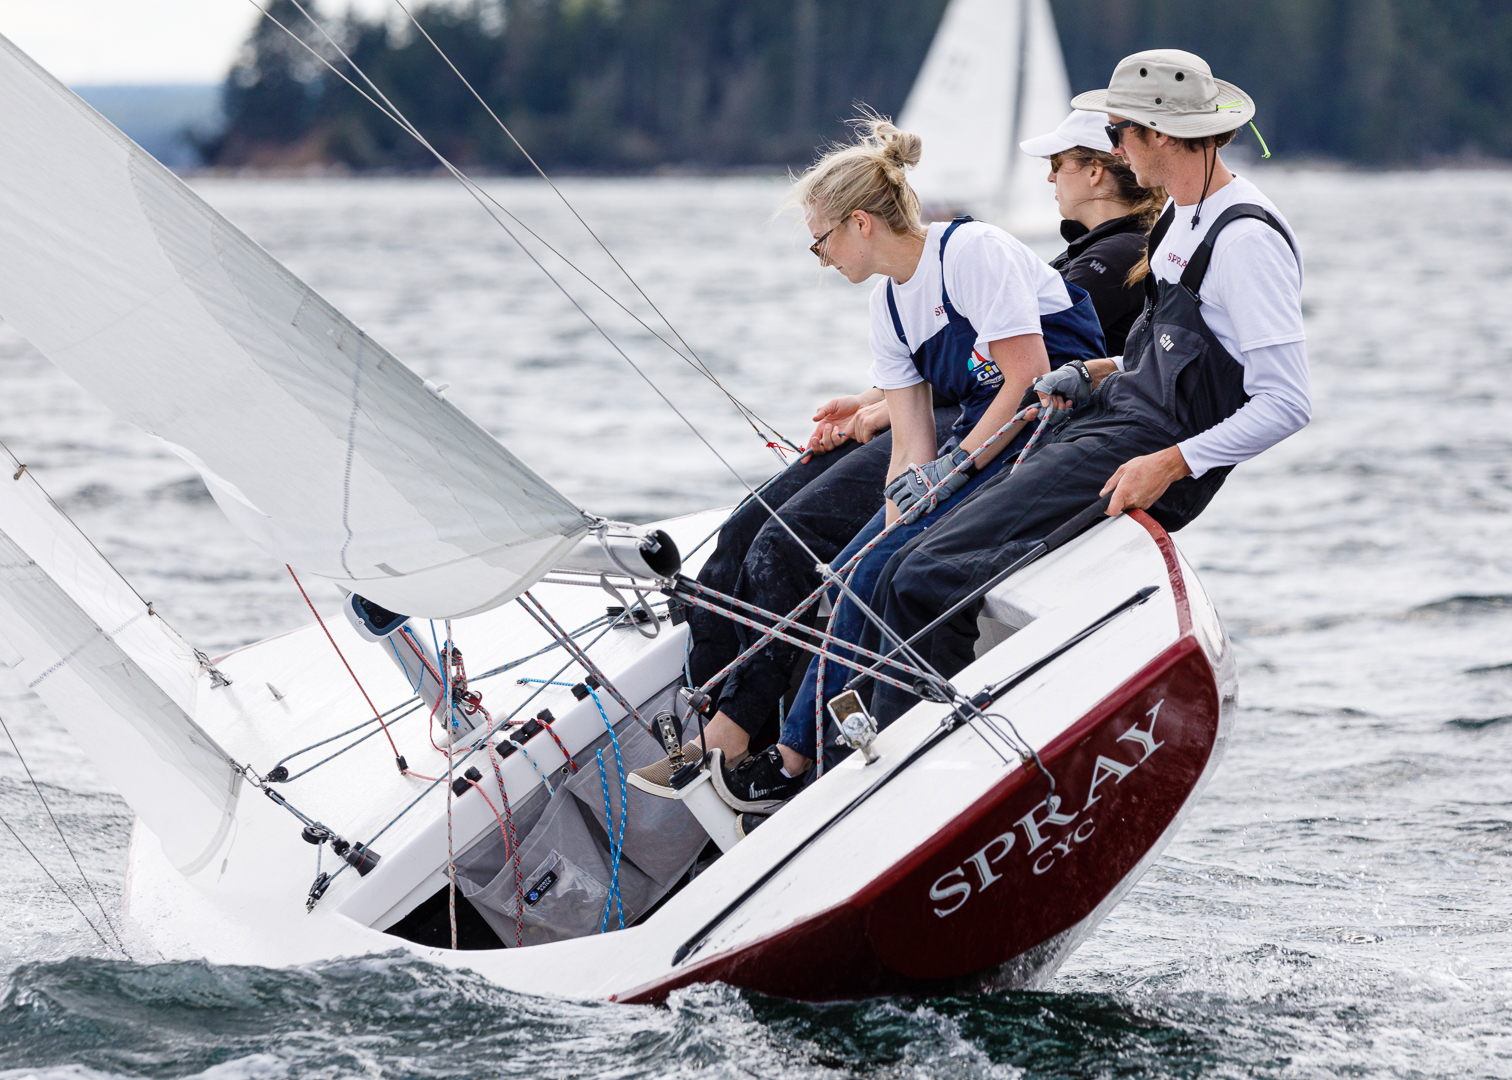
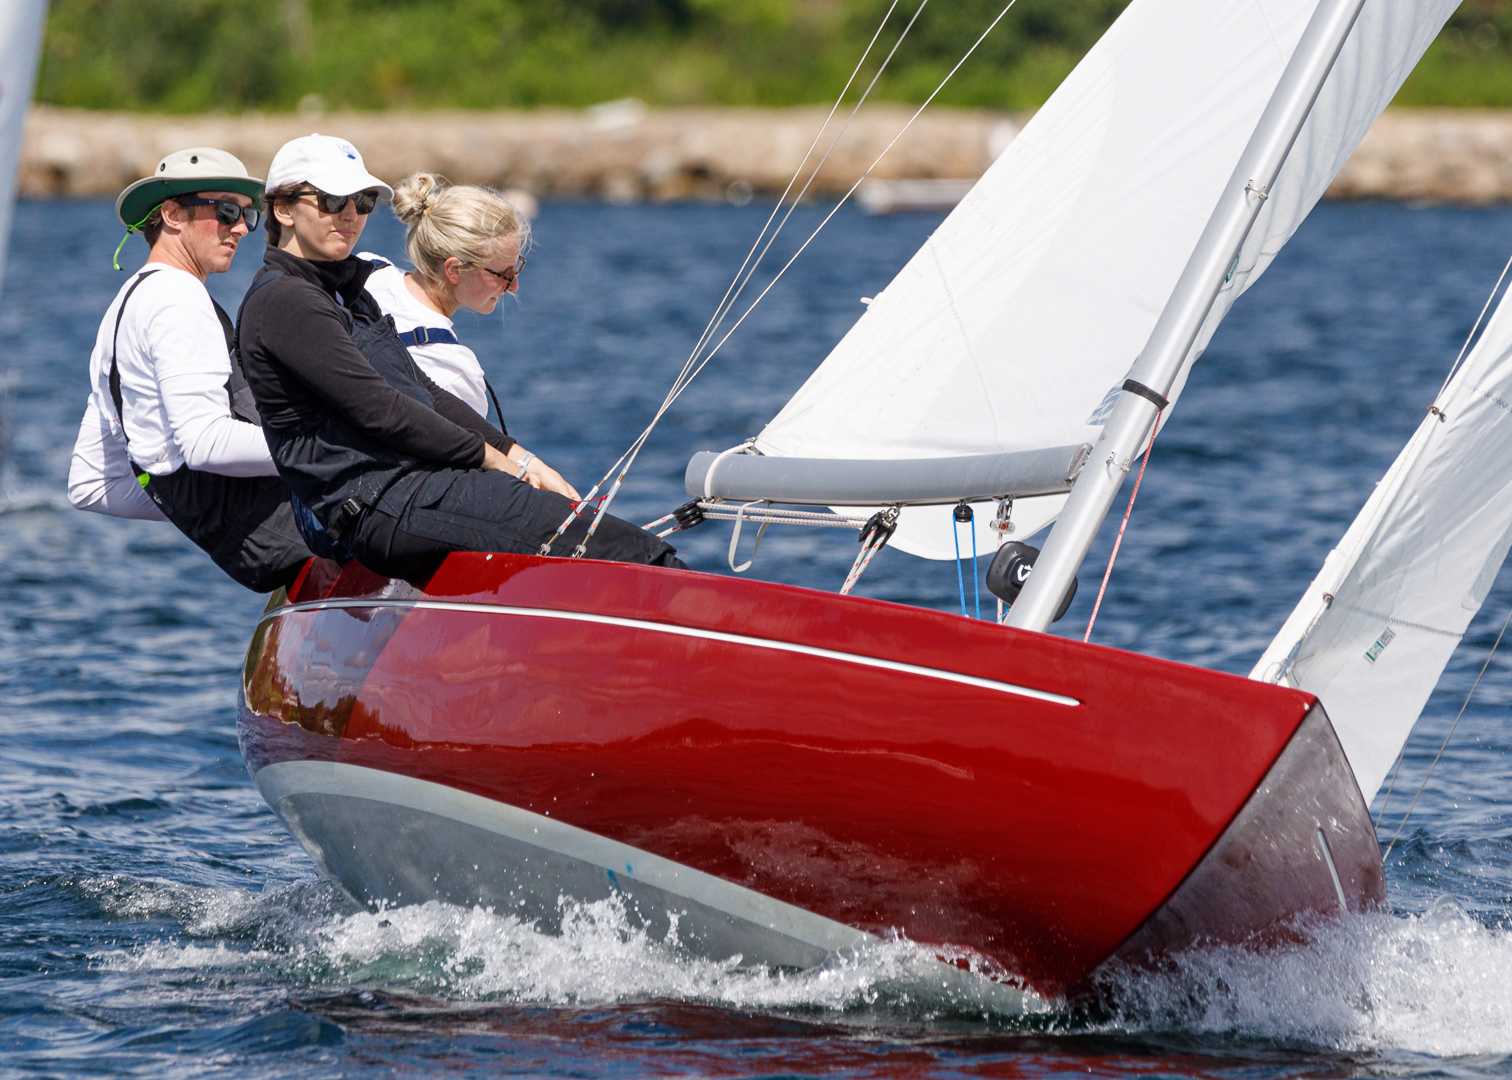
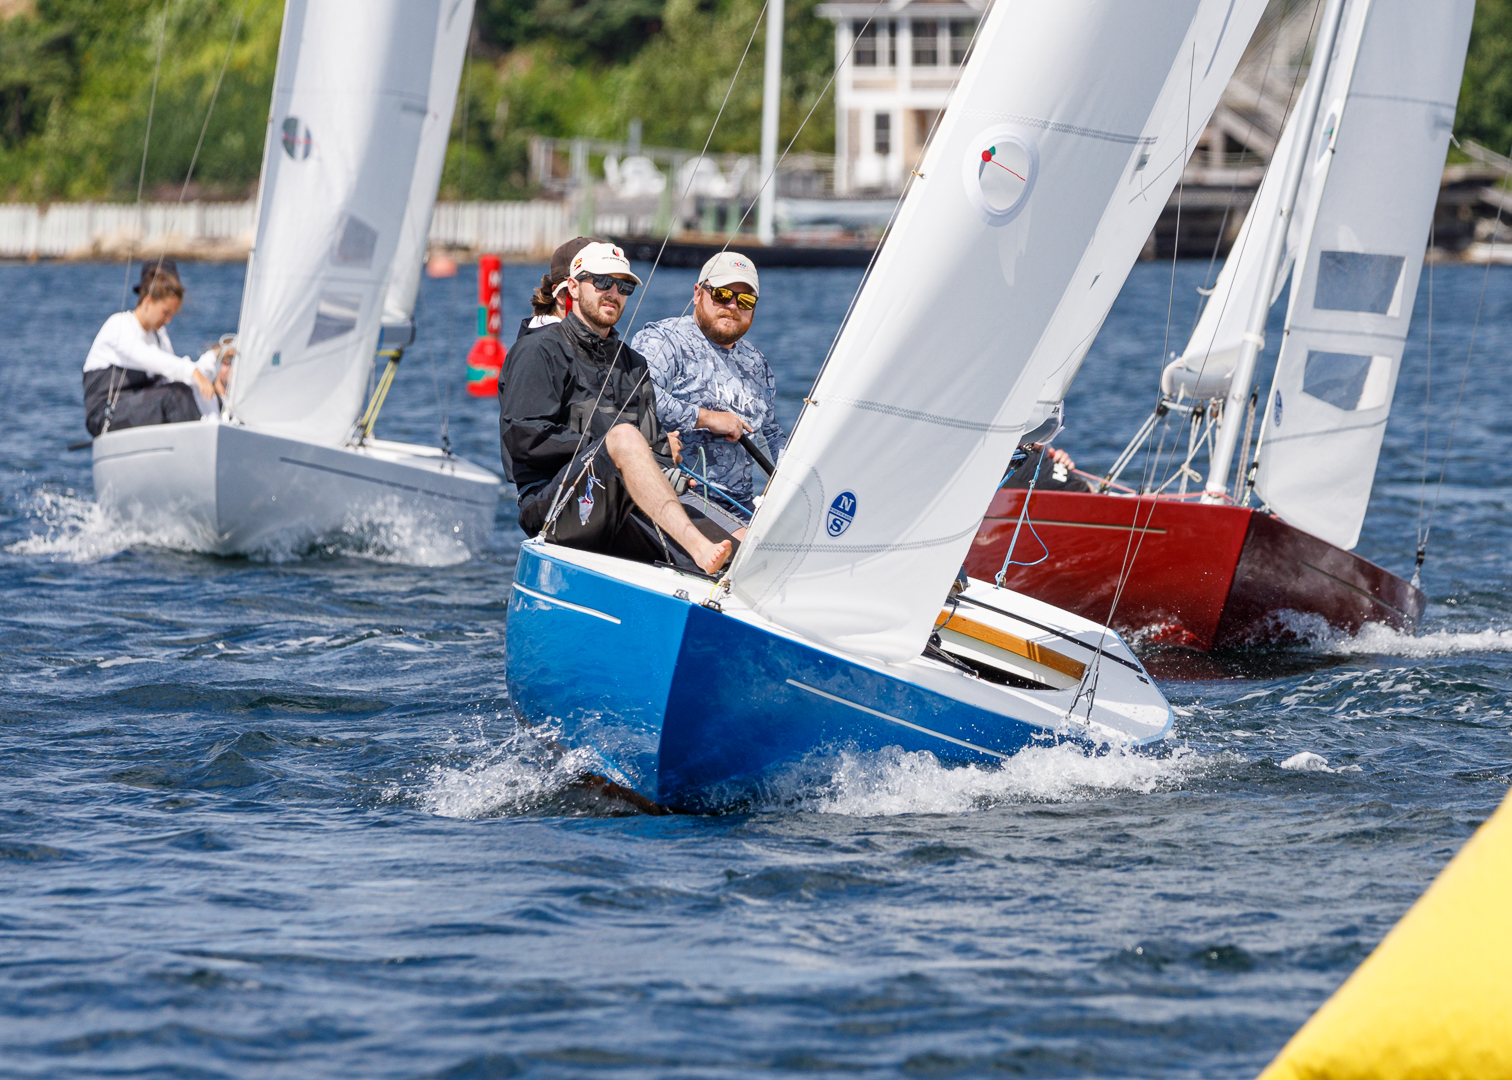
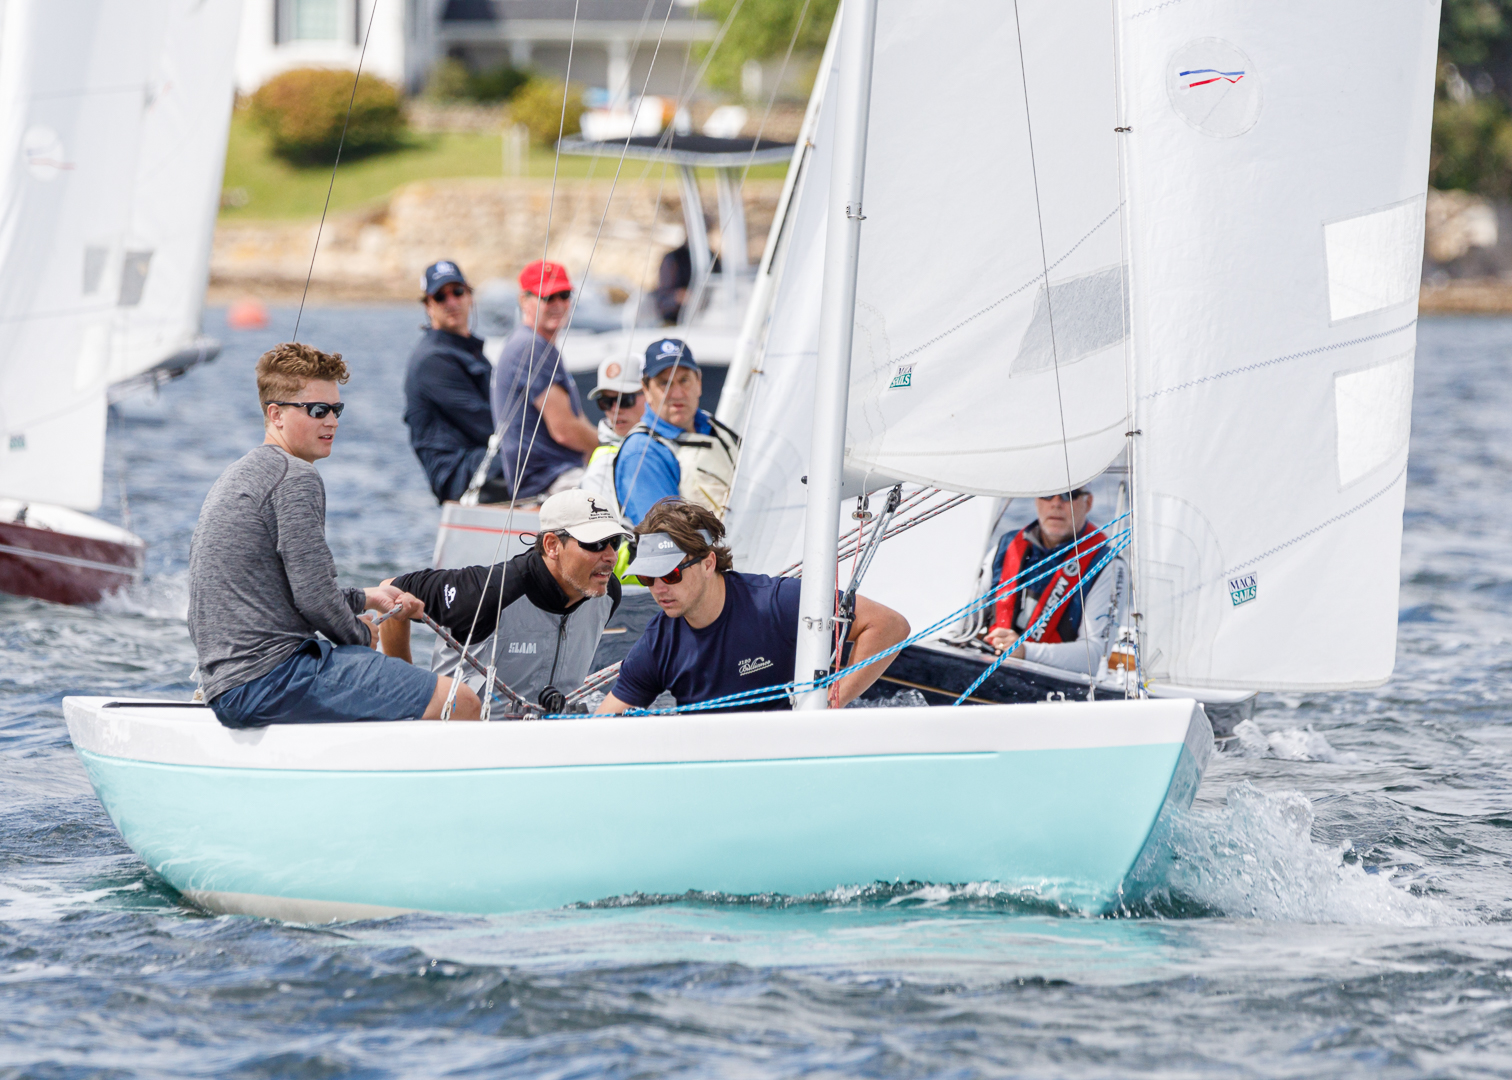
The key to photographing Sailing first and foremost is access. The best way to get an initial opportunity is to visit your local sailing club area and take some photos with a long focal length from land when they have their practices. Also practice yourself with action photography so you know how to control your camera and shoot sports in general. Once you are confident with your camera skills and have some photos to share, approach your local sailing club to see if you can get out on a power boat to get you in position at the start, turning points, and the finish line for one of their race events starting with their junior clubs and offer them photos to promote their events. If you are successful in capturing some great photos they will be interested in working with you for future events.
The Chester Yacht Club located in Chester, Nova Scotia hosts the yearly largest Regatta in Eastern Canada on the waters of Mahone Bay known as “Chester Race Week” Aug 14th through Aug 17th 2024. It’s a fantastic opportunity to get out and try some photography even from the shore line with a zoom lens you can get some images of the sailing boats going in/out of the harbour. If you want to see the races first hand, book a 1 hour Salty Sea Dog tour to get out on the water for an impressive in-person experience to see the boats racing up close. If you have media credentials you can also book a spot on the Media boat through the Media Officer, see Chester Race Week Schedule General Information under Race Week Committee. The examples shown here are from the Bluenose Fleet.


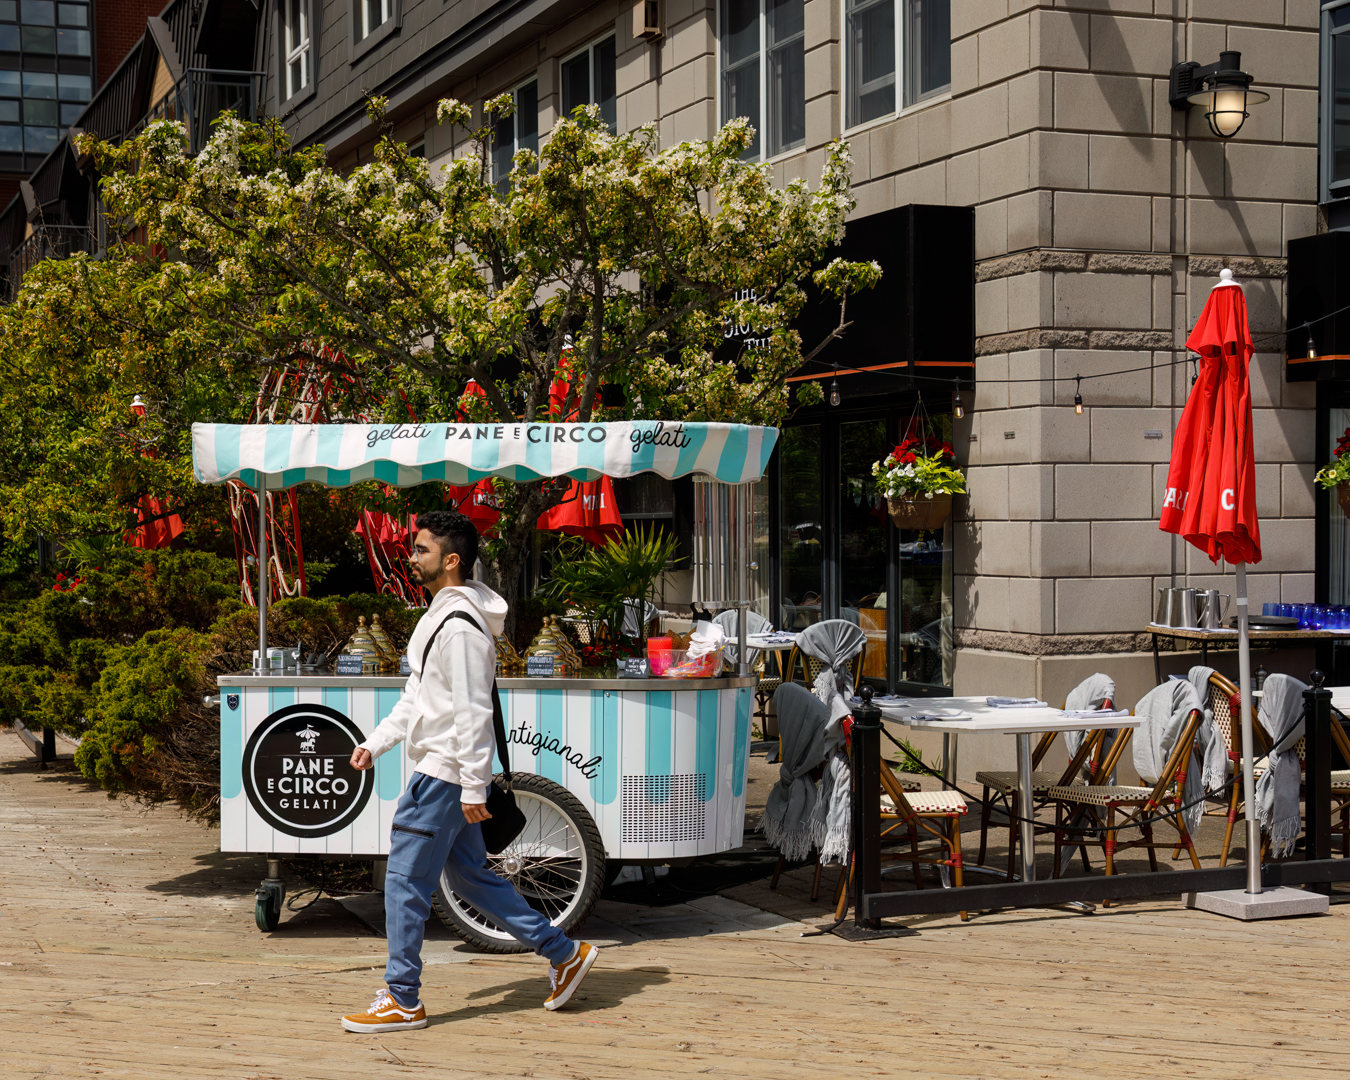
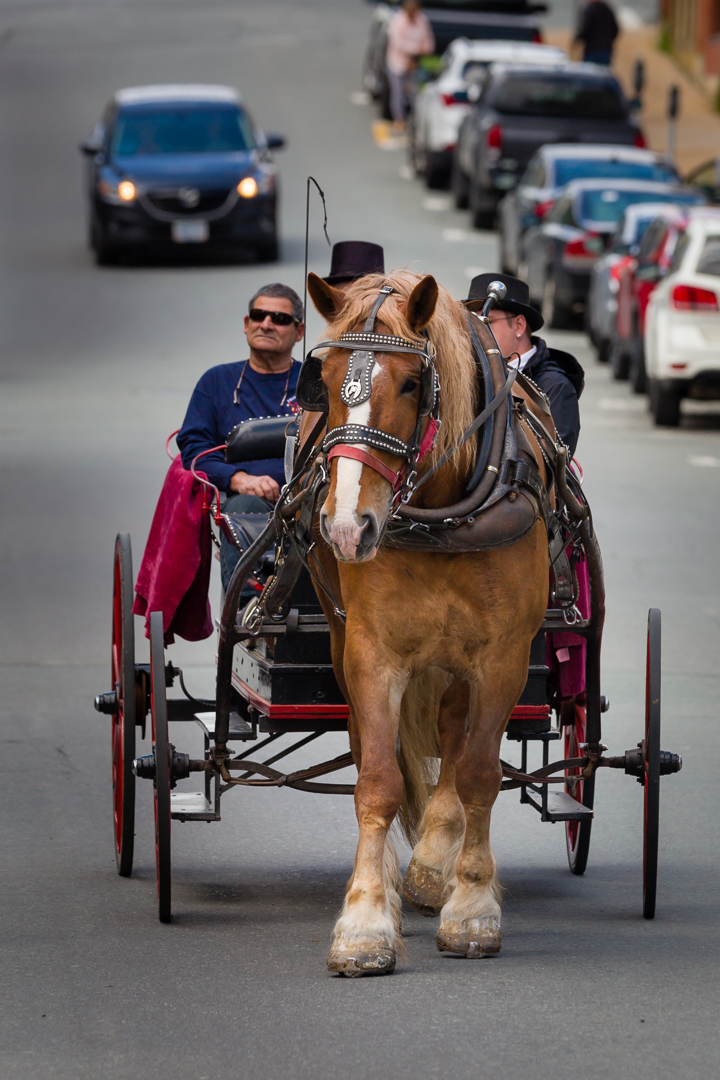
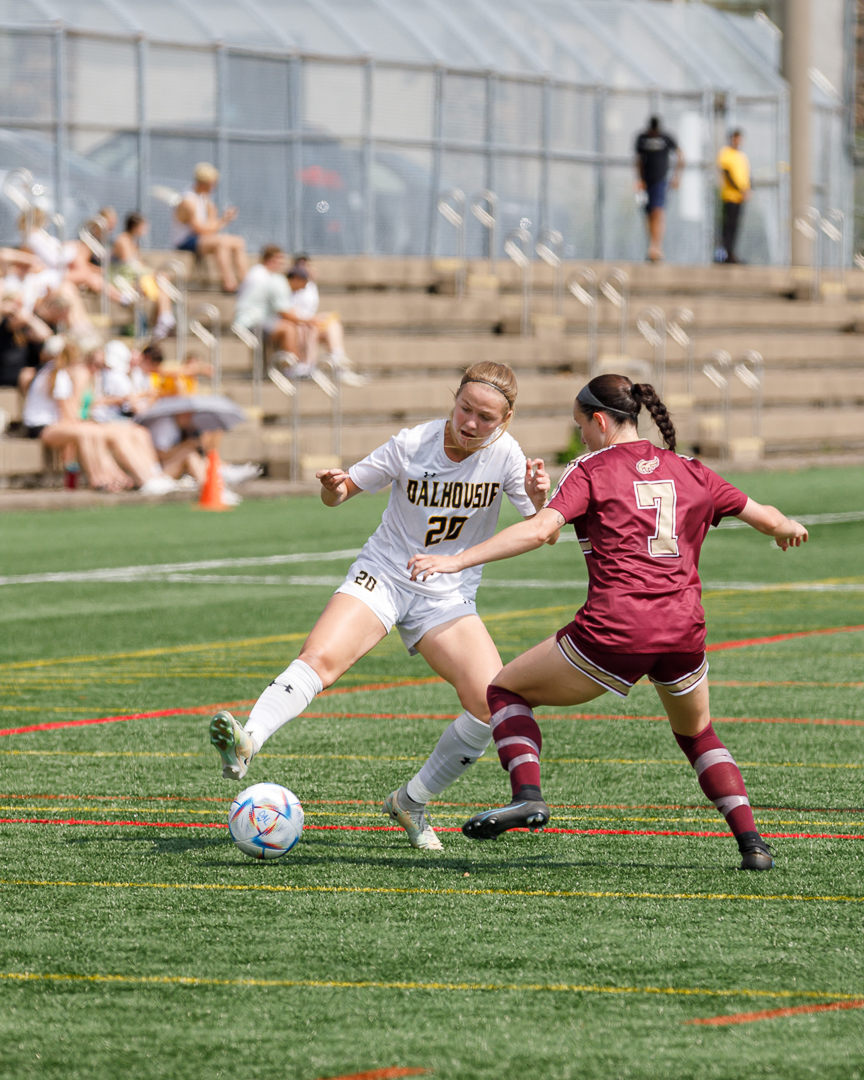
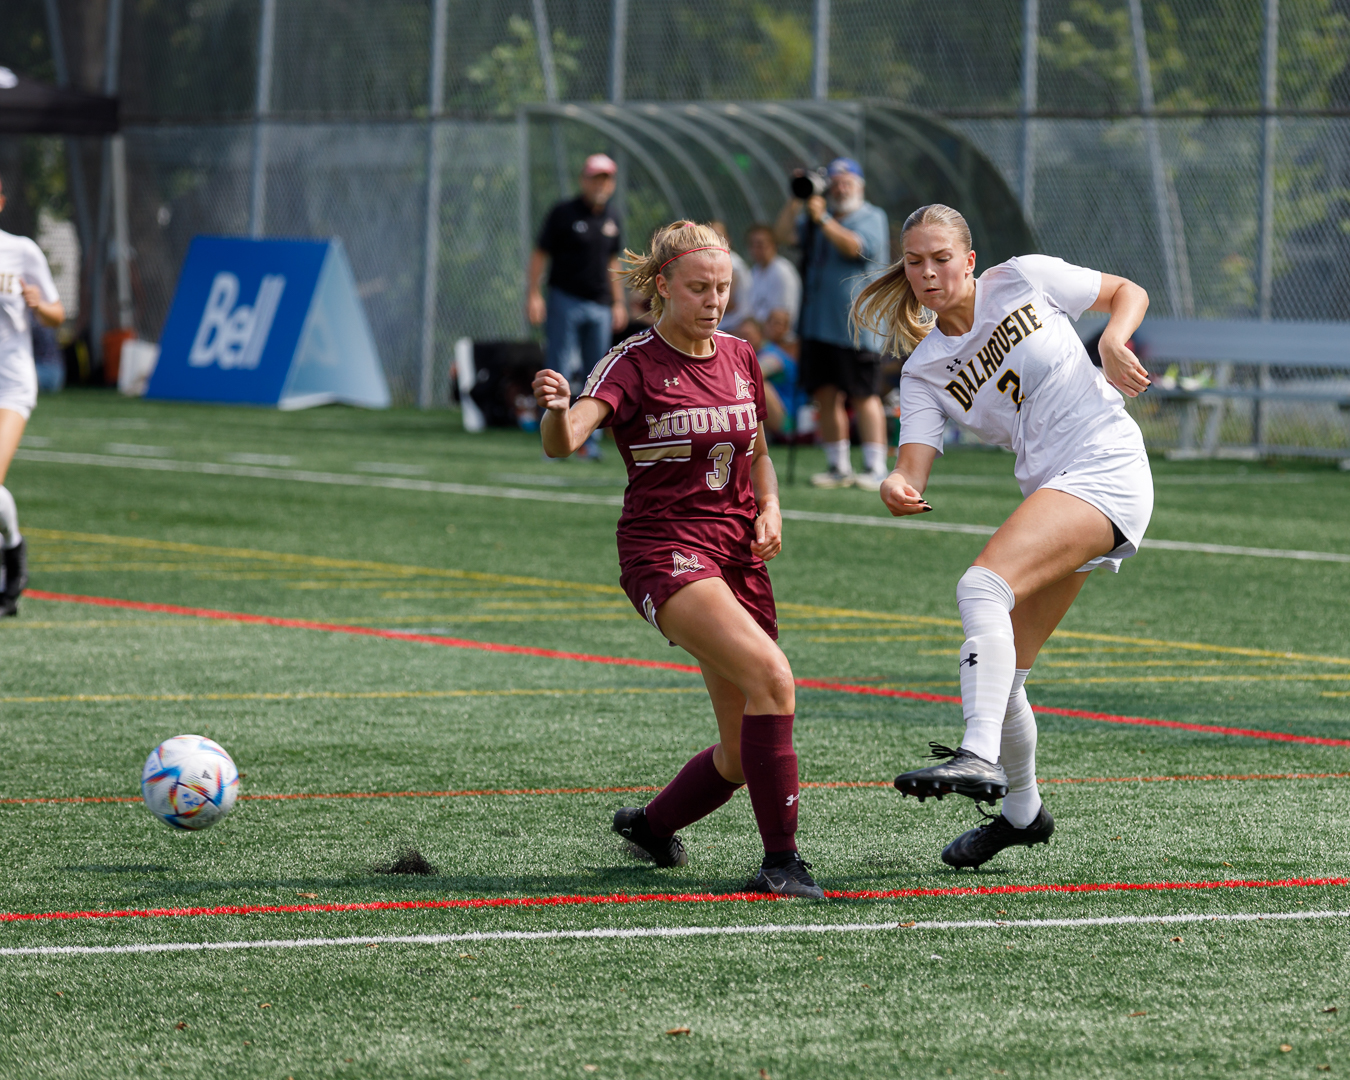
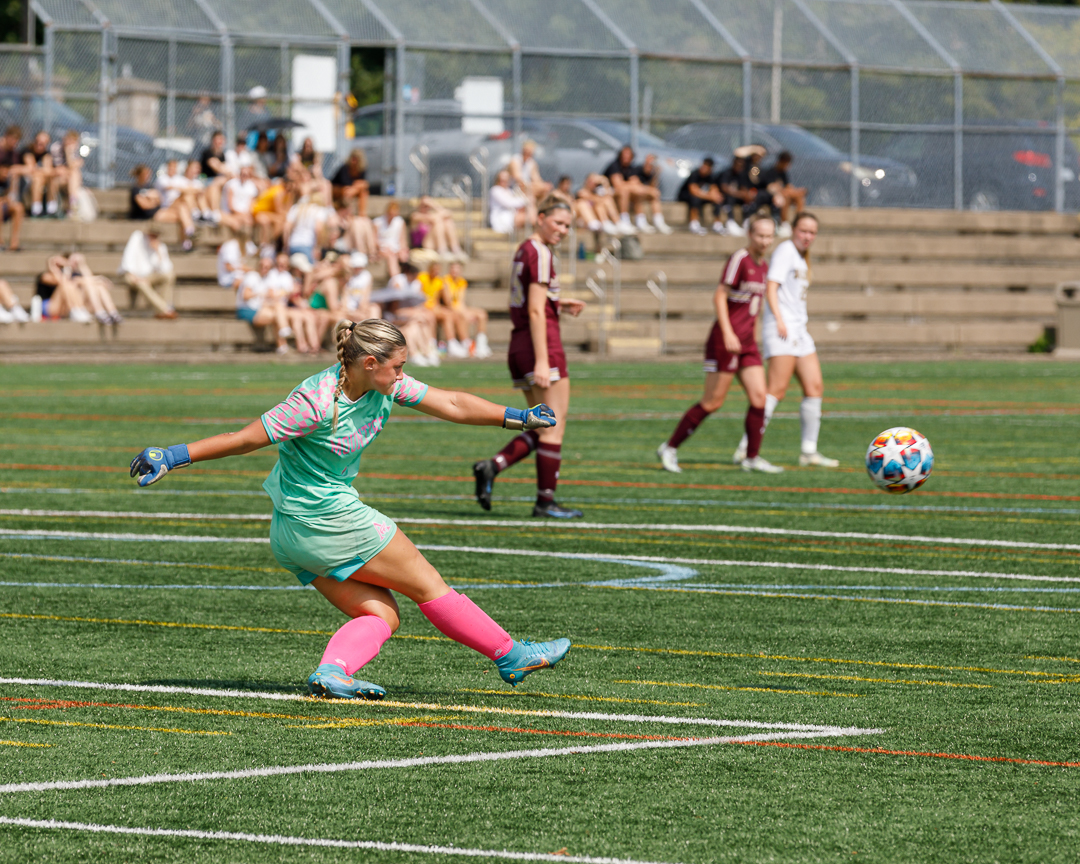
Soccer
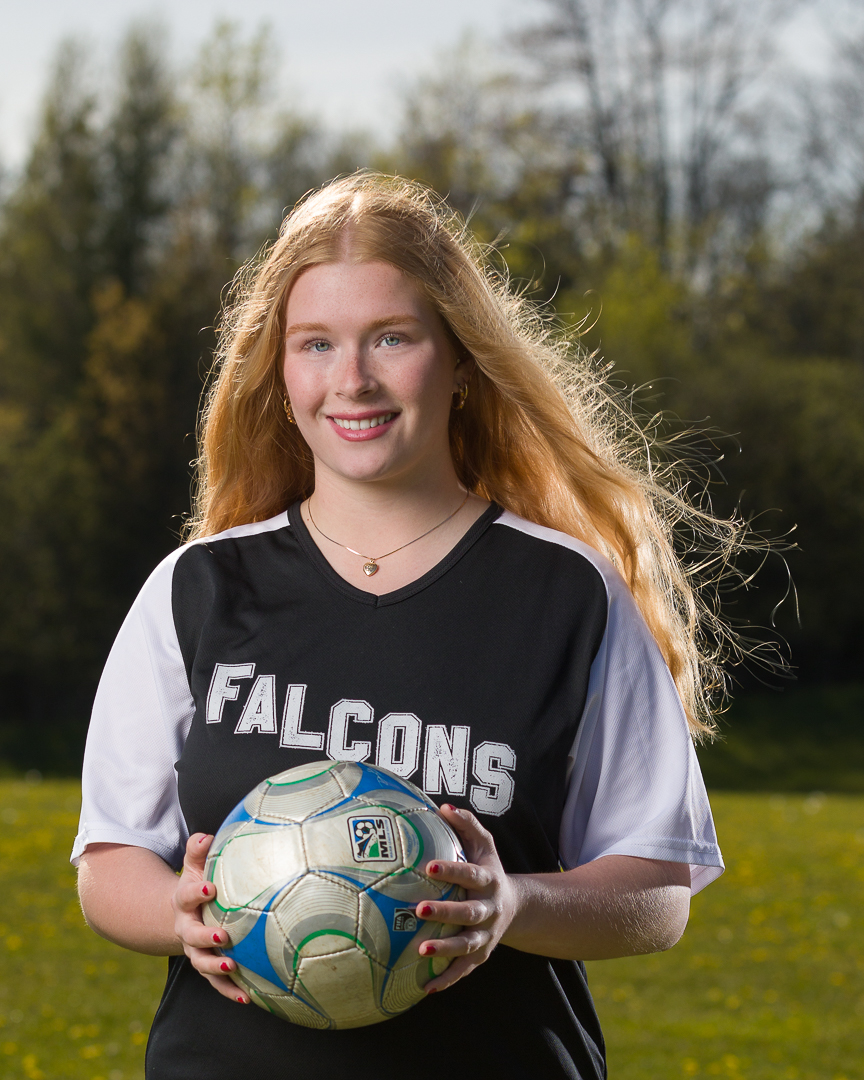
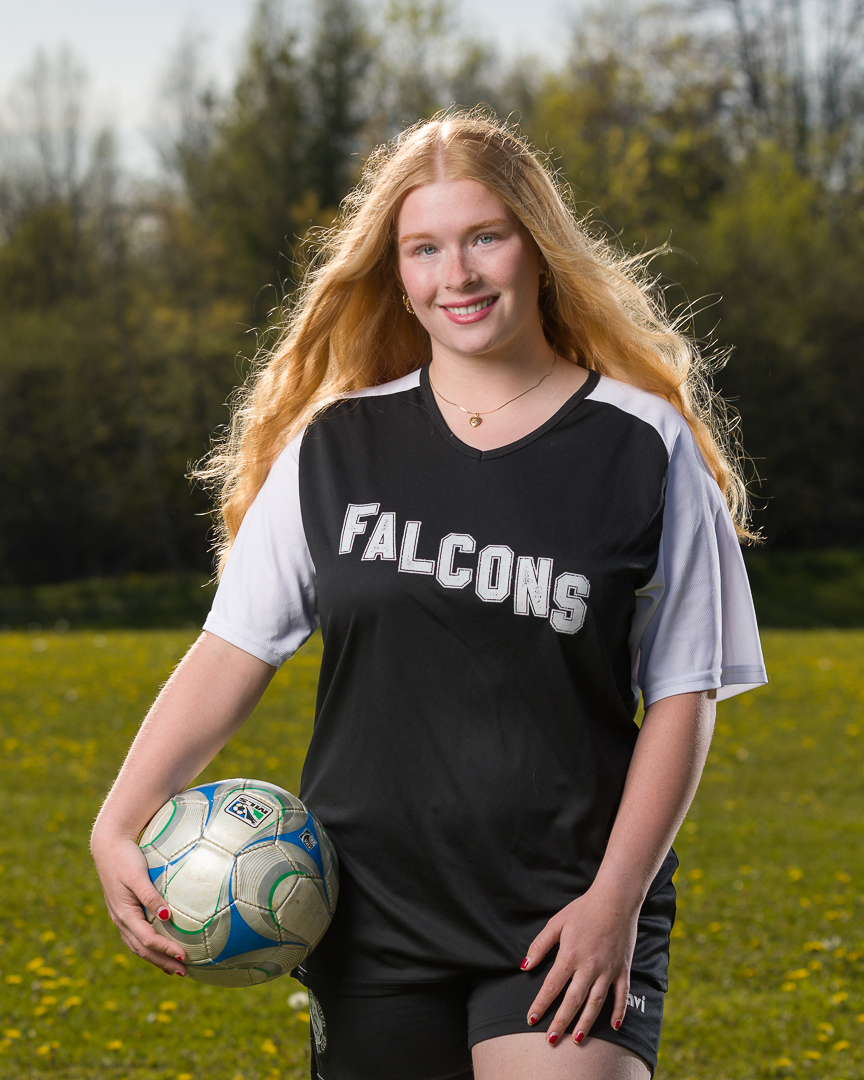
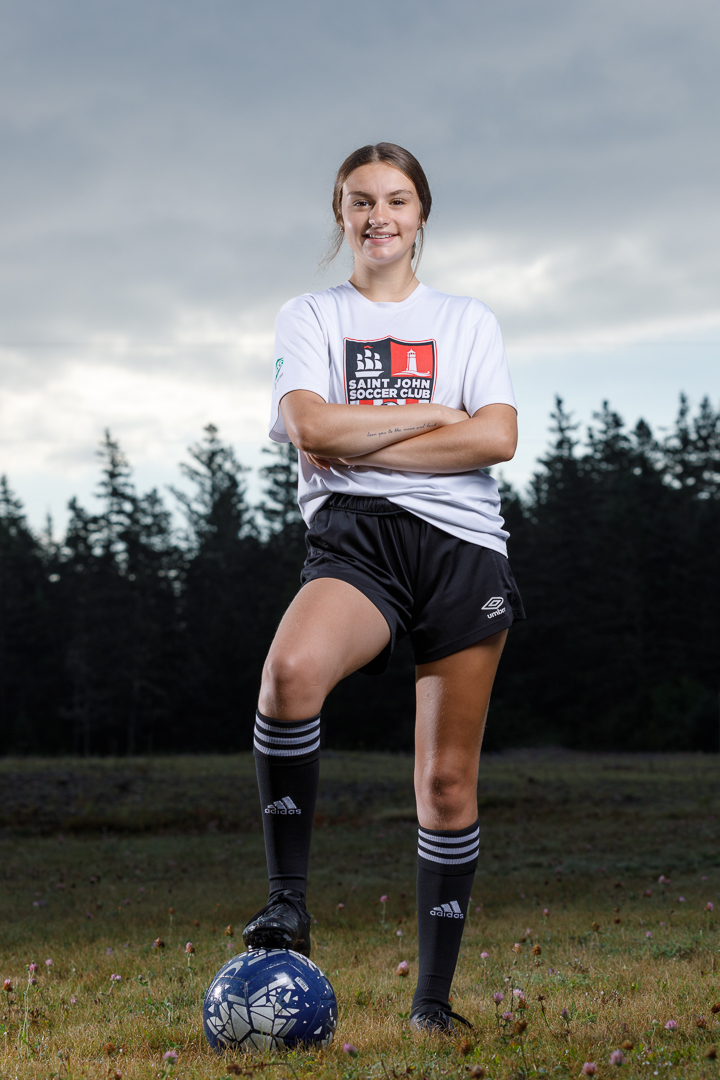
Getting out to see and photograph a soccer game is a lot of fun. Taking a few images before the game such as the first image showing the athlete warming up and concentrating getting ready for the game. During the game position is the most important, so pick your spot for the best compositions, making sure you are allowed to be in the area you want to photograph ensuring there is no chance of interfering with the play. Stay attentive, and never turn your back to the play. Having the crowd out of focus in the background is a great idea but you may not be allowed on the side of field to get the crowd in your frame. Taking photographs capturing a decisive moment makes for the most impactful images. Another option is to take an Environmental Portrait of a soccer athlete as well, these are great for graduating students as a treasured memory. Some tips for taking a portrait; wait for the right time of day to position the sun light behind the subject, consider as clean a background as possible, use strobe lights (flash) as fill light for your subject, and consider your perspective to help make the athlete look as awesome as possible. You can also use some of your portrait images to create composites with digital Amped-Effects backgrounds from Ashedesign such as the; Under The Lights Soccer Poster Template or Mystic Swirl Soccer Poster Template


Kite Surfing
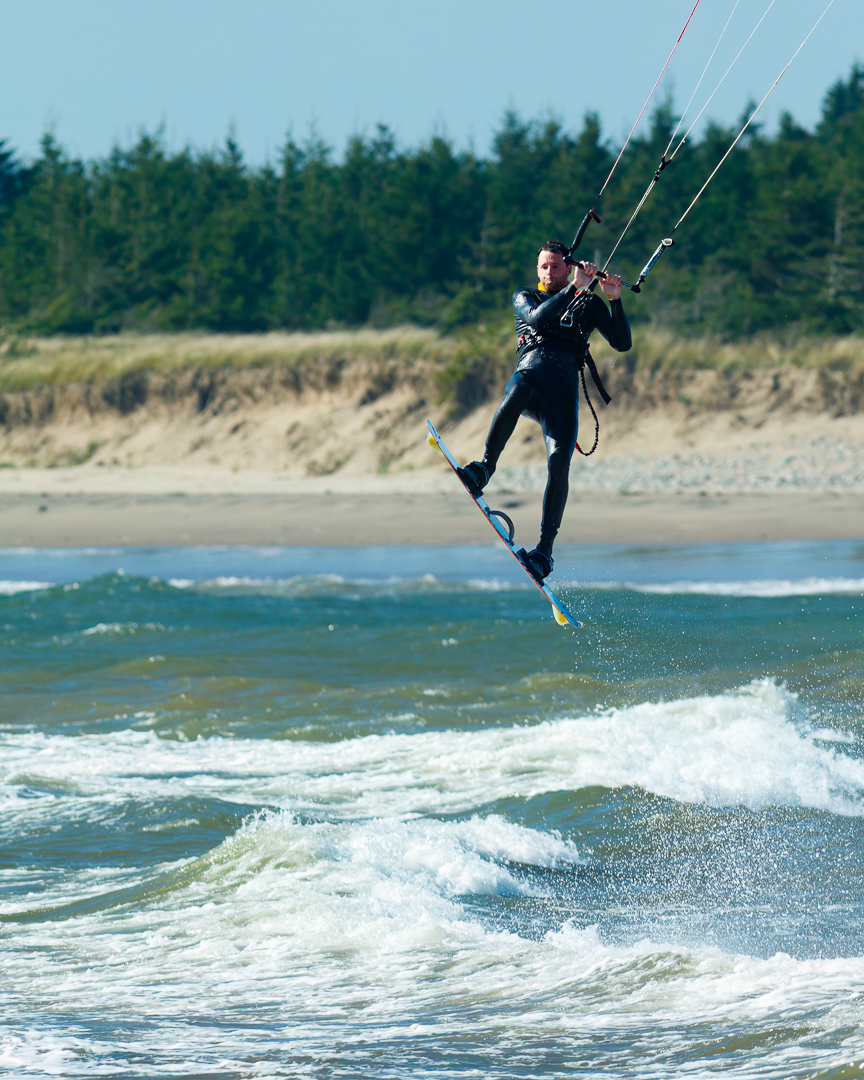
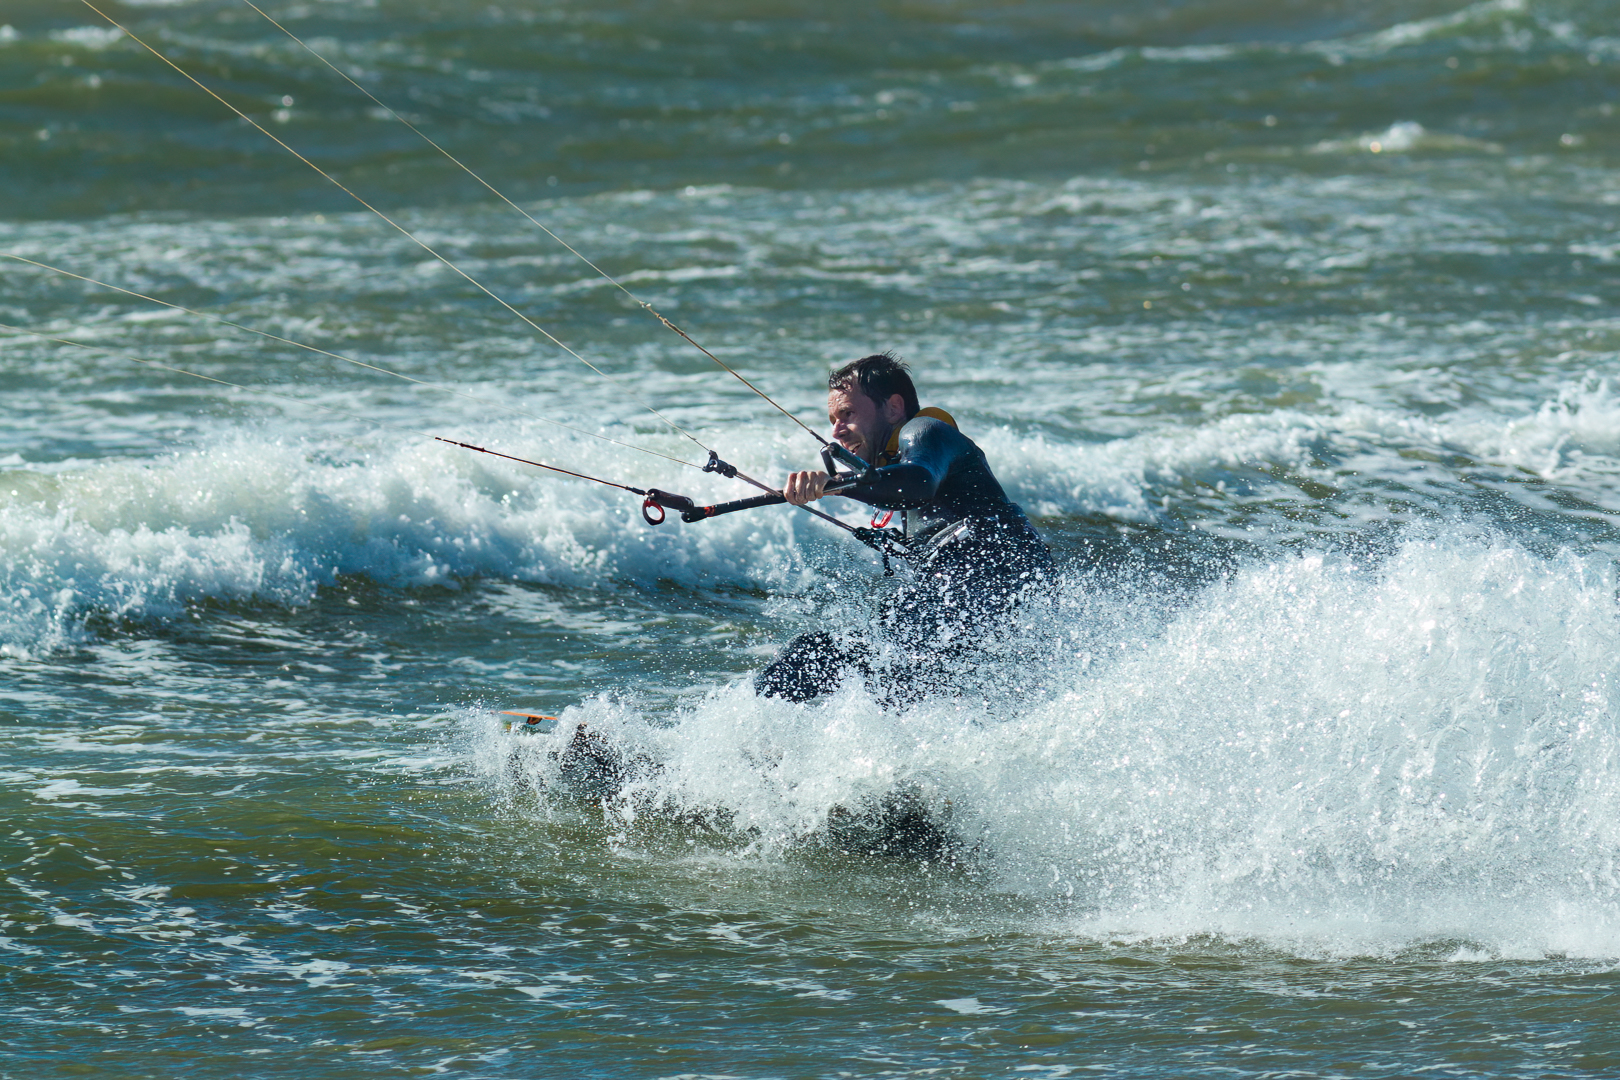
It was exciting to photograph some kite surfing at a beach with a good surf on a windy day. Using a cannon f/5.6 400mm lens on a crop sensor body (Canon 50D) provided an effective focal length of 640mm getting me closer to the subject(s). The first image of a kite surfer was taken, f/7.1, 1/1250, ISO 250, @400mm, at Stoney Beach near Lawrencetown Beach Provincial Park, Nova Scotia. A word of caution about Stoney beach, it is an unsupervised beach and is known for having severe tidal currents that can be extremely dangerous and NOT safe for swimming. The challenge was the bright side lighting causing the subject to be in dark shadow which was overcome with the use of post-processing (Lightroom classic) by selecting the subject plus a combination of exposure and lifting the shadows made the subject more visible in the photographs. Some post processing tips adjusting; contrast, highlights negative, the white and black points was the key to balancing the overall exposure, look and feel of the images. Want to learn more about the sport, check out the current issue of Kitesurfing Magazine.


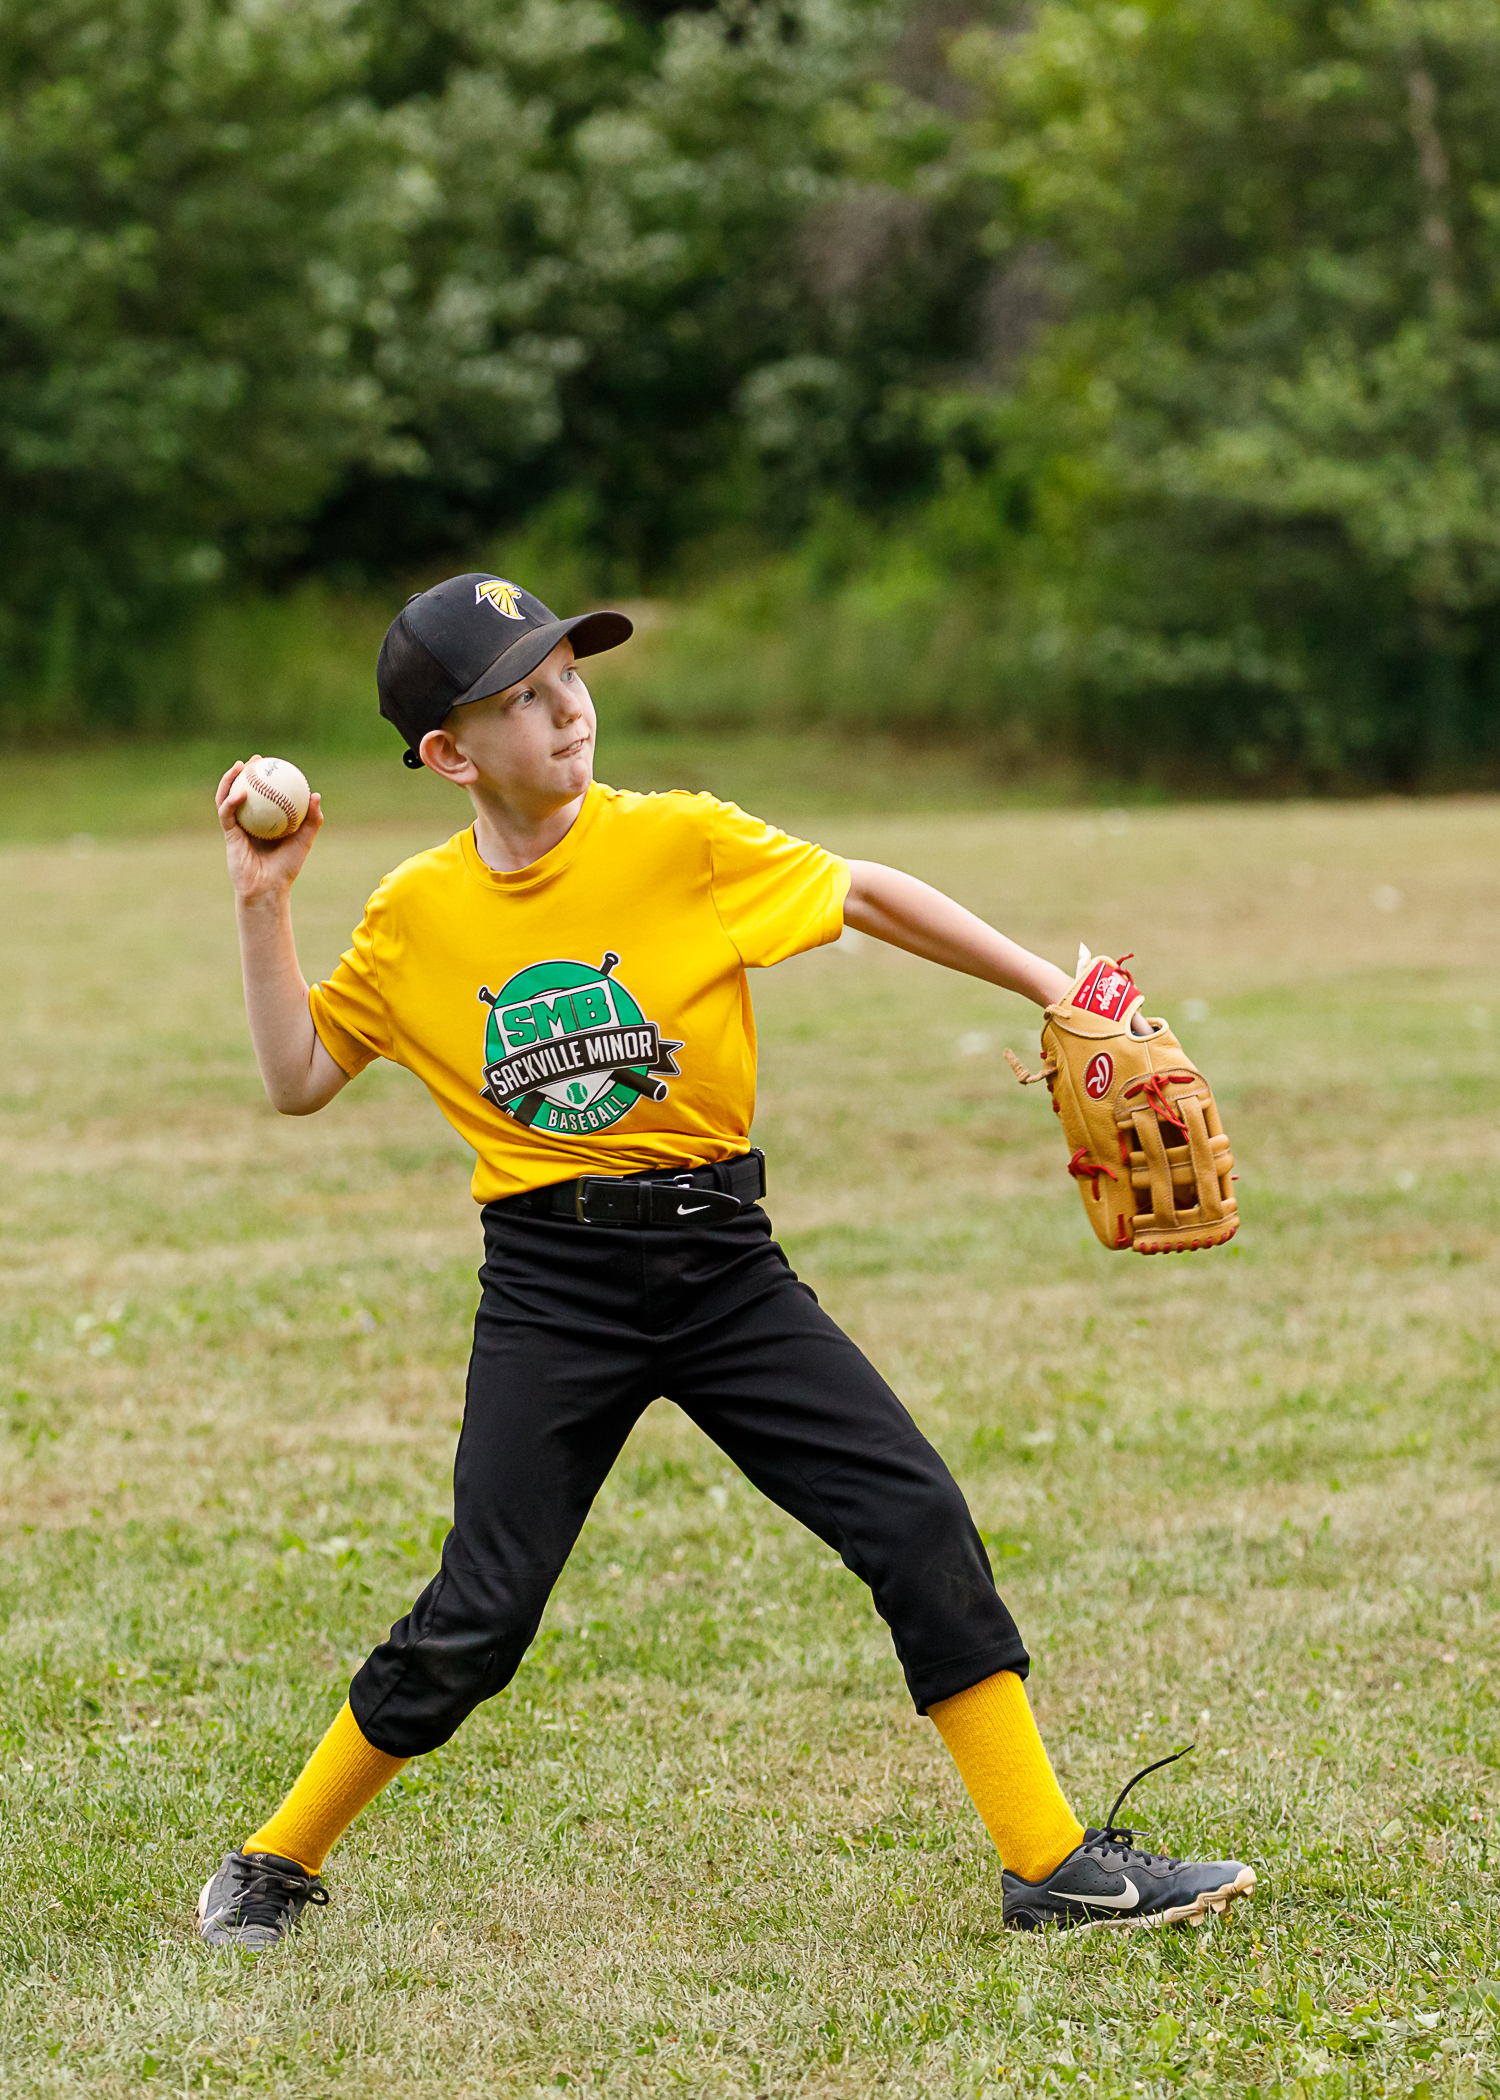
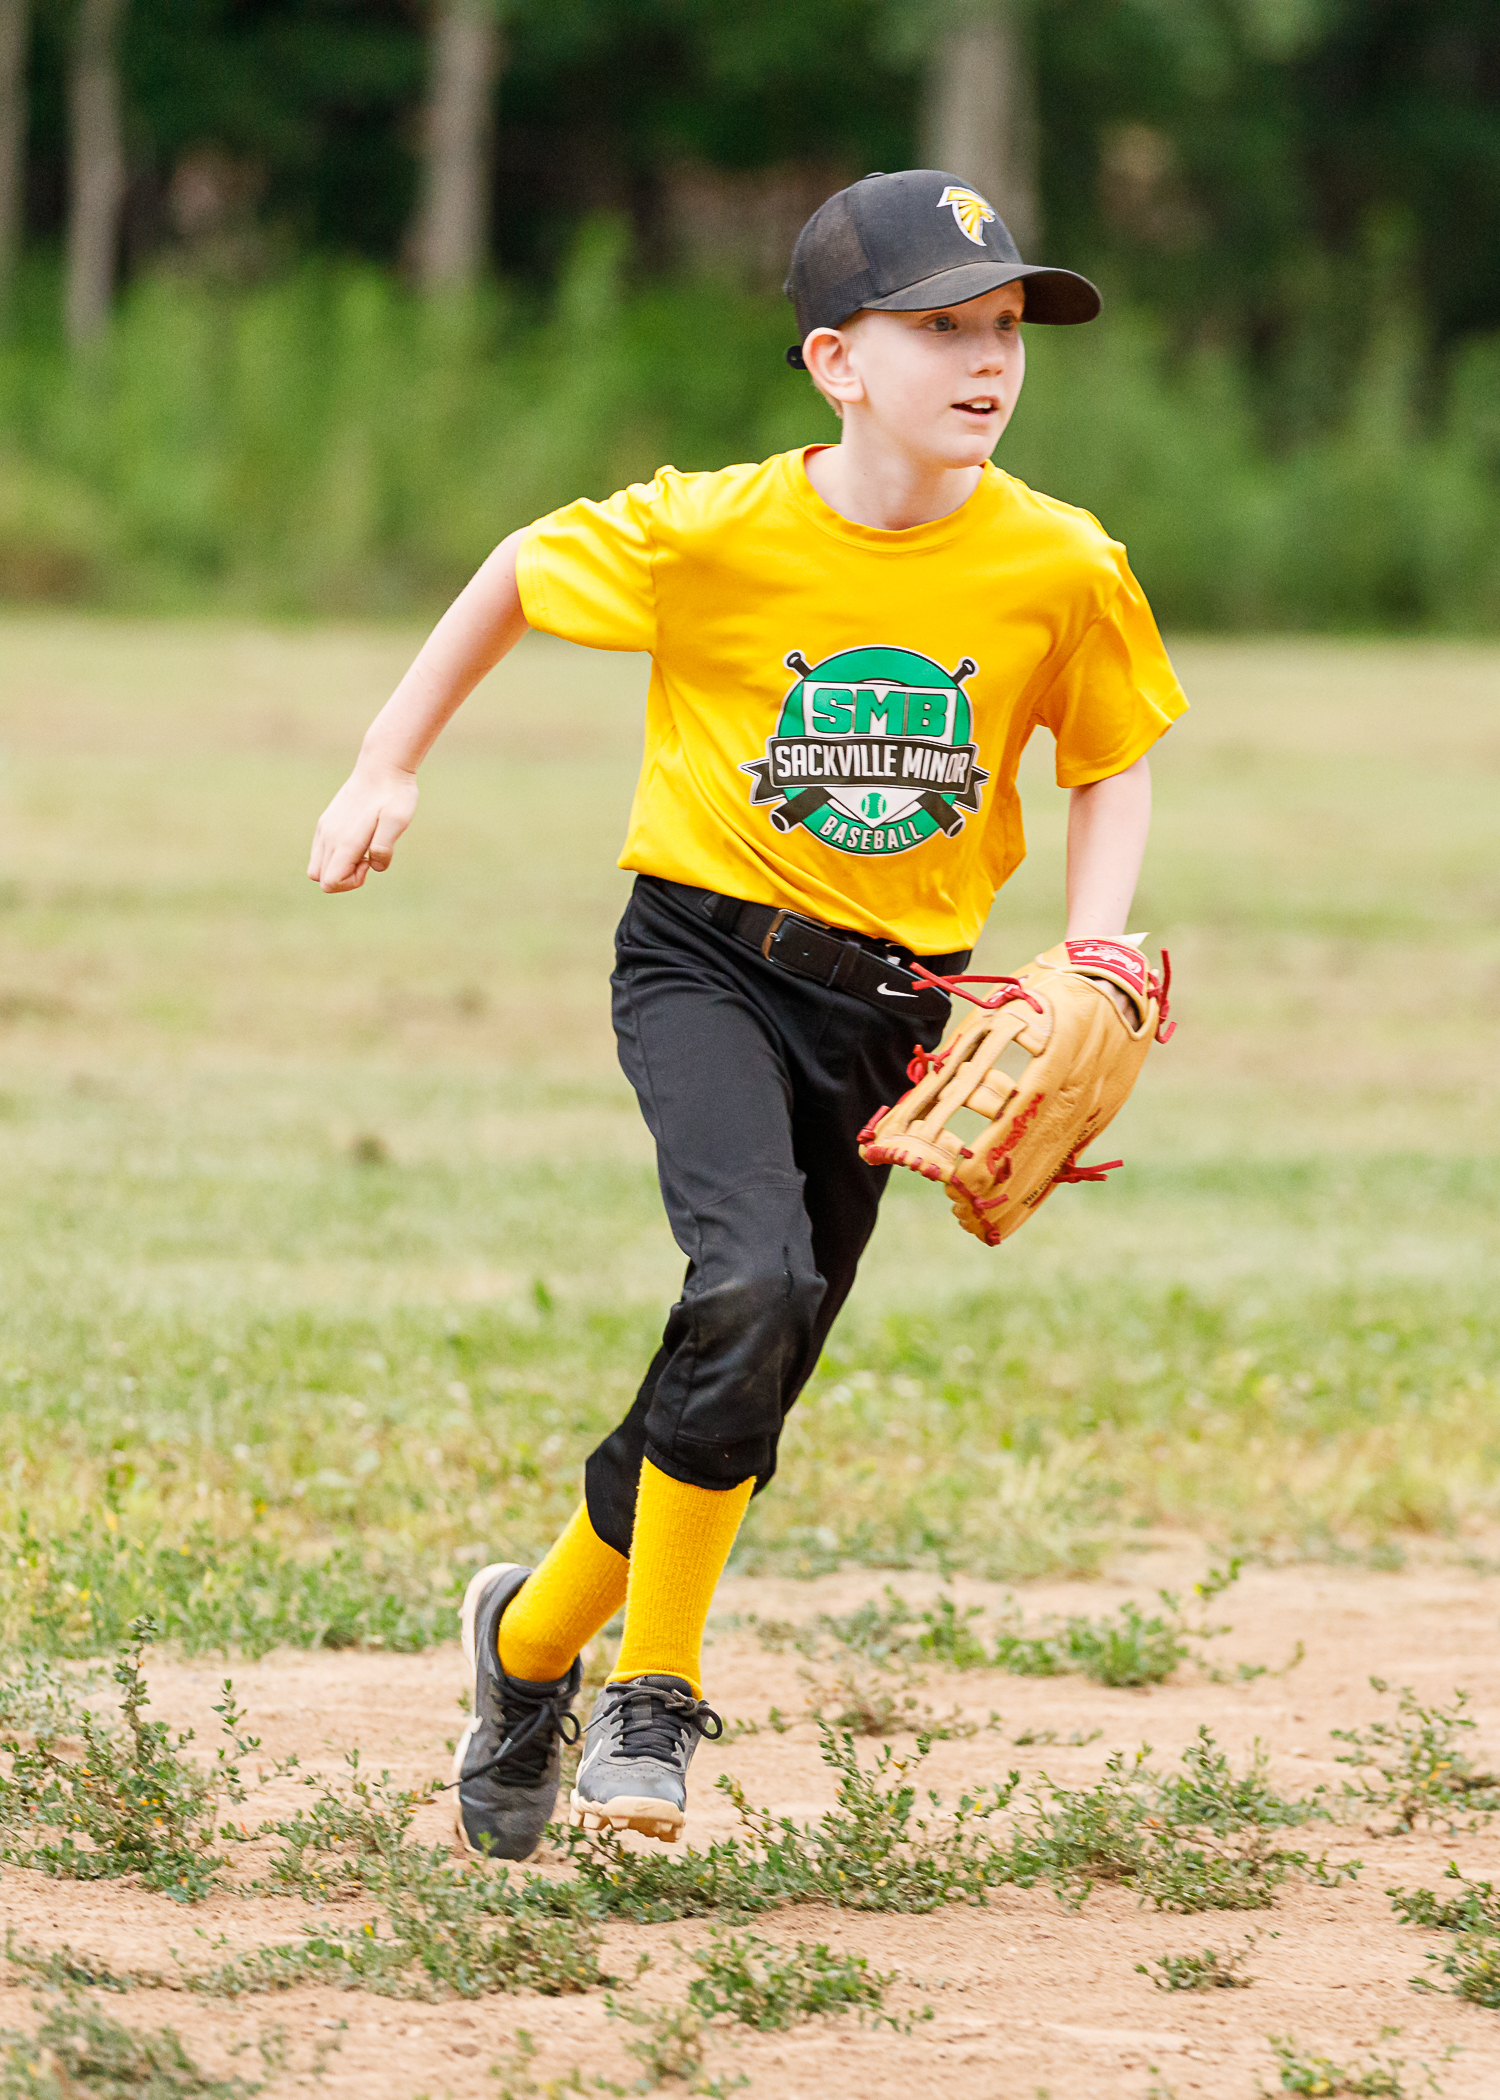
Baseball
Anticipation is the key, this is one sport where knowing what is going to happen next is important. Always keep your eye on the ball because that’s where the play is going to happen. Position yourself in an area away from potential play where you will get the best opportunity to capture the action with the best clean background as possible. Ensure you have already introduced yourself to the organizations/parents and have permission to photograph the players.


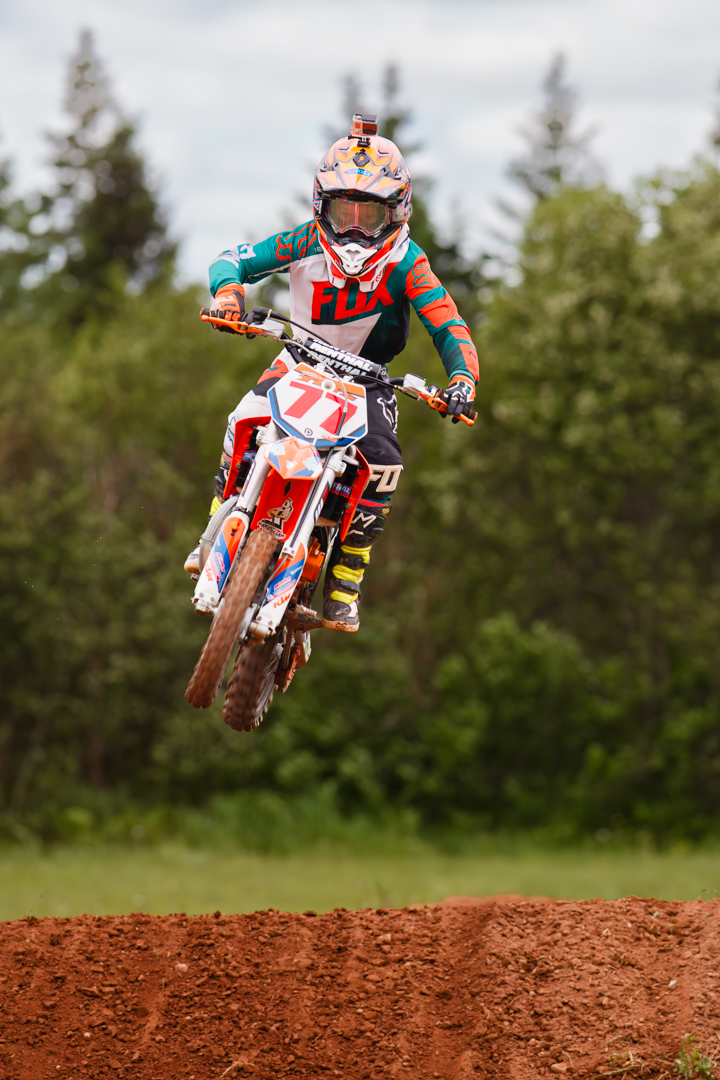
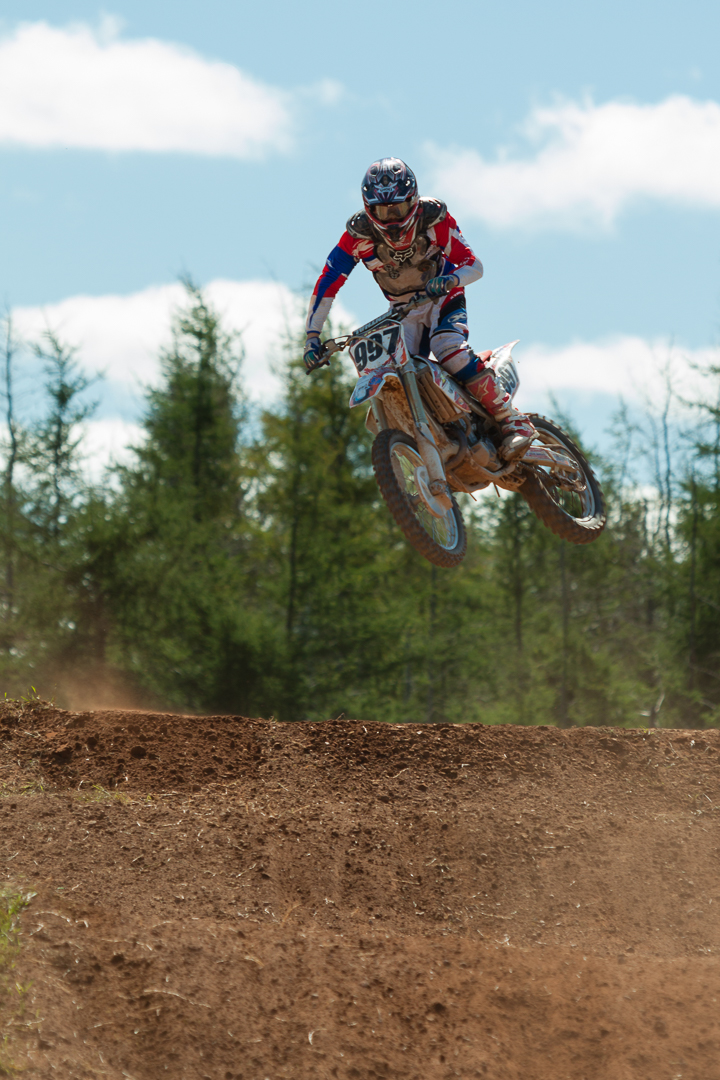
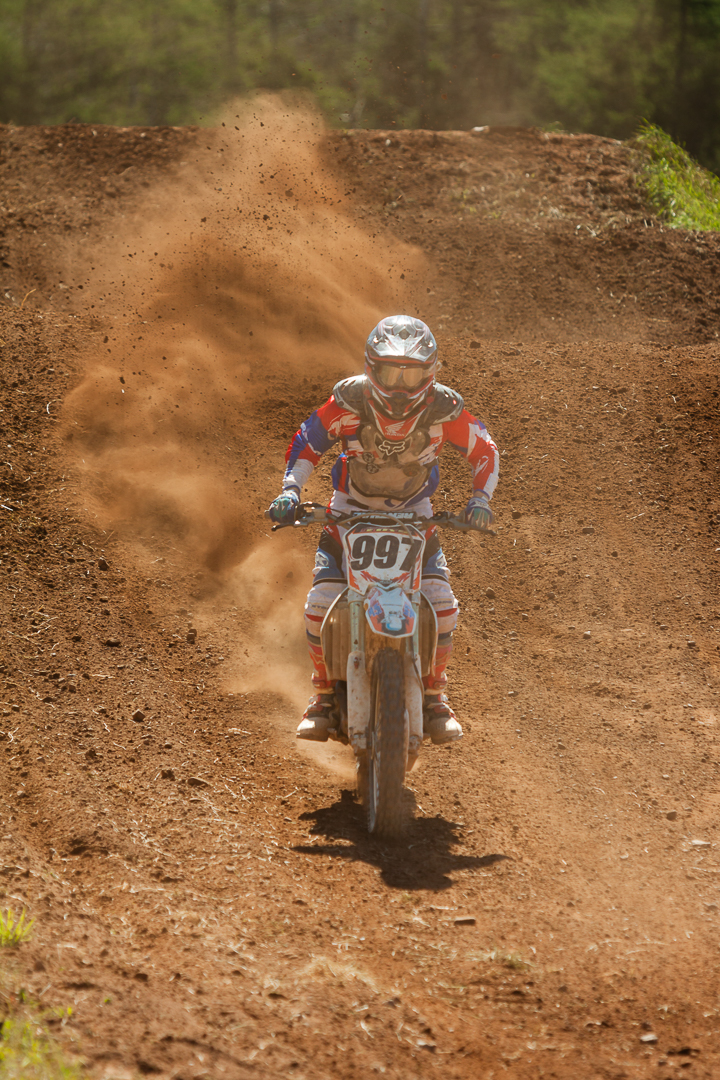
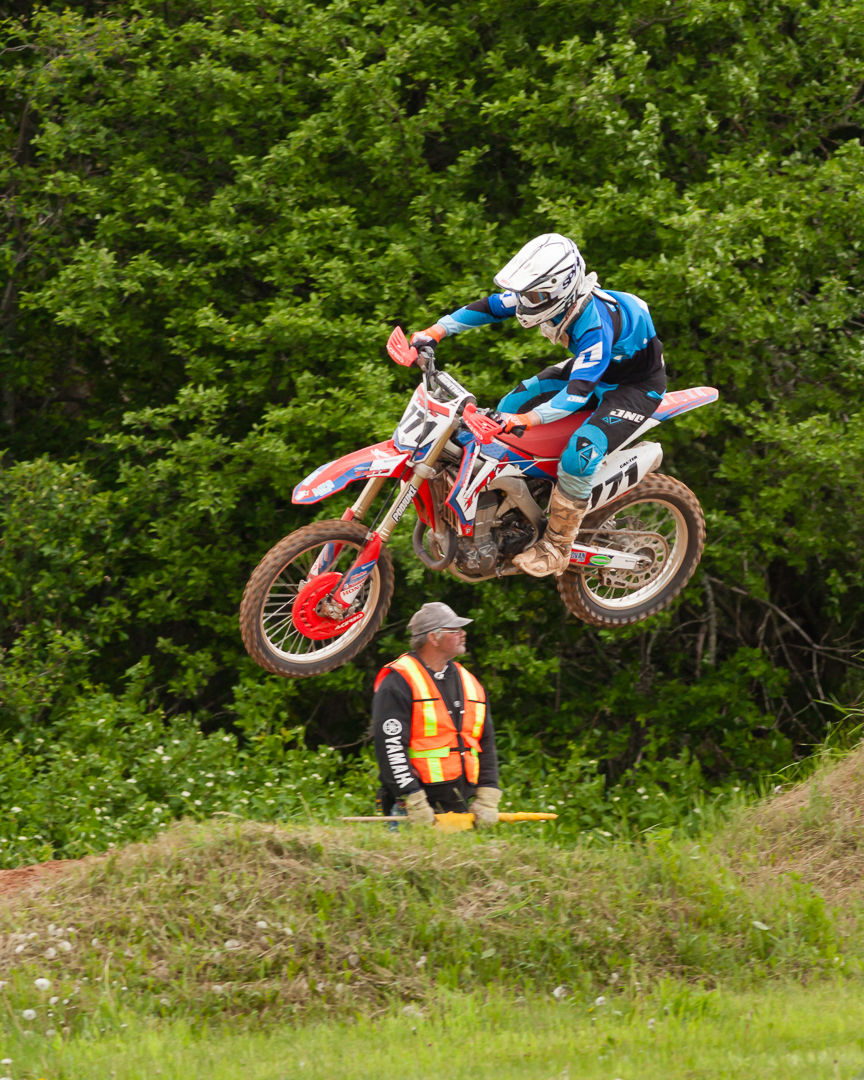
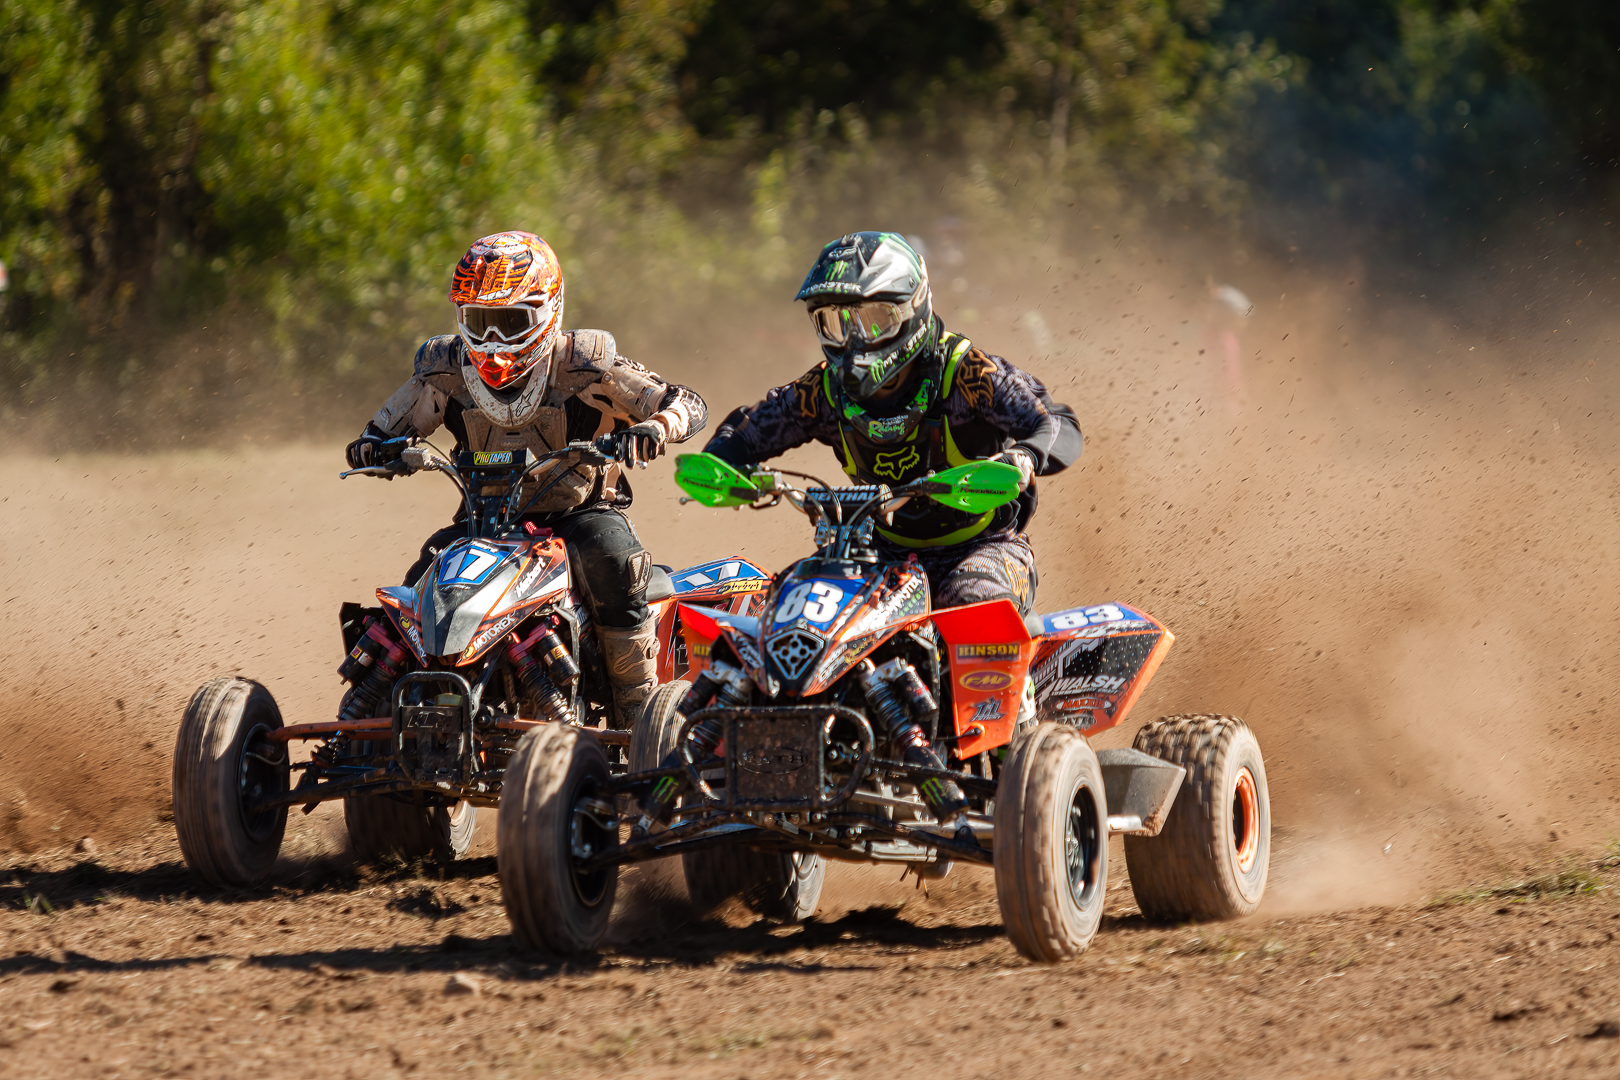
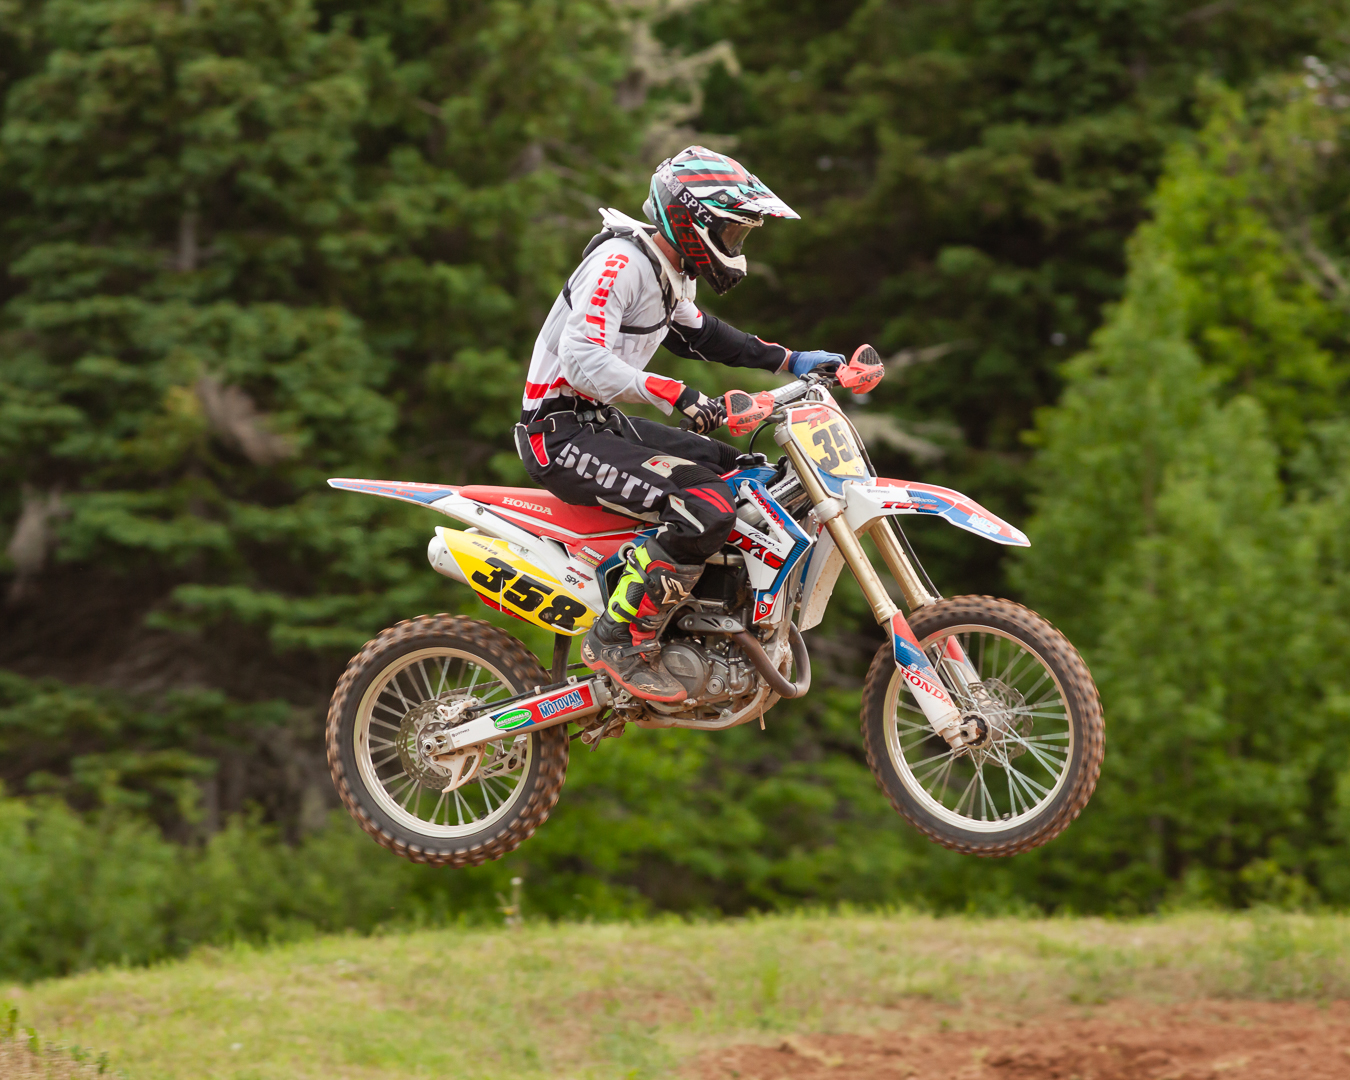
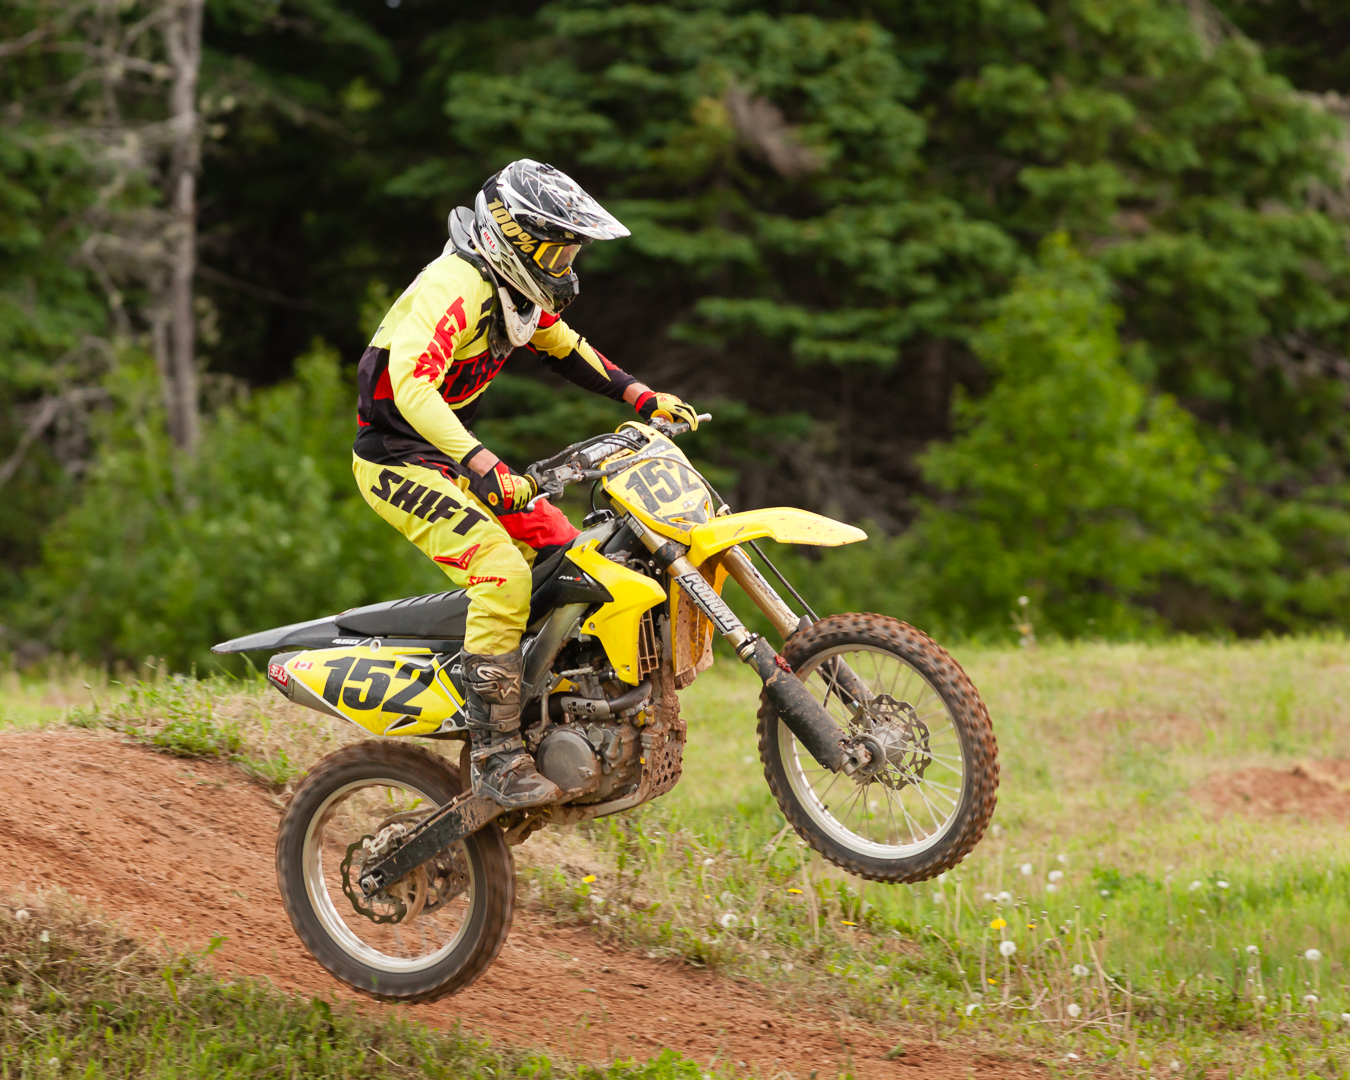
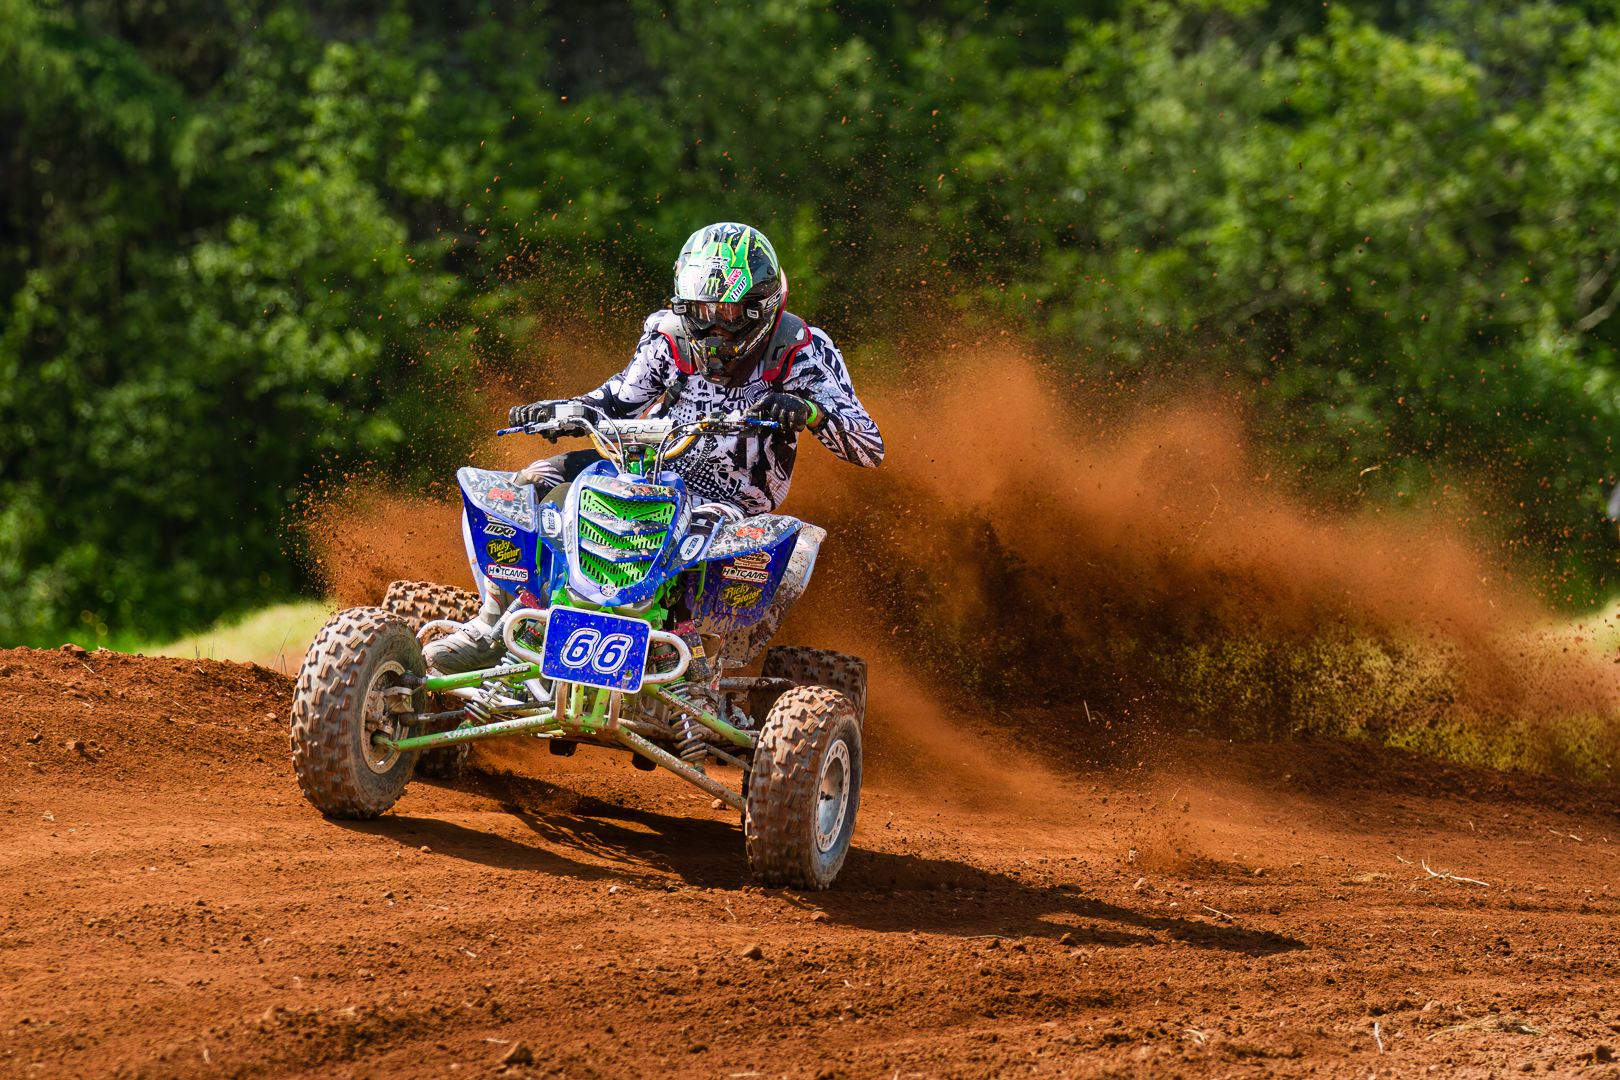
Motocross
When you arrive at a motocross venue it’s possible you will be required to sign a wavier on entry. It’s very important to position yourself in a location that’s great for your photos but you must be aware of the track and where you can safely stand. Accidents can happen very quickly and with bikes travelling at fast speeds they can end up farther off the track in an accident than you think. It’s very important to be more familiar with this sport for safety reasons. Again the same as all sports the decisive moment and clean backgrounds are very important for successful images. Something to consider with this sport is to think a bit more about “motion”, the creative option with shutter speed. The shutter speed in many of the example images are around 1/500 to 1/800 to still have motion blur in the tires but keeping the subject still sharp. Panning is also a technique to try which requires a much slower shutter speed of say 1/30 of a second, however, you will find with a dirt track that you will not get many keepers as the bike is bouncing and even the keepers will not be perfect, but you’ll still come away with some great images. The foreground blur of dirt with bike#286 was accomplished by a jump that was right behind me and as bike#286 was coming out of the corner a previous bike had gone by over the jump dumping dirt over and in front of me, consider position because it’s important.


Additional Resources
We try to seek out additional instructional resources for our monthly challenges, Below are some YouTube video links to help with techniques, hints, and ideas for Sports Photography:
■ Sports Photography Tips That Work from Your Backyard to the Olympic Games with Jeff Cable: by B&H Photo Video (1 hr 15min 55sec)
■ How to become a Better Sports Photographer in 5 minutes: by Billie Weiss (6min 20sec)
■ Sports! On and Off the Field with Joe McNally: by Adorama (1hr 18min 10sec)
■ Storytelling in Sports Photography with Jean Fruth: by B&H Photo Video (19min 30sec)
■ Uncover the Secrets to Epic Sideline Sports Photography: TheCameraStoreTV (13min 22sec)
■ Winning Sports Photography With Getty’s Elsa Garrison: by MPB (11min 28sec)
■ Everything An NFL Photographer Does On Game Day | LA Chargers: by Los Angeles Chargers (14min 32sec)
You’re encouraged to develop the ability to “tell a story or invoke an emotion“, as well as learn to plan and troubleshoot while creating images.
- It’s important to not only create an image but to also include a “Title”, this process helps with; determining your subject or story, and composition.
- Try writing a short paragraph about; how you came up with the idea, any interesting back ground that compelled you to make the image, and describe any techniques how you overcame any obstacles.
- Do some research and include any relevant information behind the subject of your image. This helps with planning and your approach for a story
An important part of improving your photography is practice, practice, practice which is one important aspect of the monthly theme challenge, in addition you have an opportunity to learn about different genres, techniques and tips that you are not familiar with.
Share your images and stories experienced this month
Even though this website is not setup to directly upload your images, you can achieve something similar by commenting on this post; firstly pasting your social media link to your image in the comment, then type any additional message you’d like to share. Everyone who visits will be able to visit your link. Note comments are moderated so it will not show up right away. We do get notifications when any comment is posted, so it won’t take long to get approved and subsequently show up. By pasting your social media link in your comment, it gives everyone visiting the bog a chance to click the link to see your image for the challenge and also the ability to look at your other work by viewing your social media through your pasted link. We want sharing to be a positive experience and we hope you have fun with this month’s dual photo challenge.