
This months challenge took a bit longer to put together than expected, so for those who visit regularly and our students, thank you in advance for your patience.
For this month, October 2023, the theme challenge is “Panorama”, which is a technique to capture those wide expansive shots that can’t be obtained with just a single wide angle lens and at the same time achieve more detail in your final image.
There are a number of situations where the panorama technique can be used to achieve an image that you may not be normally able to capture. 1. If you want a detailed image of an expansive scene without too much sky or foreground, 2. If your wide angle lens is not wide enough to get all of the scene in one frame, and 3. you want to create a high resolution image to create a large print.
Understanding getting from digital to print is to understand resolution, the type of print media (print or canvas), where your are going to hang it on your wall, and how you are going to light it. The other important consideration is to adhere to standard panorama crop ratios so you can minimize the cost to avoid custom framing costs. The standard panorama crop ratios are 2:1, 3:1, and 4:1. Take a look below to compare one image with the various crop ratios. One idea to save on cost if the print lab you have does not provide panorama prints for say a 12×36 (3:1 ratio), is to place 2 images on a 24 x 36 using Photoshop Elements or Photoshop and cut the final print down the middle. Another option is to Choose a Canvas which makes the overall cost of a large print a bit more affordable as well as being lighter and easier to hang.

The typical standard print sizes available for panoramas:
■ 2:1 ► 8×16, 10×20, 12×24, 16×32, 18×36, 20×40, 24×48
■ 3:1 ► 8×24, 10×30, 12×36, 16×48
■ 4:1 ► 8×32, 9×36, 10×40, 12×48
The process to create a panorama is relatively straight forward once you get used to doing it:
1. For best results use a tripod, remember to level the tripod depending on the situation you may need a special panorama head to minimize parallax by adjusting the nodal point (typically only required if you have foreground elements that are close)
2. Camera in Portrait (vertical) orientation and choose the best focal length for your image
3. Manual mode
4. Set your exposure for the brightest part of the scene
5. Obtain focus at the point chosen then switch to manual focus
6. Take each shot by overlapping the images by 1/3 to get the best result from the stitching software
7. Stitch your images with a software program such as but not limited to Photoshop Elements, Lightroom, Photoshop or Hugin (free)
8. Remember to crop your image to one of the standard crop ratios listed above
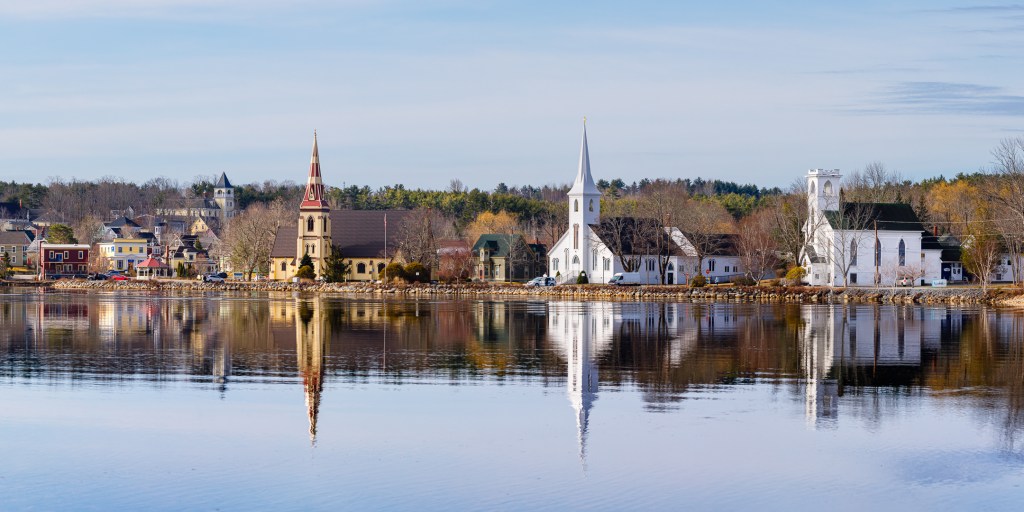
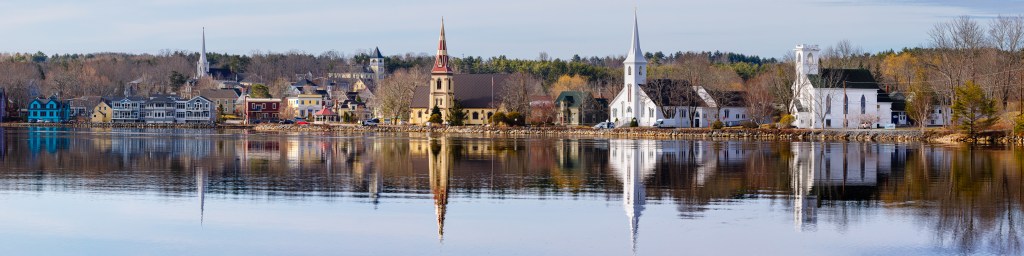
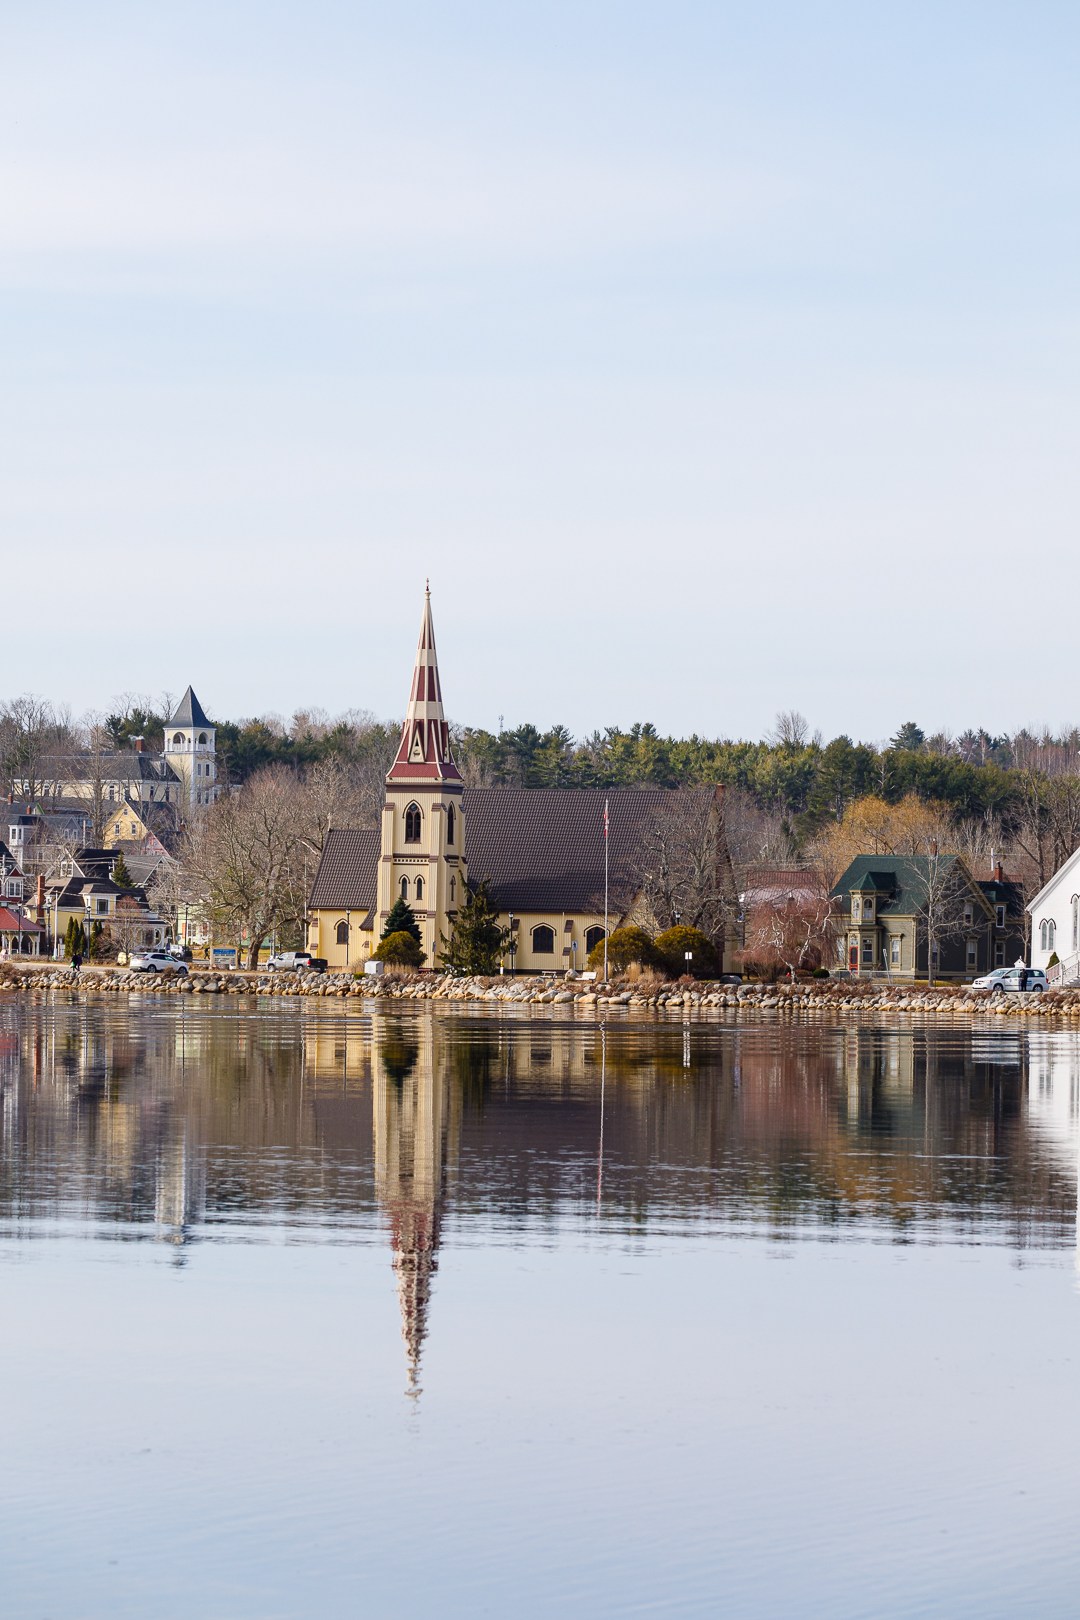
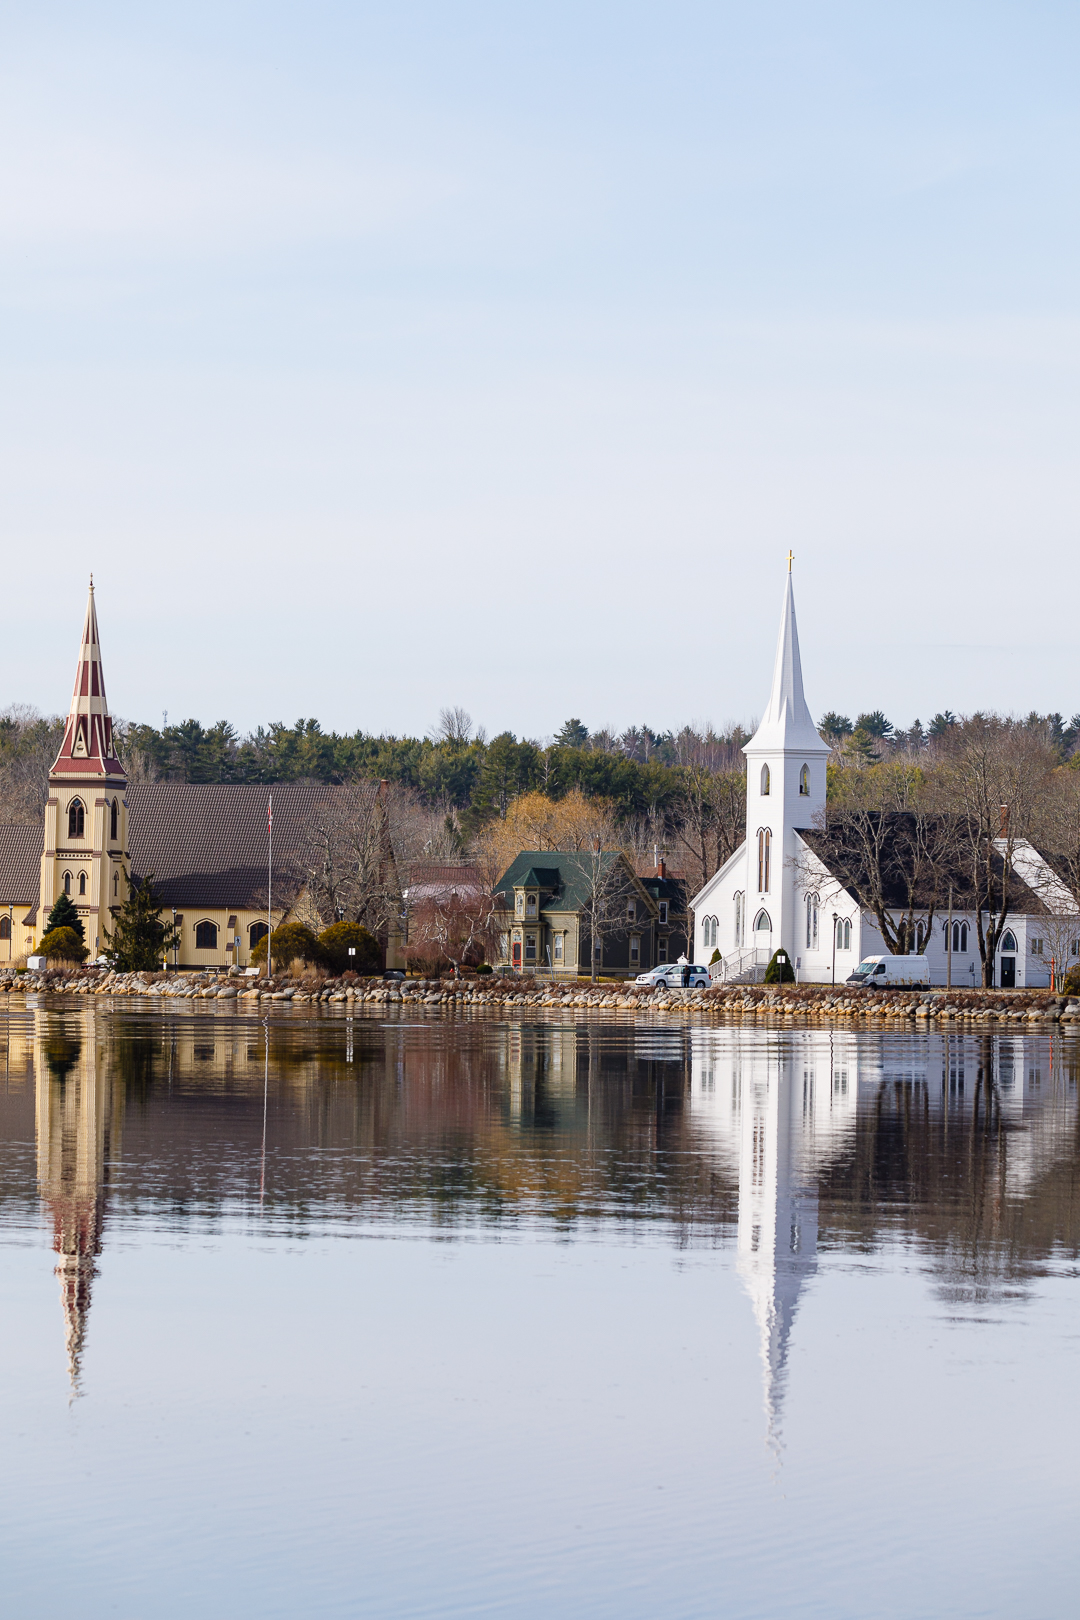
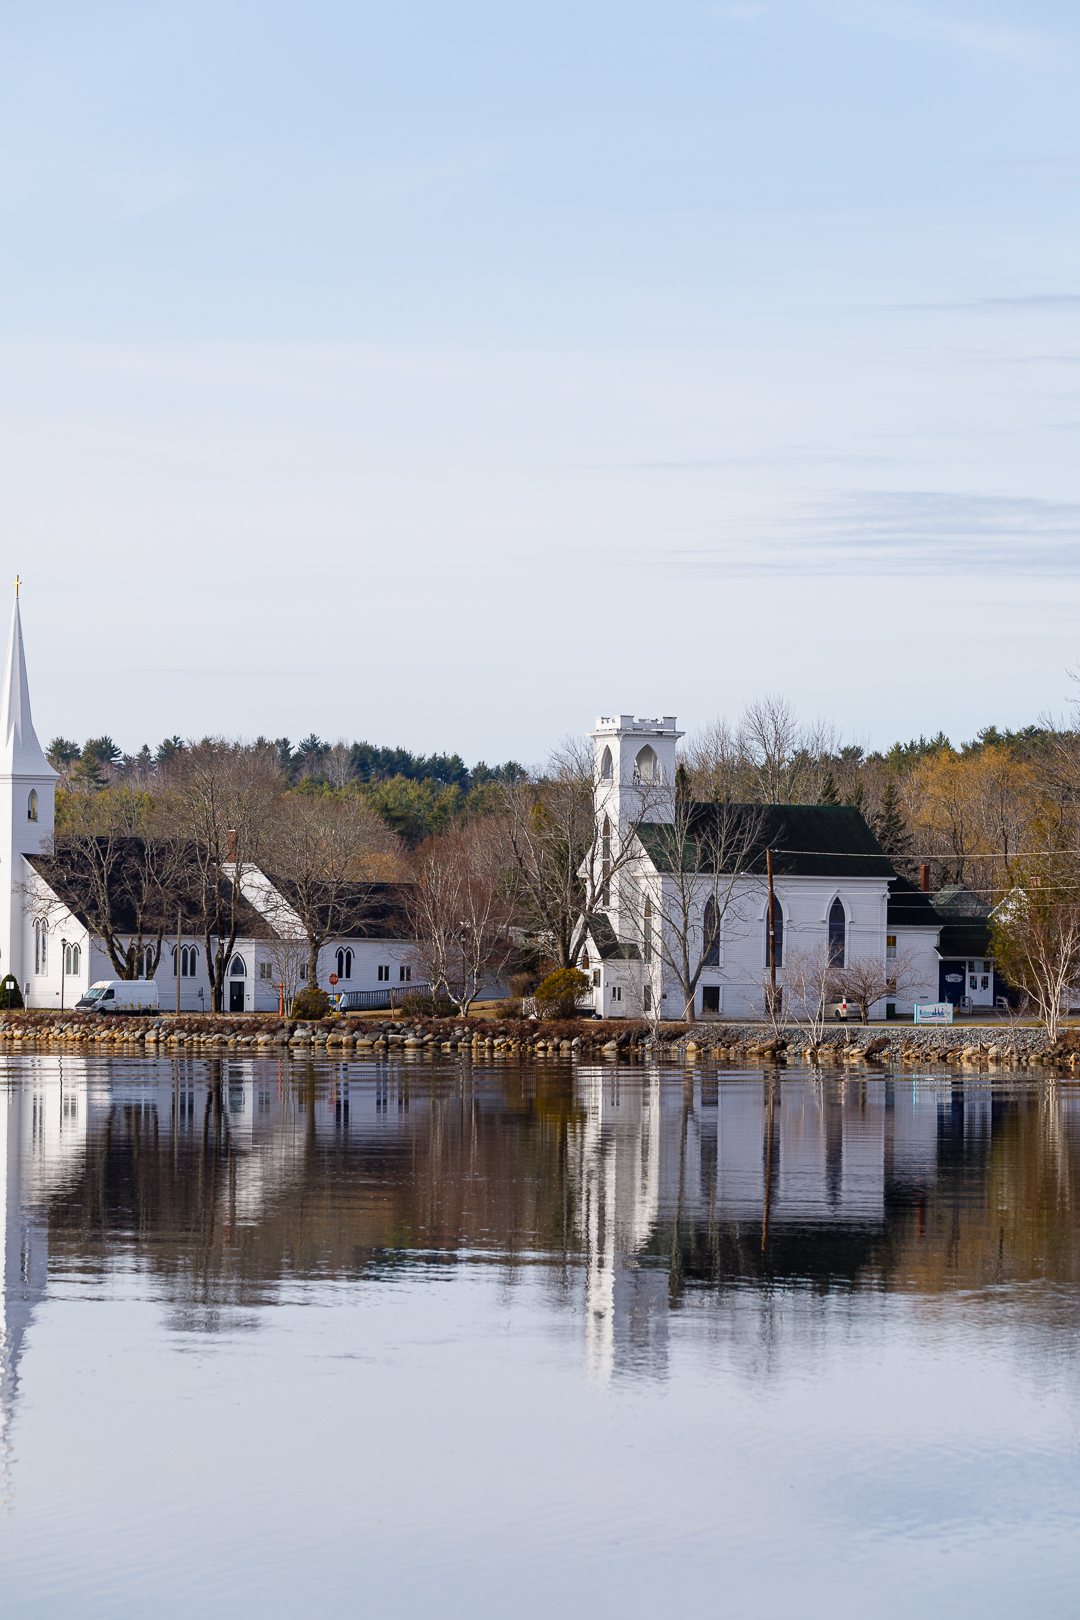
Here is the example of the 10 images captured with a Canon 5DmkIV with a 150mm Lens to create the Mahone Bay Nova Scotia Panoramas shown above:


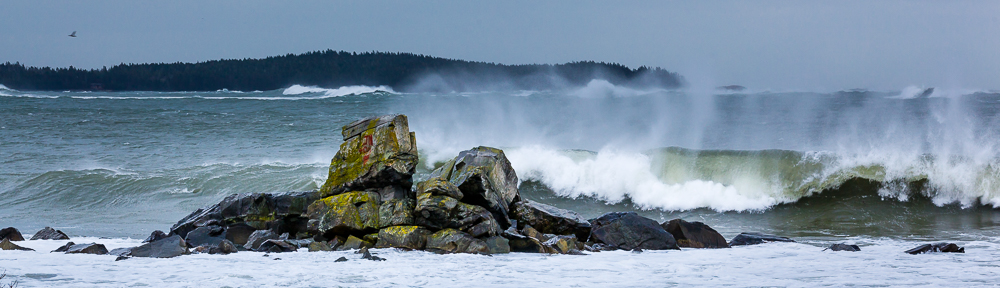
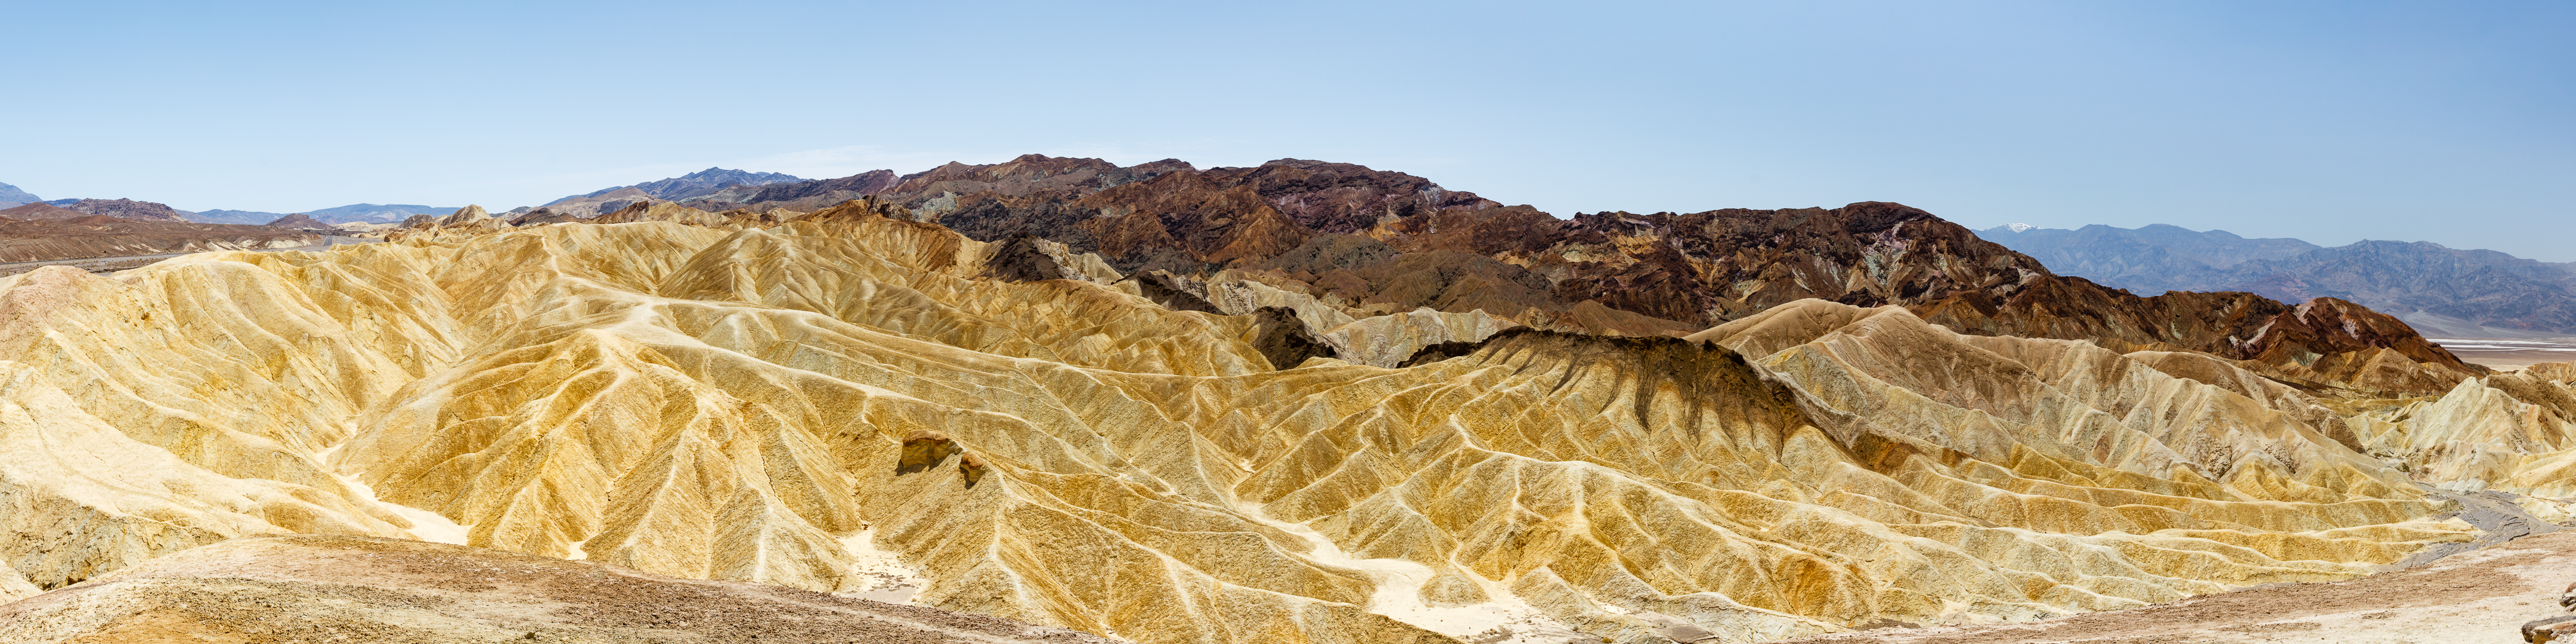
Here is a 4:1 ratio 10 image Panorama taken with a Canon 50D and 17-40mm wide angle lens right at the edge of Zabriskie Point In Death Valley California in 2011.
Here is an example of a 2:1 ratio 7 image panorama taken with a Canon 5DmkII and a 200mm lens of the fall colours across the lake by the beach in Bayswater Nova Scotia

We hope that the above examples were helpful to get your mind thinking of the possibilities and as always with our monthly theme challenges we try to seek out additional instructional resources, below are a few YouTube video links to give you some examples, hints, and ideas on how to create Panorama photographs:
■ The Ultimate PANORAMA Photography Guide By: First Man Photography (19min 55sec)
■ Panoramic Photography DO WE NEED THIS? By: Gary Gough (23min 28sec)
■ How to photograph Panoramas – Complete guide By: Gary Gough (21min 36sec)
Hugin (Free) Panorama Software Tutorial
■ Hugin Tutorials
■ Panorama stitching with Hugin Tutorial Part 1 – Introduction
■ Panorama stitching with Hugin Tutorial Part 2 – Expert Mode
If you want to share your image just paste your social media link of your image in your comment and we’ll be able to see your image. The comments are moderated so it will not show up right away, however we do get a notification when any comment is posted so it won’t take long to get approved and subsequently show up. By posting your social media link of your image in your comment, it gives everyone visiting the bog a chance to not only see your image for the challenge but also the ability to look at your other work as well by visiting your social media through your link. We hope sharing your image will be a positive experience and that you have fun this month with this challenge.
An important part of improving your photography is practice, which is one aspect of the monthly theme challenge in addition you have an opportunity to learn about different genres, techniques and tips. Don’t forget to practice, practice, practice, it will really help improve your photos a lot.
