June Theme Challenge – “Black & White”

For this month, June 2019, the theme challenge is “Black & White” also known as “Monochrome”.

©Trevor Awalt_100 Ton Steam Train_s

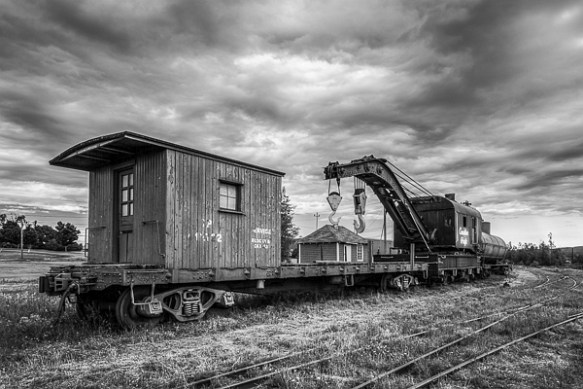
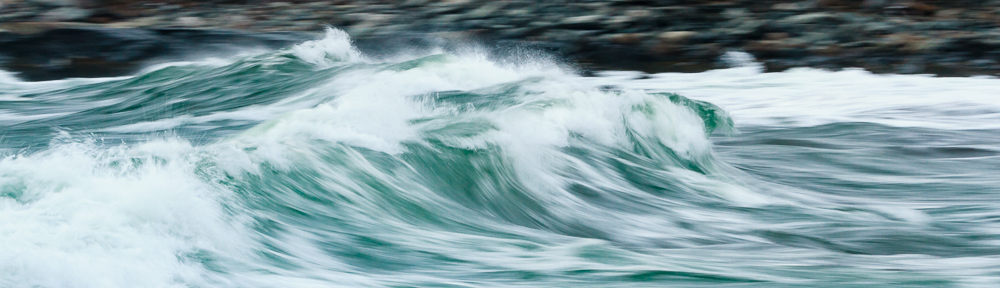
There are many opportunities for monochrome images such as dramatic clouds and older style subjects, even during harsh daylight is a great time to consider choosing monochrome to capture your images.

It is important to be able to preview your images on the camera in “monochrome”, which will help you visualize your result as you are shooting. To shoot in “monochrome” requires a change to the camera settings.

As an example lets see how to setup two Cameras to shoot in monochrome:

  • Change the “My Colors” setting on a Canon SX30, (manual pg 79); press the “func/set”, on the back of the camera, then use the up/down arrow buttons to choose the “My Colors” option. Then press the right/left arrow buttons to pick the “Se” (sepia) or “BW” (black&white) option and then press “func/set” to choose the selected option. (Warning: It is important to know that when shooting in “Jpeg” the captured image will not have any colour, remember to change the “My Color” option back to “OFF” when done shooting monochrome images to allow capturing any new images in colour.)
  • Change the “Picture Style” setting on a Canon T6i to “M” (monochrome), (manual starting on pg 125),  press the down arrow (picture style) button, on the back of the camera, and then press the right/left arrow buttons, on the back of the camera, to pick the “M” (monochrome) and then press “set” to choose the selected picture style. Before pressing “set”, you can also press the “info” button to change the sharpness, contrast, filter effect and tone effect (example sepia) as well. (Warning: It is important to know that when shooting in “Jpeg” the captured image will not have any colour, remember to change the “Picture Style” option back to the previous setting such as “S” (standard) when done shooting monochrome images to allow capturing any new images in colour.) Note shooting in “RAW” retains the colour information.

Students are encouraged to develop their ability to tell a story or invoke an emotion, as well as how to plan and troubleshoot while creating their images. As such it’s important to not only create the image but to also include a “title”, and write a short paragraph about; how they came up with the idea, any interesting back ground that compelled them to make the image, and describe any techniques on how they overcame any obstacles.

As always with our monthly theme challenges we try to seek out an instructional resource, below is a YouTube video link to give you some hints and ideas.
B&H Event Space instructional aid:
Black and White Photography in the Digital Era
Speaker: Harold Davis
Link: Black and White Photography in the Digital Era (38min 15sec)

An important part of improving your photography is practice, which is one aspect of the monthly theme challenge in addition you have an opportunity to learn about different genres, techniques and tips.

What is “White Balance”

Up to this point we have talked mostly about achieving a correct exposure by paying close attention to the intensity of light, but we also need to consider the colour of light and know how to set our camera to capture it correctly by setting a properwhite balance“. The white balance settings available on your camera are basically presets that can be set to match the ambient lighting conditions allowing the captured image to be the proper colour. The colour temperature of light is measured in degrees Kelvin using the symbol “K” which is a standard that provides a means to compare light sources.

Camera’s currently do not have the artificial intelligence to correct for the colour temperature of a scene, this is why we need to understand how to evaluate the lighting conditions and set the camera so it can capture the correct colour. The “white balance” basically ensures that the white in the scene actually looks white.

Typical preset settings are represented by symbols which have specific colour temperatures or ranges of temperatures for general situations.

©Trevor Awalt_Canon White Balance

With “AWB” the camera automatically evaluates the scene trying to interpret an appropriate white point to determine the temperature setting. This method works good for most daylight conditions.

When taking photos in doors it is better to set the white balance using the Tungsten or Fluorescent setting. However, it is important to understand there is a wide range of in door lighting used from a colour temperature perspective, therefore it is best to try a few white balance settings to see which gives the best result. It may be necessary to set a “customwhite balance to ensure proper colour in the captured images. To set a custom white balance it is important to use a calibrated gray card and follow the procedure in your camera manual.

There may be a specific requirement to set a specific temperature, for example, when taking photographs of products. Usually for this situation the colour temperature of the light source is known and you then set the camera to the same Kelvin setting to match.

The setting of the colour temperature is more important when capturing images as “Jpeg” because the colour temperature is directly applied to the image. When capturing images in “RAW” the colour temperature can be changed using post processing but it’s always good to set the right white balance so the image preview on the back of your camera has the correct colour.

Below is an example of the same image with three different colour temperature settings. The image was taken near a window with daylight lighting, center image 55000K, left image 35000K, and right image 75000K. Notice the left image has a blue tint which is a cooler colour, and the right image has an orange tint which is a warmer colour.

©Trevor Awalt_White Balance Example_small

When adjusting white balance for a portrait it is important to maintain the proper colour to match the skin tone, therefore matching the camera white balance colour setting to the match the ambient light is important. For a landscape you have a bit more freedom to make the resulting image cooler or warmer based on how you want the viewer to feel which can be used as a creative adjustment.

In our next lesson we will take a look at the camera mode dial and how each setting will help you collaborate with your camera to have a better chance of getting a good exposure when capturing an image under certain situations.